


Raw Data Exporters can be used to send text data to FDS mLED Displays and control the variables.
Basic Exporter Setup

- Trigger exporter from Split or Timing Point.
- Select correct COM Port
- 9600, n, 8, 1
- Export data in Custom Export Data
- LF line ending
Export Data Setup
As standard each line of data will start with the following:
chr(2) & "13" & ...
chr(2) defines ASCII code 2, used to identify the start of data by the display
The 2 digit number defines the line number (1-8, depending on mLED configuration) and brightness (1-3 where 3 is max).
Following this you can send any standard data field from RR12, this should be written as a text string.
For example to send bib, followed by space, then the first name:
chr(2) & "13" & [Bib] & " " & [FirstName]
Multiple Line Setup
The most common line numbers to use with the mLED are as follows:
1 - Full height text as a single line
2 - A full-width line on the top half of the display
3 - A full-width line on the bottom half of the display
If sending more than one line using a USB-Serial adapter, you can set this up in a single exporter. To make this easier it is recommended to store the data for each line in a User-Defined field, you can then join the lines using "& [LF] &" which creates a line-feed in the data.
For example:
[Line1] & [LF] & [Line2]
To imitate a scrolling type effect where names scroll down the display on different lines you can use the Rank .Prev function, where Line 1 would be the current participant to cross the line, and Line 2 would take the values for the previous participant according to the relevant rank. This is best done with a separate rank setup in Rankings to order participants by the finish time of day with no grouping.
Multi-Colour
Colour codes can be used in the export data string to change the colour of each separate field if desired. To do this enter the colour code between two ^.
Available colours:
| Colour | Code | Colour | Code |
| Black | cs 0 | Cyan | cs 6 |
| Red | cs 1 | White | cs 7 |
| Green | cs 2 | Orange | cs 8 |
| Blue | cs 3 | Deep Pink | cs 9 |
| Yellow | cs 4 | Light Blue | cs 10 |
| Magenta | cs 5 |
For Example, the following would send Bib in Red and FirstName in Blue
chr(2) & "13" & "^cs 1^" & [Bib] & " " & "^cs 3^" & [FirstName]
It is also possible to use some dynamic colouring using If statements, e.g. all Magenta for Female or all Blue for Male
chr(2) & "13" & if([Gender]="m";"^cs 3^";"^cs 5^") & [Bib] & " " & [FirstName]
Other Tricks
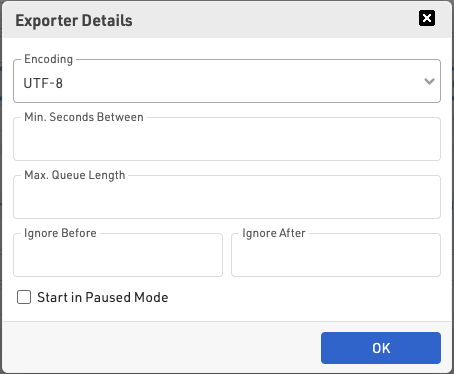
If you expect participants finishing close together and want to ensure their data is displayed the exporters can apply a minimum delay between each data record in the advanced settings. You may also wish to set a max queue length to ensure this does not lag too far behind current finishers.
To ensure text is always aligned as you wish, for example aligning a field to the end of a row you can use the string() function to add additional spaces.
For example on the second line you could return the Nation.IOC field which is always three characters and the time at the end of the line, but time could be minutes/seconds or hours/minutes/seconds.
A time with hours will be 7 characters (h:mm:ss) whereas only minutes and seconds would be 5 (mm:ss)
The following would ensure that the field always takes 7 characters so the end digit will be aligned to the same place:
String(7-len([Time]);" ") & [Time]