The Chip Timing view gives a compact view of your connected systems and some basic settings for timing the event.
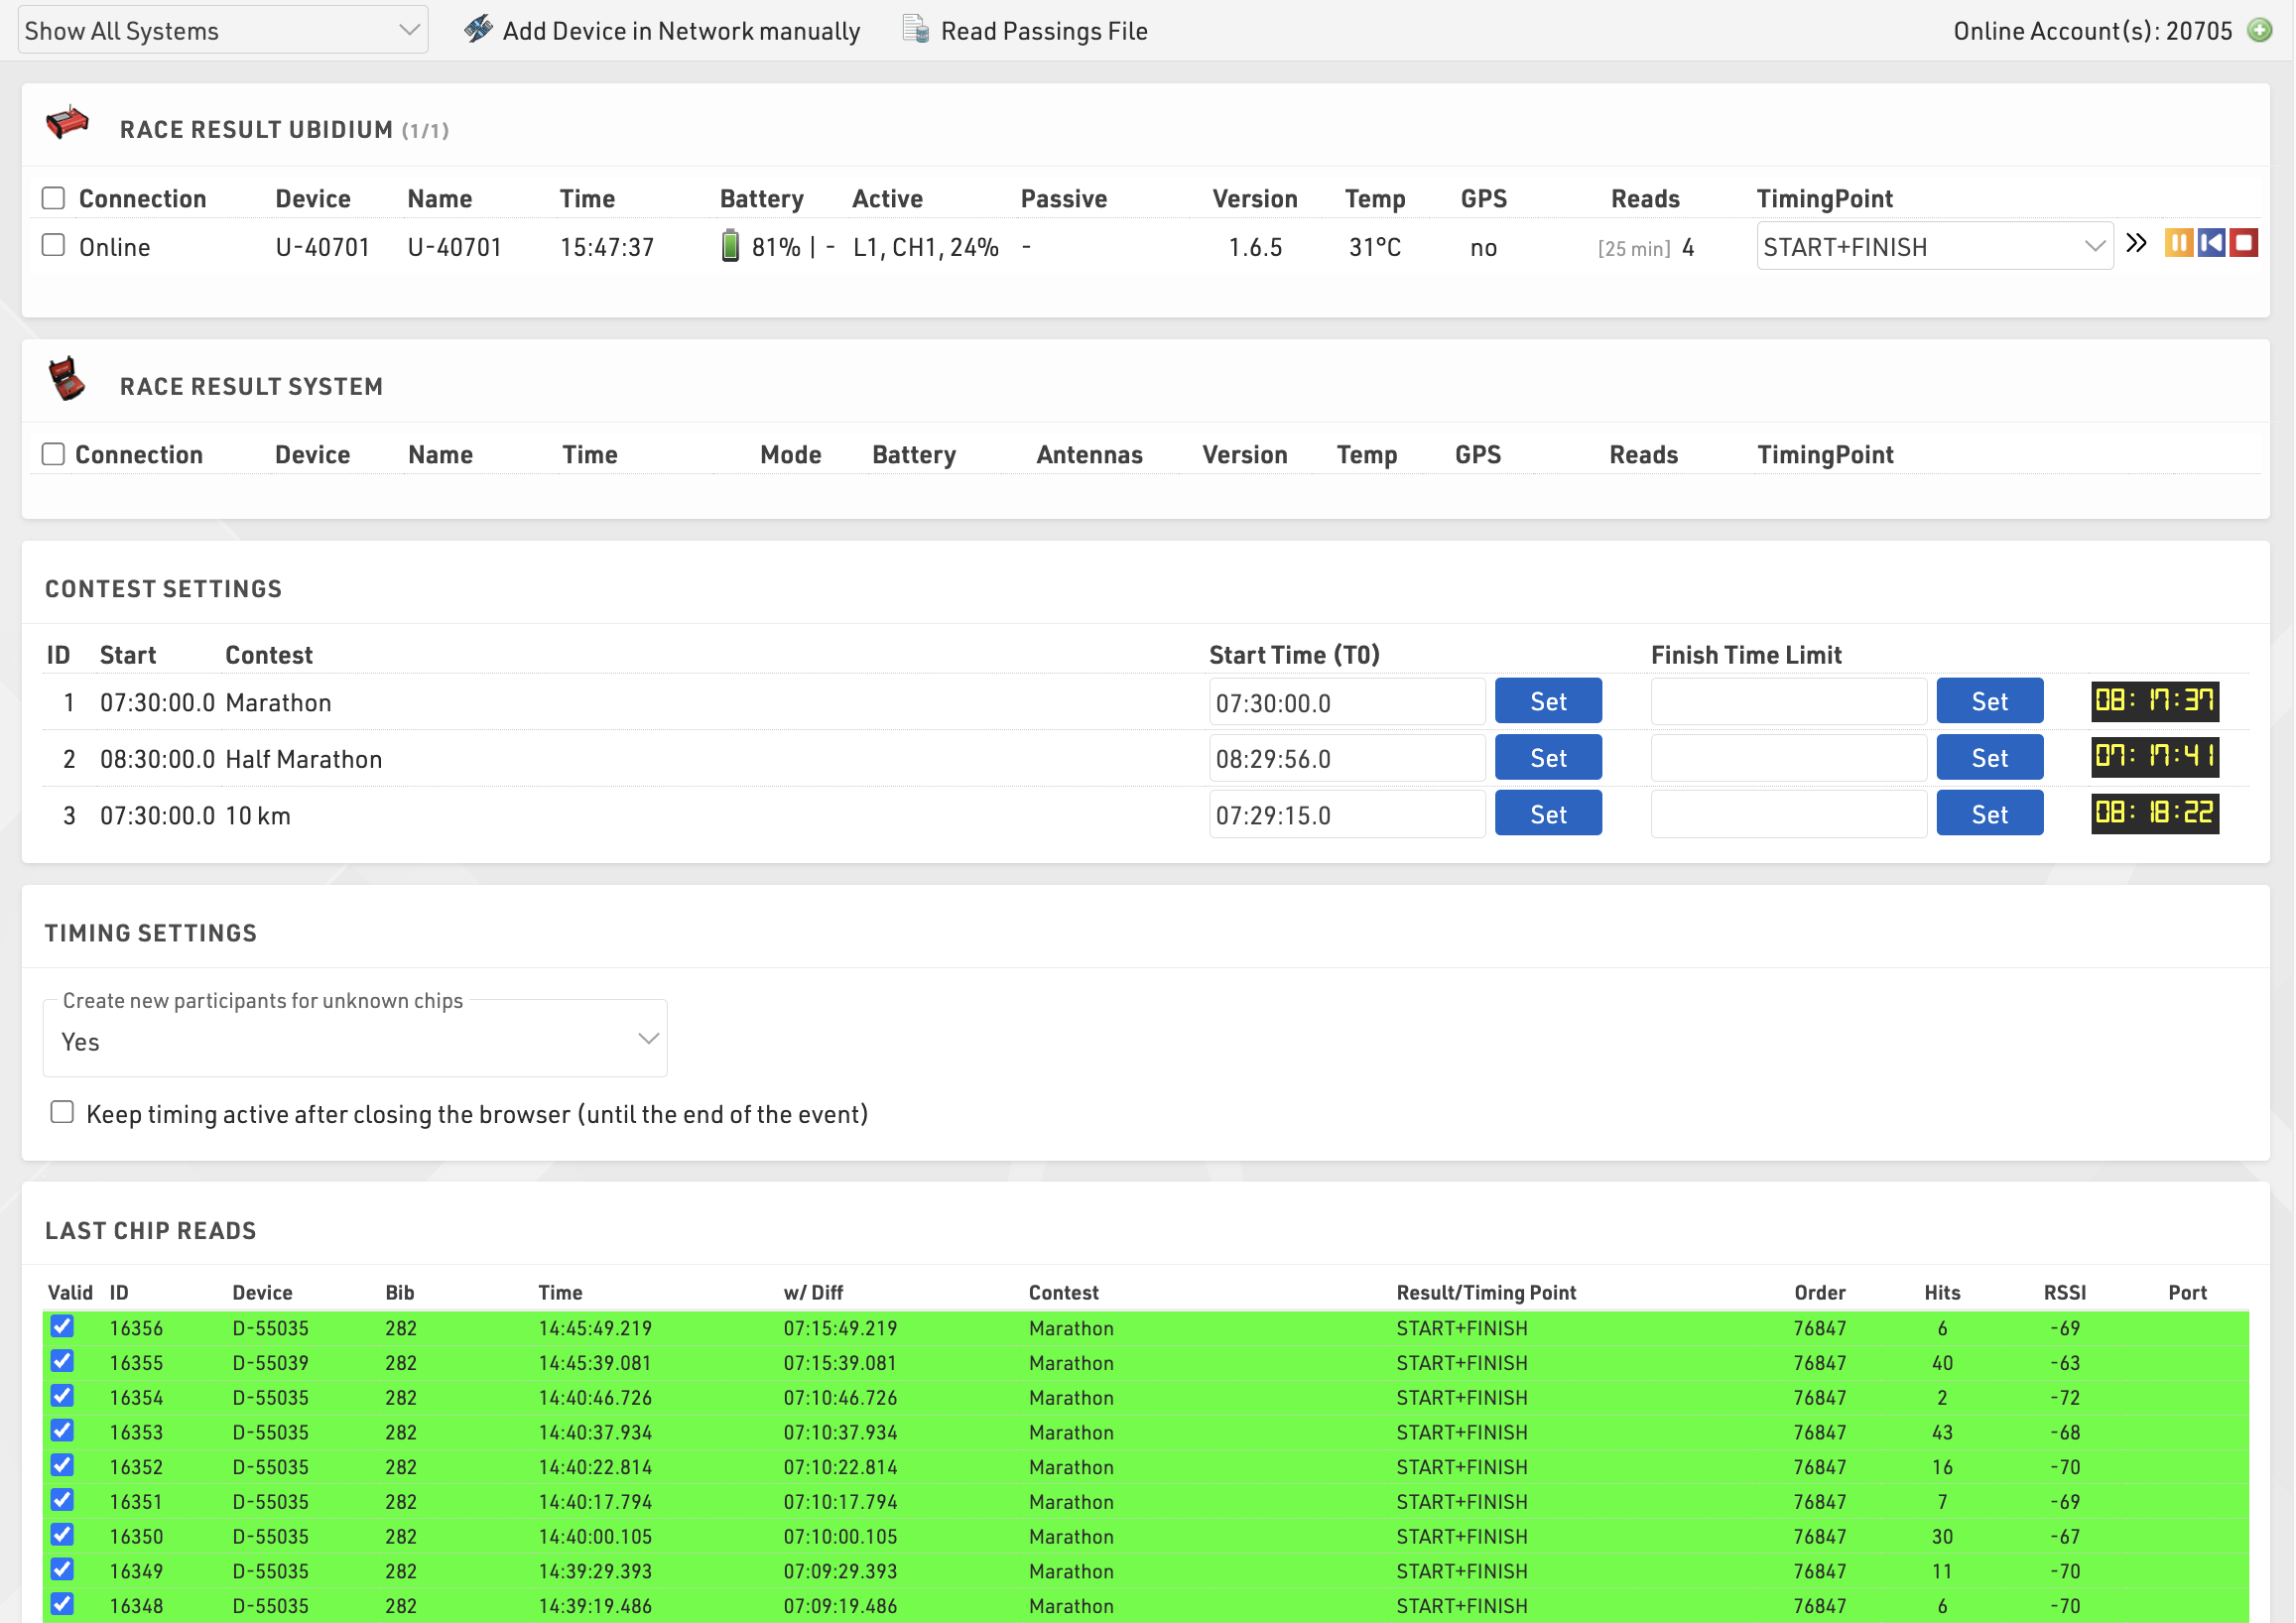
Any available devices (via your local network or online) are listed automatically, grouped by device type, a window is always shown for both RACE RESULT Ubidium and RACE RESULT System, additional device types will be shown if available either locally or online.
Systems can be filtered to show only those to which you are Connected or those within a certain distance based on the Basic Settings and the system GPS location.
Critical information about your systems is displayed here including connection, location, device name, device time, device mode, battery remaining and information about your antennas or loop settings, clicking on a Device ID will also open the System Control window with additional control settings and functions for the system.
If the system is reporting an error then the erroneous element may be shown in red to highlight any potential errors, errors will be cleared once acknowledged or cleared on the system.


If you are timing using RACE RESULT online and wish to connect to a locally networked decoder or USB Timing Box you will need to run the RACE RESULT Web Server on your computer as this will create the connection between the browser and your local devices.
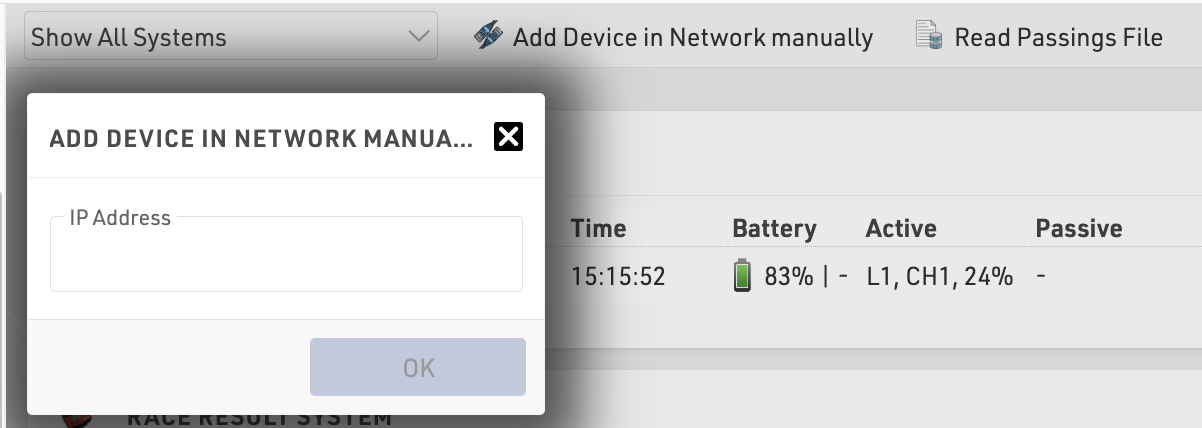
If your locally connected system is not shown you can press Add Decoder in Network Manually in the top right corner to connect via the IP address of your decoder.
Passings files from sytems can also be read in manually, see the below article for more information on how to obtain and handle the passings files.
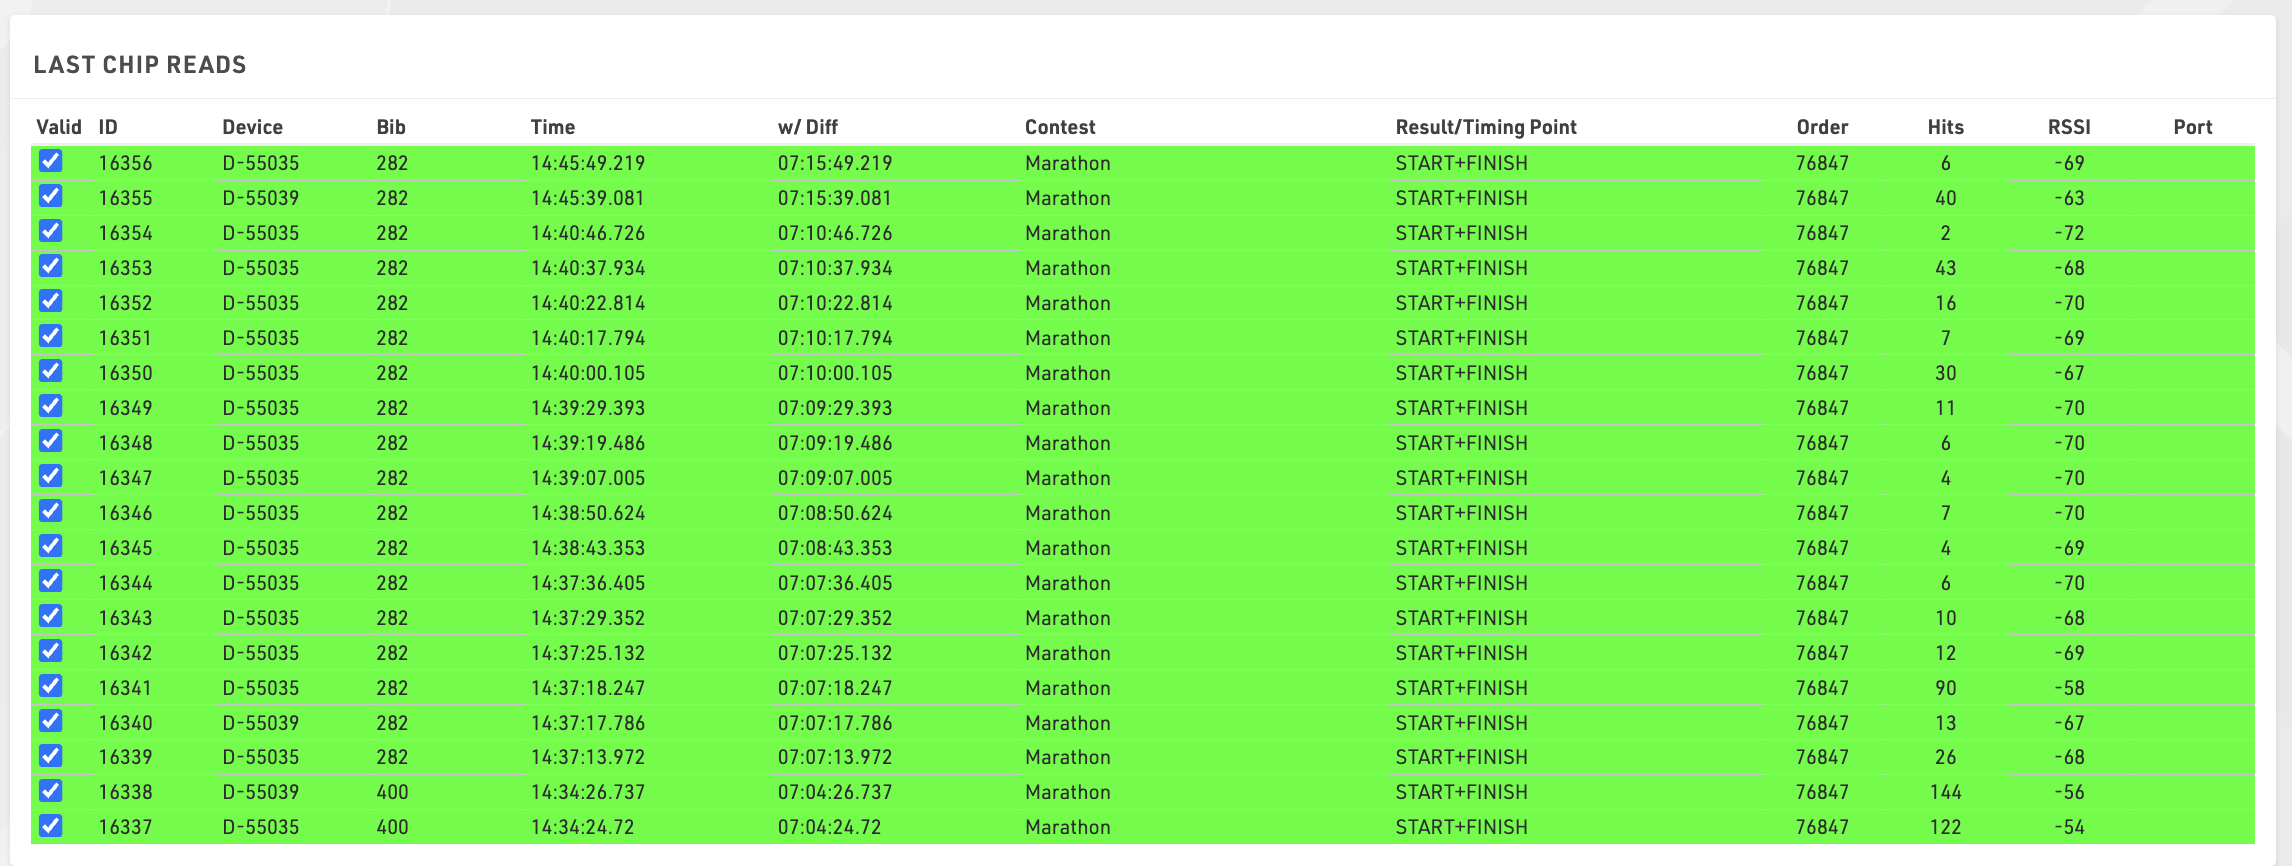
The chip timing view also has a window of the last chip reads which will autotmatically populate with the latest times received from all systems, the information shown is the standard columns from the Chip Reads screen.
Connecting to Systems
To open a connection to your system, select the timing point to which the data should be assigned, or if using Automatic Timing Point Selection then you can leave this blank, and click the green play button. When connected, any data recorded by the system will be automatically sent to the event file, to stop receiving data from a system click the red stop button.

To replay the data from the system you can click the blue replay button at any time, this will also send data recorded before the connection was started.
Note that these buttons are completely independent from the START button on the system, they are not used to activate or deactivate Timing mode on RACE RESULT Decoders, they simply control whether you are collecting data from a timing device or not.
If your event file is online and you are connected to decoders which are online, in the event of your laptop losing internet connectivity the timing module will remain connected to timing systems for a maximum of 30 minutes assuming your decoder is still connected to the internet. This allows the collection of timing data to continue even if your connection is interrupted.
The extended settings provide additional settings to control the incoming data.
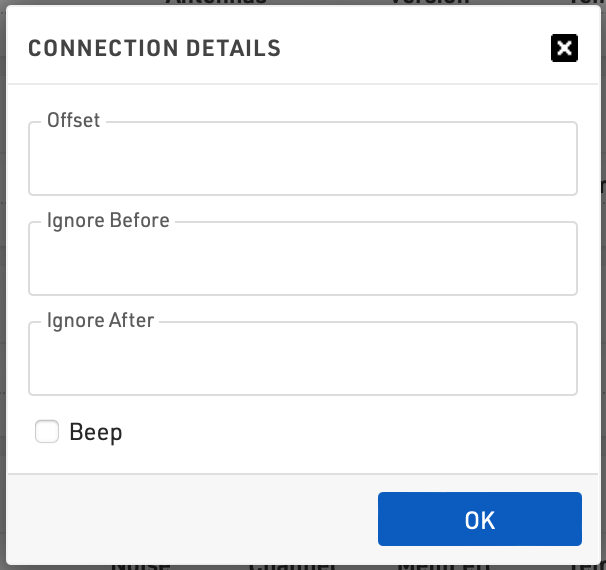
When an offset is applied then all times will be adapted by this value when being saved to the event file, this can be a positive or negative value.
It is also possible to define values for Ignore Before and Ignore After, these values create a time frame for which passings should be accepted. You can enter either before or after, or both values as required, these values should be entered in the format DD:hh:mm:ss.kkk. This is often used when replaying a system and you only need to consider times after a certain point.
It is finally possible to enable a beep which will play an audible beep in the browser when a passing is received from this connection.
System Controls
Some settings and other information about your system can be viewed / edited by clicking the device ID from the Timing Tab. This opens a window with additional options according to the type of system and current mode. For systems with GPS the current GPS location will be shown on a map below.
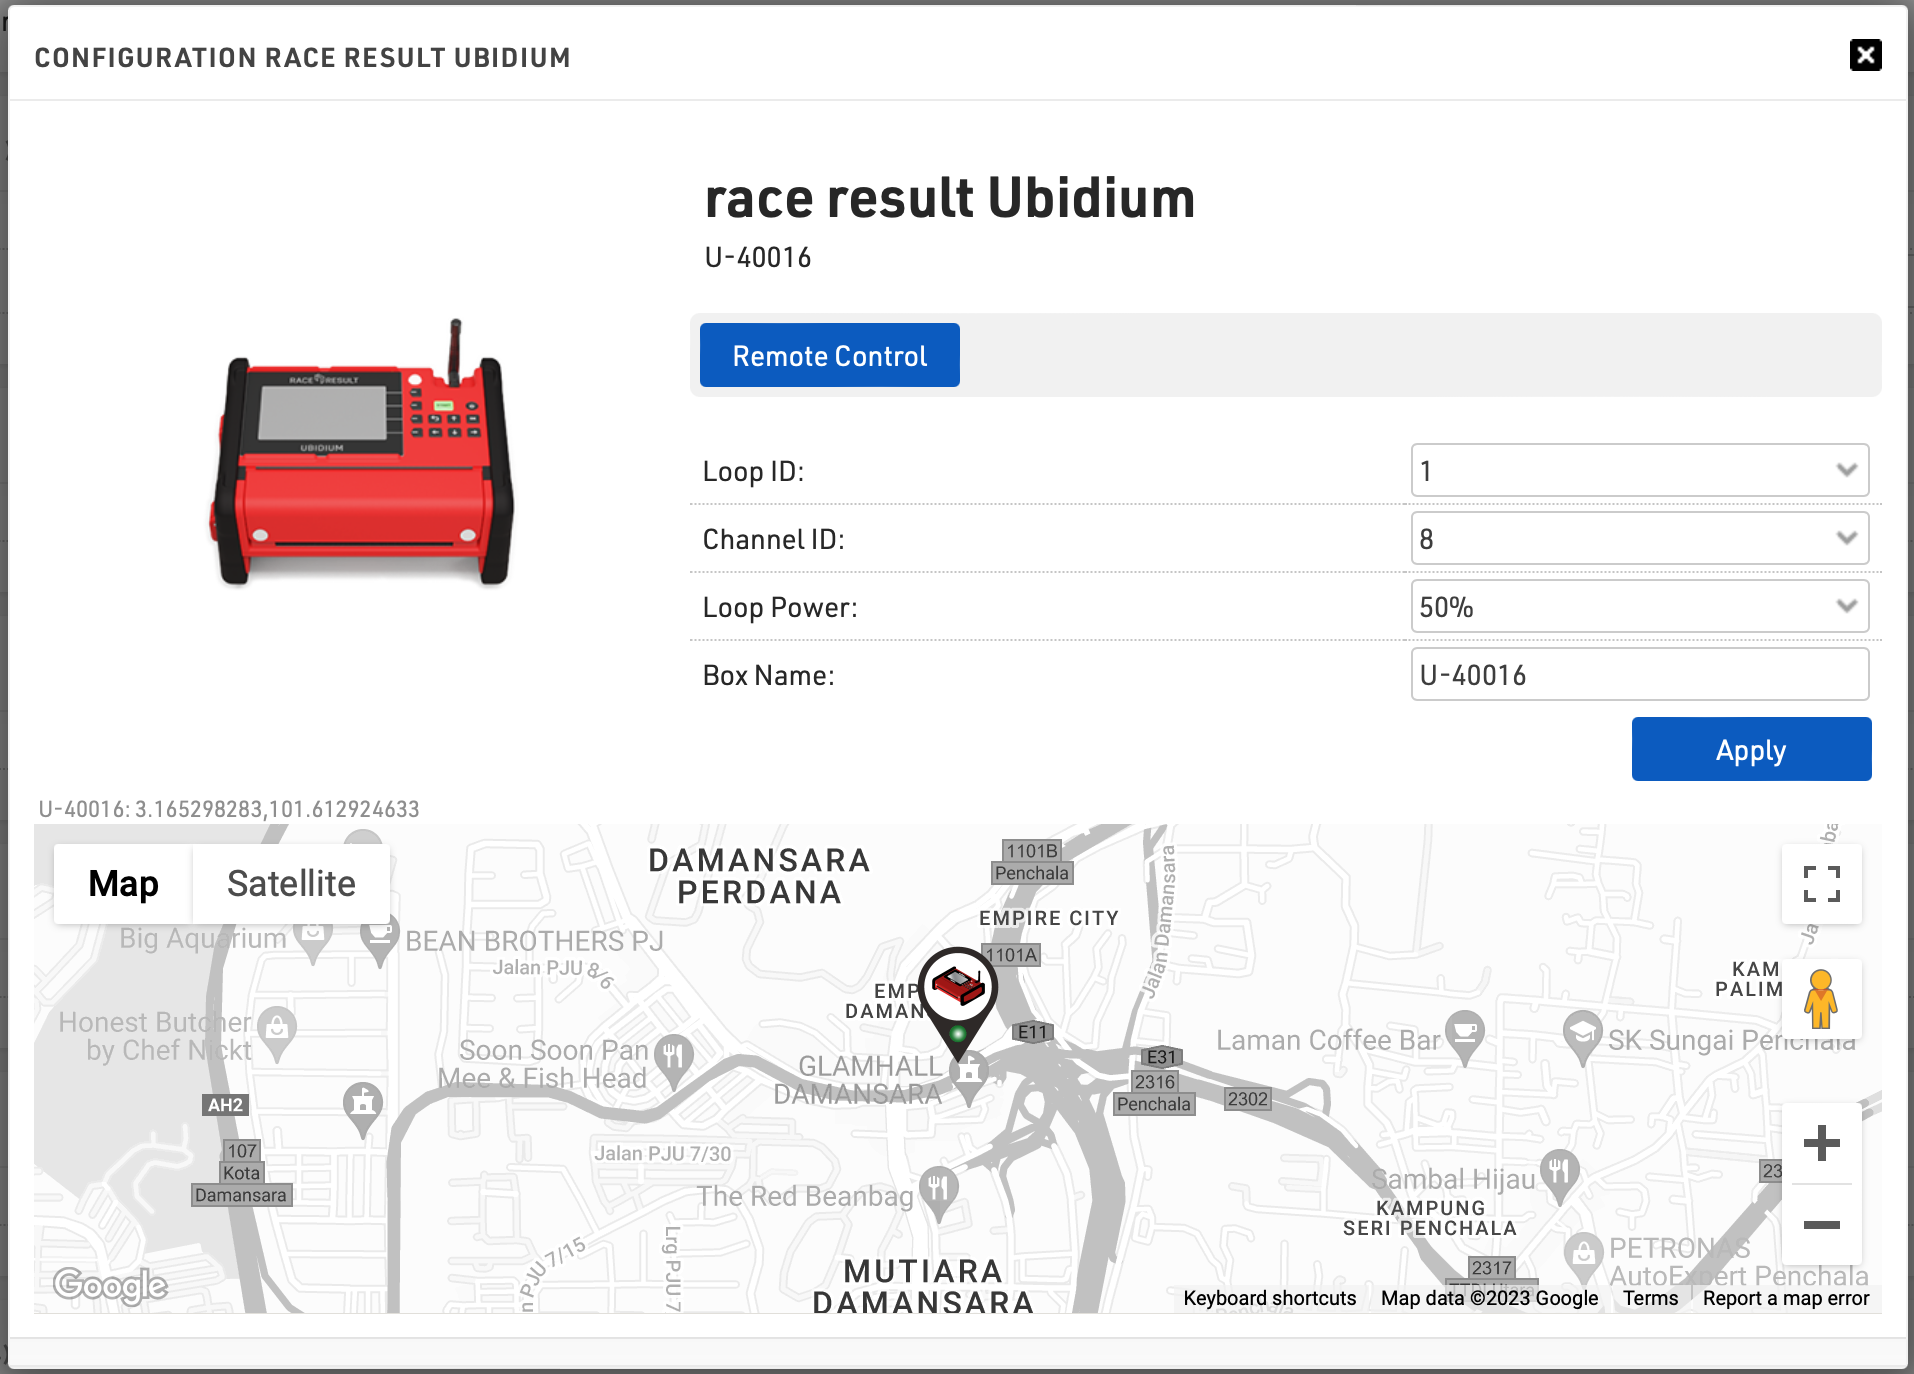
Ubidium
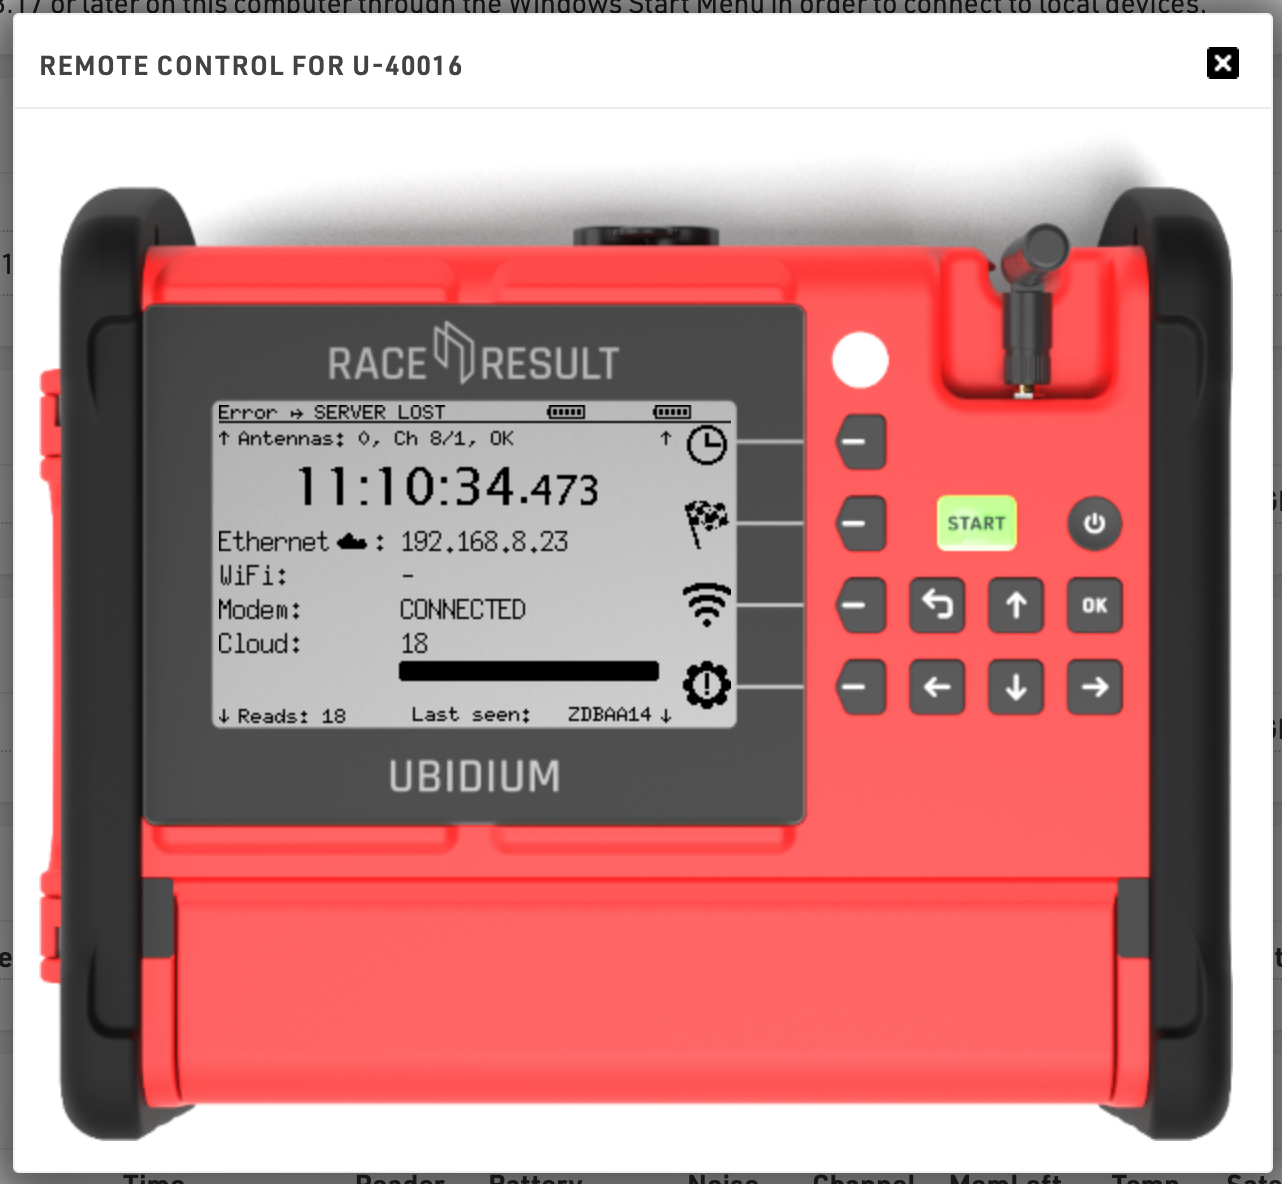
Ubidium system controls allow for changing the Box Name or Active Loop settings, additional settings can all be controlled via the Remote Control function which offers a full GUI of the system.
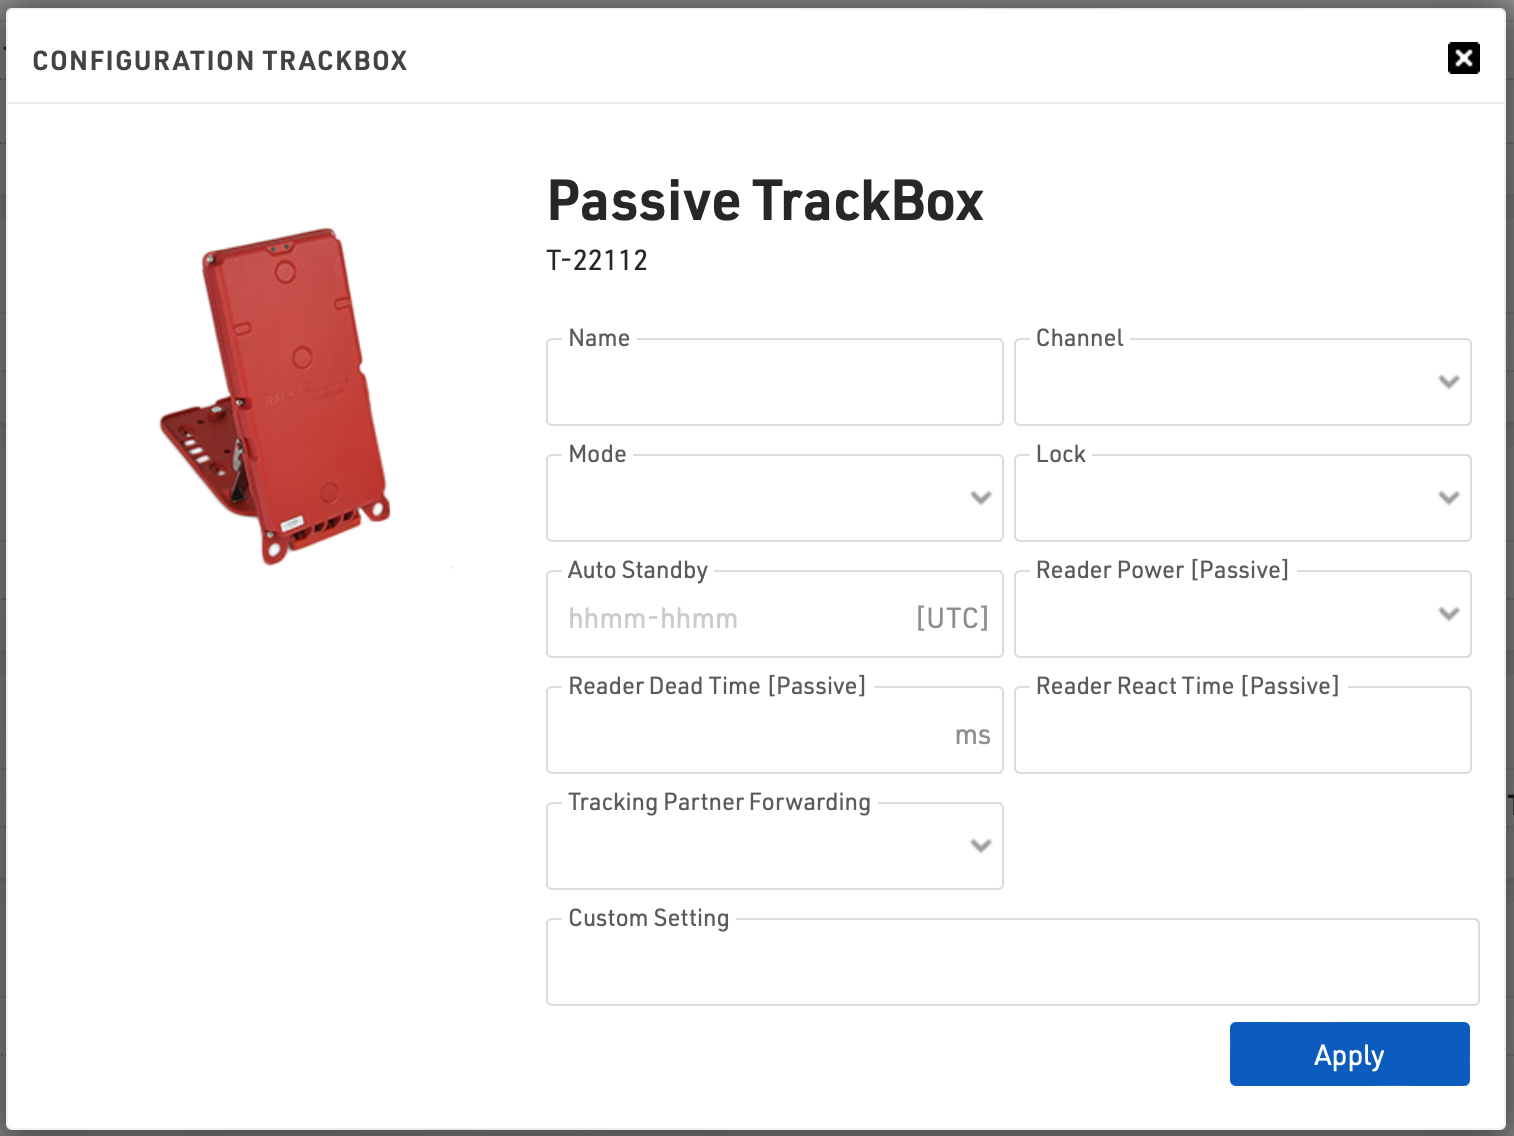
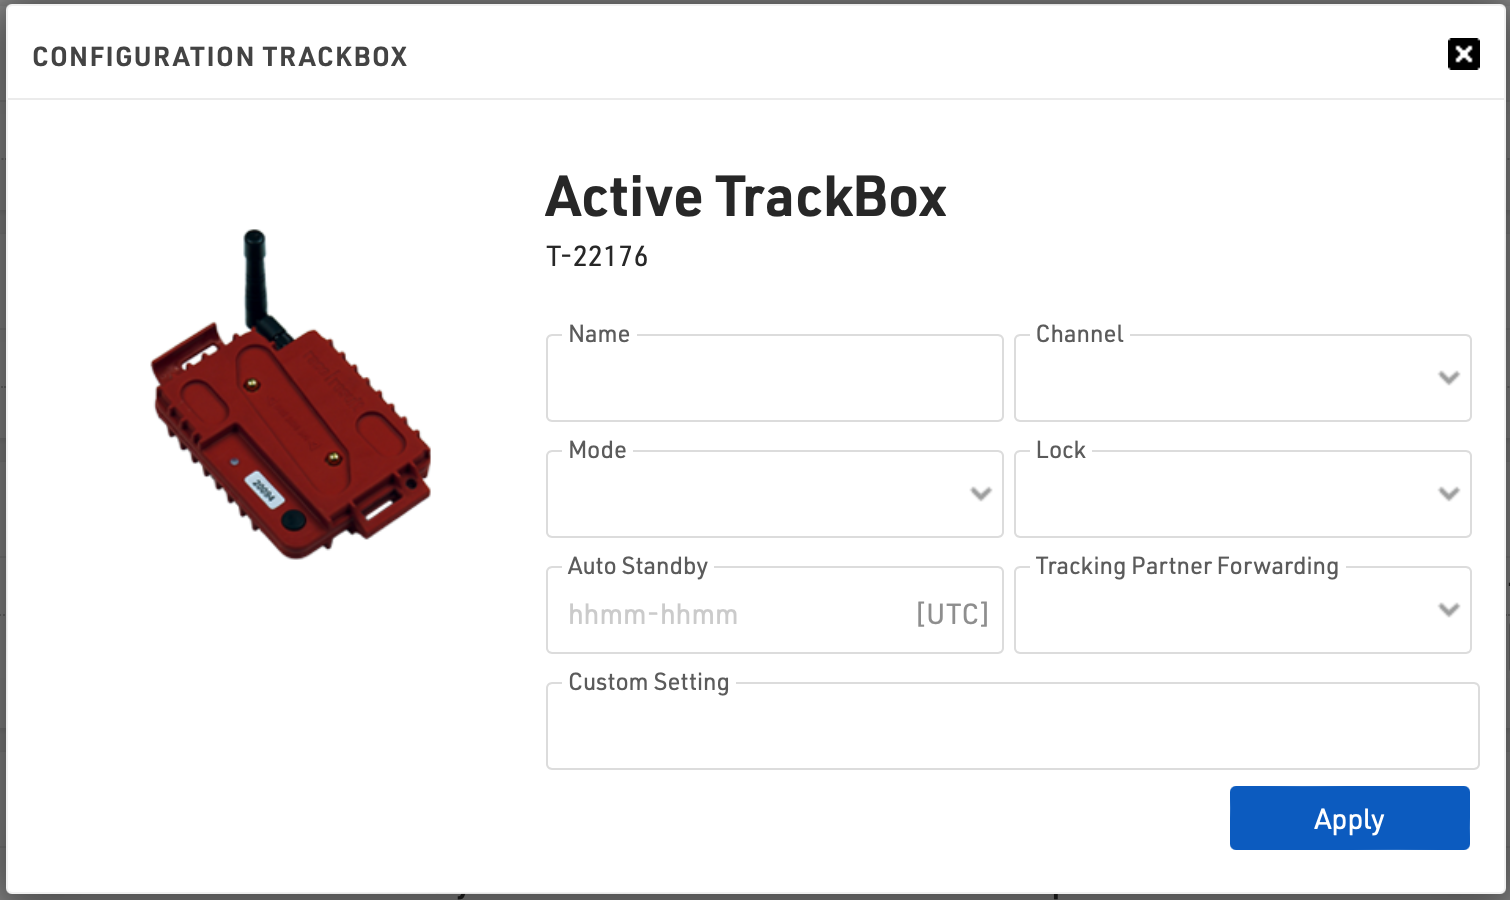
Track Boxes
Track Boxes allow you to set the individual Configuration Rules for each box according to the box type.
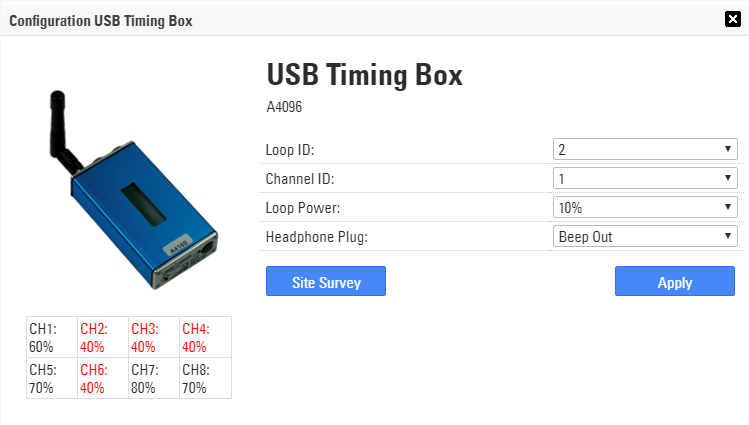
USB Timing Box
The USB Timing Box has the unique ability to run a Channel Survey from the Timing tab, channels with low quality (<50%) are shown in red.
RACE RESULT Decoders
When opening the control window for RACE RESULT Decoders you have a number of quick settings that can be changed directly in the window. These vary depending on whether the system is operating in Passive or Active mode, remember also that the time/time zone can only be set when in TEST mode.
Decoders can also be controlled entirely remotely by clicking the Remote Control button, this brings up a window emulating the screen and keypad of the decoder. You can navigate through the menu of the decoder as per usual using this interface. Note that at this time the External 12V DC indicator is not supported.

Through the system control, you can also access old passings files from the decoder. For local systems this is any file that has not been archived, when accessing online systems it can only call files that have been uploaded to the server. You can either view the passings file, download it locally or stream it directly to your event by clicking the green play button. When streaming to the event the file will appear in your list of systems for you to select a timing point if necessary and play the data.

Timing Settings

Create New Participants for Unknown Chips
This controls how the software will handle unrecognised timing data, by default the software will create a participant record for any unrecognised transponder code, this is useful if you may have late registrations or mixed up transponders.
You can choose to disable this, or enable it only for transponders listed in your Chip File.
How to Handle Times of Multi-Day Events
This setting is only shown when the End Date of your Event Settings is set to a date different from the Start Date.
By default all times are stored as a value in seconds counted from midnight, however for multi-day events this time needs to count past 24 hours, and so a start reference is subtracted in order to get the total elapsed time.
This can either link to the Event start date, which will subsequently automatically update, or a fixed date reference. Note that changing this setting does not impact existing timing data, if you need to fix this data you will need to reimport the passings.
Keep Timing Active After Closing the Browser
Normally when timing you need to have keep RACE RESULT 14 open in the web browser in order to keep connections to Timing Systems alive.
For long-running events it can be useful to keep these connections active until the end of the event, this can be enabled using the Keep timing active checkbox at the bottom of the Chip Timing / Systems windows.
When using this option, connected systems will remain connected until the event file end date, defined in the Basic Settings.
If working with offline systems you will still need to keep the RACE RESULT Web Server running, and so requires the computer to remain active. It is advised to work online if using this feature.
Read Passings File
The timing tab can also manually read in passings files in the event that data was deleted or needs to be imported at a later time.
Passings files from systems can be accessed/retrieved through the following methods:
- System Controls - For decoders currently available through the Timing Tab.
- Decoder browser interface
- Raw Data Exporters - The relevant Exporters need to be set up first
- USB drive download from a system
- Timing System Archives - For passings files which have been uploaded to RACE RESULT servers.
To import a file click Read Passings File from the top, and select the file which should be imported.

After selecting the passings file, assign a timing point, then read data into the file by hitting the green PLAY button. The detection file will now be read and imported, once complete the file will be cleared from the list of systems.
