The following articles show different ways how to use a Checkin Kiosk for different purposes.
Search for Participants Using a Unique QR Code
The main idea here is, that the participant will receive a QR code which is sent with an e-mail template after completing the registration form.This QR code contains a personal and random value which identifies the participant uniquely.
During race pack collection the participant can show this QR code, which is then scanned in the search step of a Check-In Kiosk when working with the Event Tools App.
User Defined Fields and Advanced Settings in Registration
The first step is to add an additional field where we can save the string to uniquely identify the participant later.

In the registration form's After Save Actions we add the additional field [IdentificationNo] to store an additional value with a specific expression:
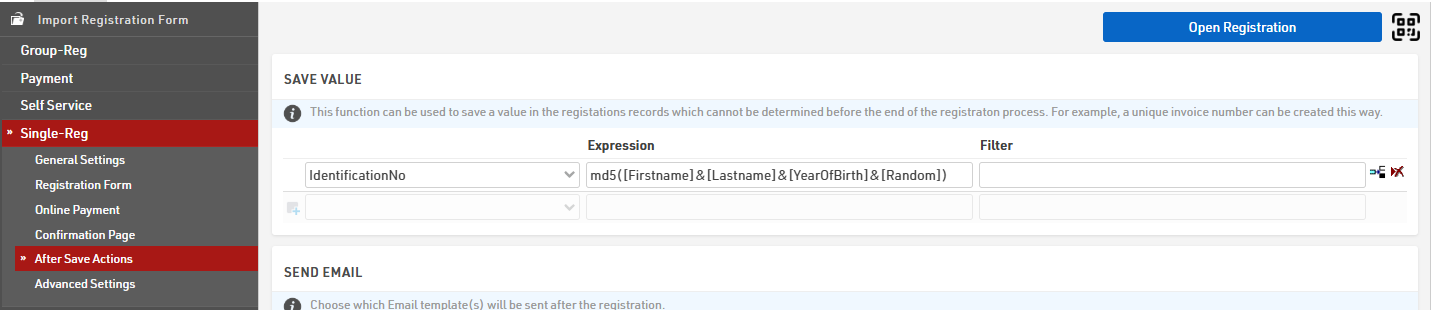
With this expression ("md5([Firstname]&[Lastname]&[YearOfBirth]&[Random]") a combination of the participant's entries ([Firstname], [Lastname], [YearOfBirth]) and a random value are saved in the additional field. The field [Random] is a Derived Field which returns a random number between 0 and 1. Additionally we use the md5() function in order to get a more secure string, which is quite impossible to copy.
QR Code Generation
The QR code will be generated in a certificate which can then be sent to participants with the confirmation e-mail. You can generate the QR code under Output >> Certificates via the small barcode icon on the right side in the tools section:
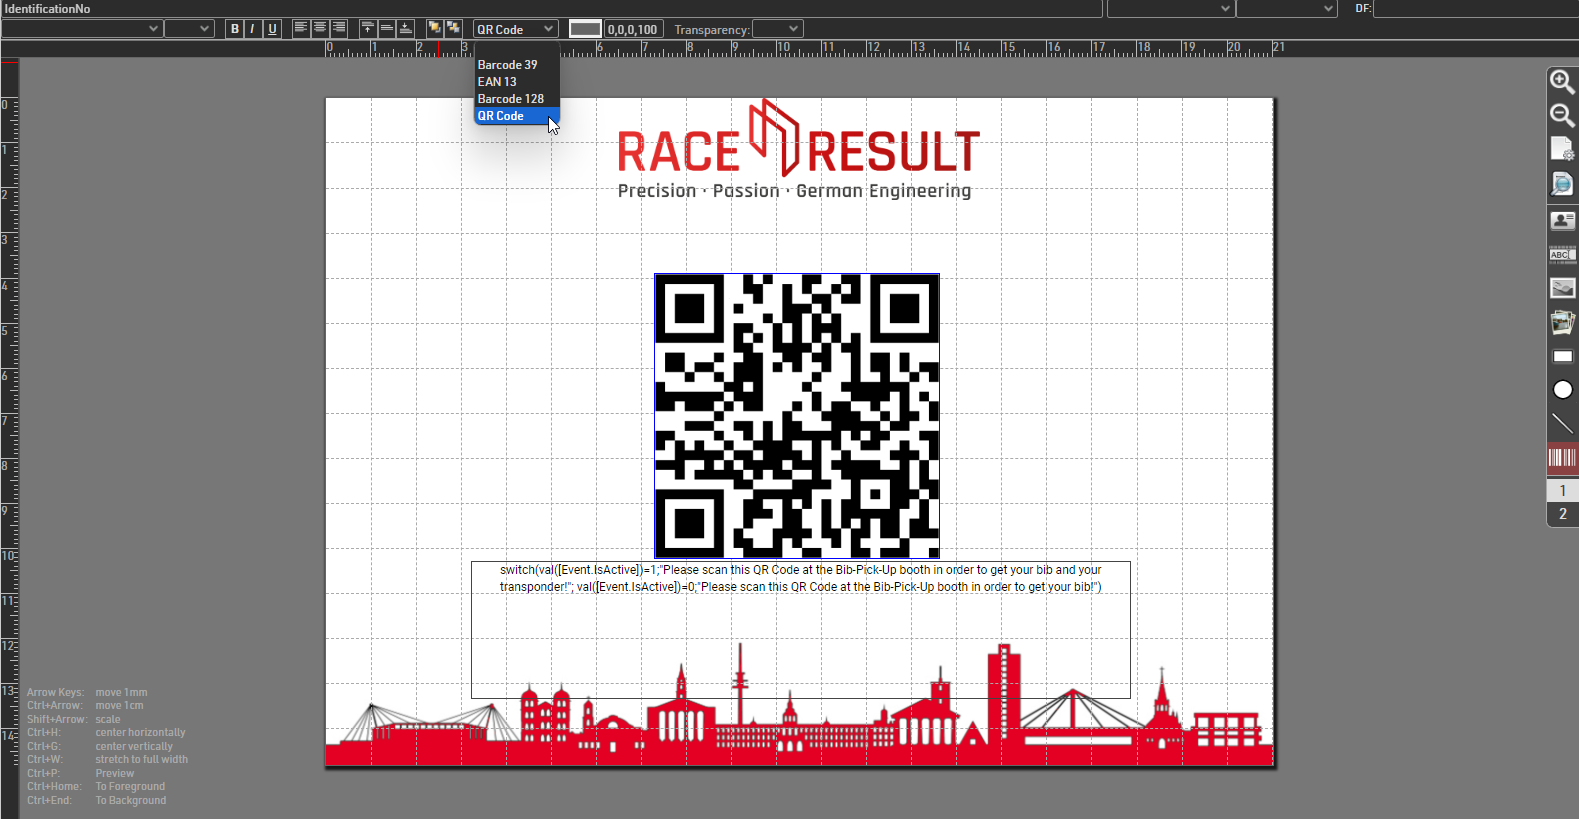
This will first create a barcode, but it can be changed to a QR code with the dropdown you find in the upper section.
After changing to the QR code we need to select the correct field which we want to save in the "QR code data". To do so, select the QR code and start typing the name of the field where you save the unique participant data during the online registration. Select the desired field from the dropdown of suggested datafields.
Email Setup
The confirmation email is set up in the Email/SMS Templates. As the participant should receive his QR code with the confirmation email after the online registration, the pre-setup certificate needs to be added as an Attachment to the email:

Event Tools App usage
After logging in into the Event Tools App select your Event and open the Checkin Kiosk for the Bib-Pickup.
By selecting the small, blue QR Code symbol on the bottom of the smartphone the app enables a camera mode which allows it to scan QR codes for the search entry field. In this mode the QR code for the bib pickup can be scanned and the participant's information and edit fields are going to be displayed in the next step:
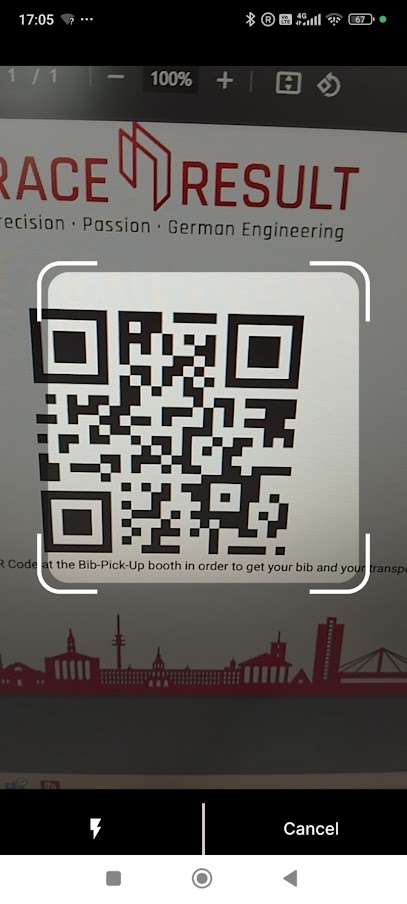
After searching the participant in this way, it is possible then to adapt the editable data in the next step. This could also be a Dynamic Bib Assignment.
Dynamically Transponder Assignment
Instead of preparing a chip file and sorting chips correctly to the participant's bibs or racepacks before the event, it is possible to assign transponders easily on-site dynamically by using the Checkin Kiosk.
The transponders can be either assigned manually, by typing in the transponder code, or automatically by using a Decoder, Management or USB-Timing Box. It is also possible to use the QR-Code scanning option of the Event Tools App.
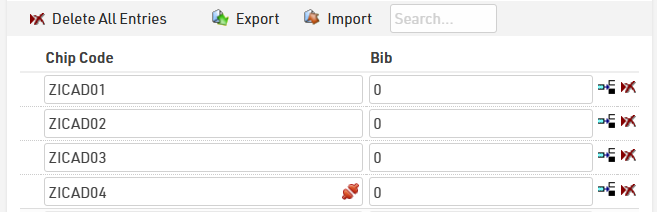
It is recommended to first import all transponder codes to the Chip File with bib number "0", this allows you to also verify the correct transponders are being assigned if using manual entry. This can be done easily scanning the transponders with a Management Box or a USB-Timing Box connected directly or through TagTool.
Checkin Kiosk setup
The basic setup for the Checkin Kiosk is the same for all three options. The small differences are explained in each option's description below.
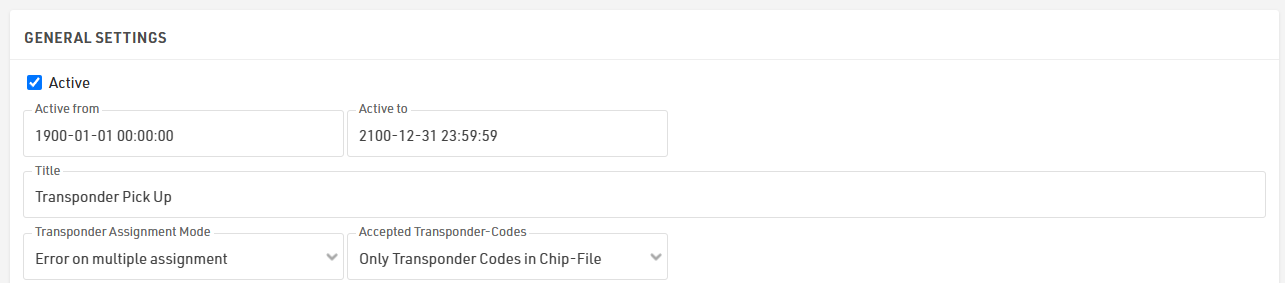
In the general settings it is recommended to set the transponder Assignment Mode to Error on multiple assignment. In this case we get a notification if a transponder is getting assigned a second time (for what reason ever). Additionally, set the accepted transponder codes accordingly to use those in the chip file if applicable.
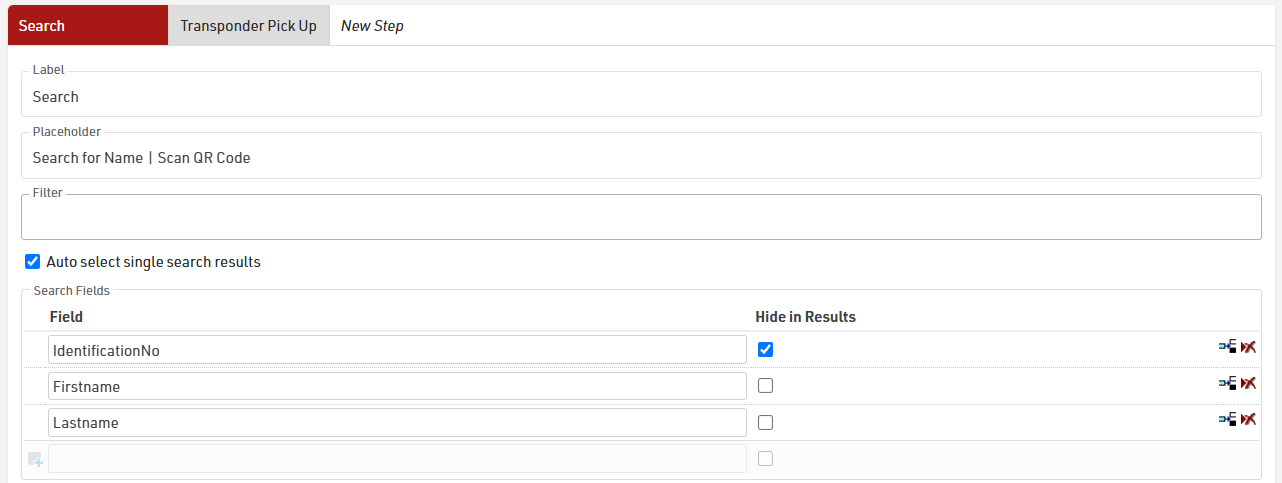
In the search step of the Checkin Kiosk we determine the fields that can be used for identifying a participant. This could be for example the first- and lastname, or a specific identification number which is encoded in a QR code. This QR code could be scanned by using the EventTools App in order to search for the participant in the database. How to set up this feature is described in the following article: Searching for Participants using a QR code.
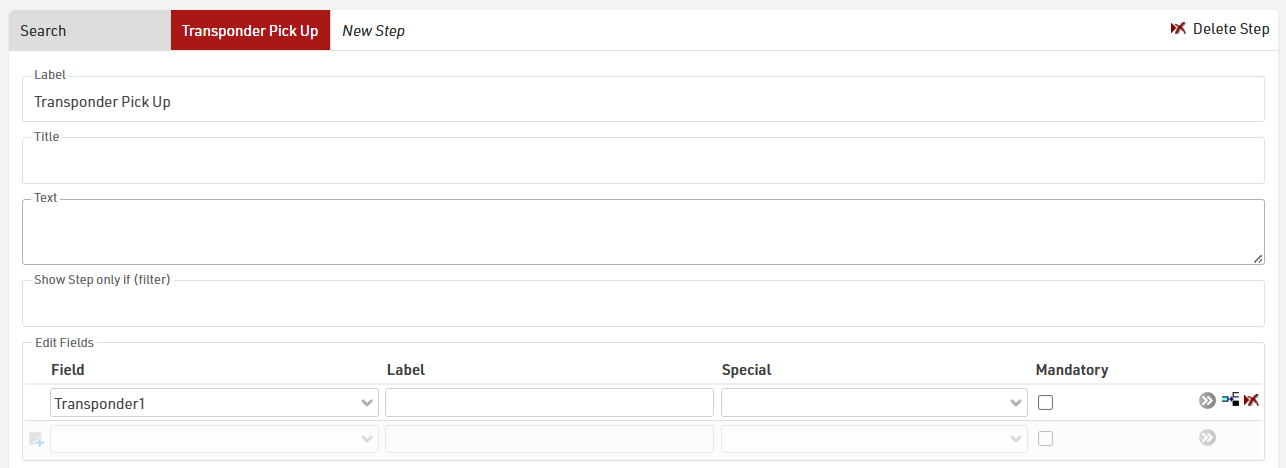
In the step for assigning the transponder code to the participant, the only editable field should be the Transponder1 field (and Transponder2 field, if two transponders per participant are handed over). If more data should be editable, the corresponding fields need to be added either in this step, or in additional steps. It is for example also possible to combine the transponder assignment with a [[@41740|dynamic bib assignment].
Manual transponder assignment
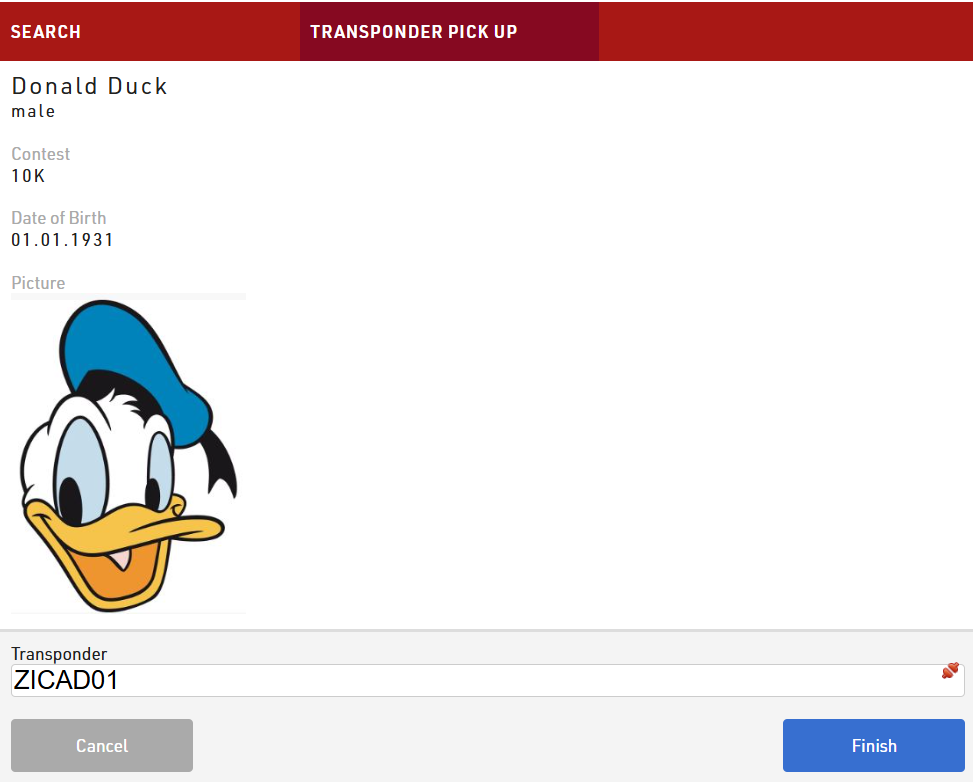
The easiest way without any additional equipment is assigning the transponder by typing in the transponder code manually on the laptop or by using the EventTools App.
If a wrong transponder code is entered, we get a notification, that this transponder is not in the chipfile that has been edited before:

If somehow an already assigned transpondercode is entered because of a typo, we get again a notification:

After clicking on the "Finish" button the entry of the correct transponder code is saved to the participants data and the transponder has been assigned correctly.
Transponder assignment with Management, USB-Timing Box or Main Timing System
Instead of reading the small printed transponder code, transponders can also be scanned directly with one of the following devices, you will need to have the RACE RESULT Web Server running on the computer running the kiosk.
- Management Box in Check mode
- USB-Timing Box in Check mode
- Ubidium
- Decoder with Active Extension connected
When connected, click the red connection icon to search for available devices and select the relevant device, the connection icon will turn green when it is connected.
Now it is possible to simply scan the transponder on the device and the transponder code is copied in the entry field automatically.

Transponder assignment with EventTools App
Using a Checkin Kiosk on the EventTools App gives us the opportunity to use the QR-Code scanning option which is implemented in the App.
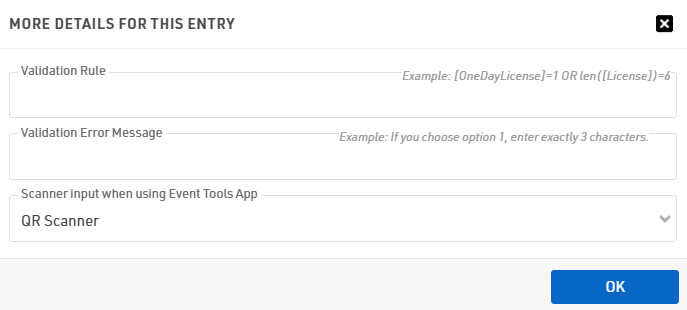
As a preparation for the transponders, all need to have a sticker on them with a QR-code which contains the Transponder code. In the Checkin Kiosk advanced settings for the editable Transponder1 field we need to select QR Scanner input when using the EventTools App:
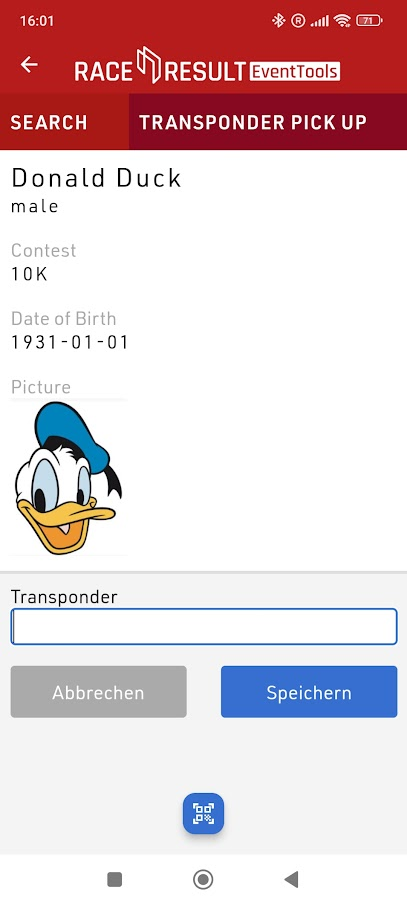
By doing so, the small blue QR-Code symbol on the bottom of the screen will be shown in the App for scanning the transponder's QR code and to encode the transponder code:
Dynamic Bib Assignment
Using dynamic bib assignment allows for a faster bib collection for participants and can also reduce errors, participants are assigned the next available bib number rather than having to search for and select the correct bib.
Bib Numbers
The first step is to set up bib number ranges that are outside of the actual bib number ranges which are going to be used for the event. The bib ranges are set up in the Participants Data -> Bib Numbers menu:

After the online-registration the participants are going to be saved in the event file with a bib number in these ranges. During the bib pick up, the bib number will be changed in the participant's data to the bib the participant receives at the bib pick up booth.
If the assigned number ranges overlap with your actual bib number ranges it may be necessary to use the reassign bib numbers in the Adapt Data menu.
Checkin Kiosk
Bib numbers can be dynamically assigned using a Checkin Kiosk. Volunteers need to simply search for participants and then assign the bib number.
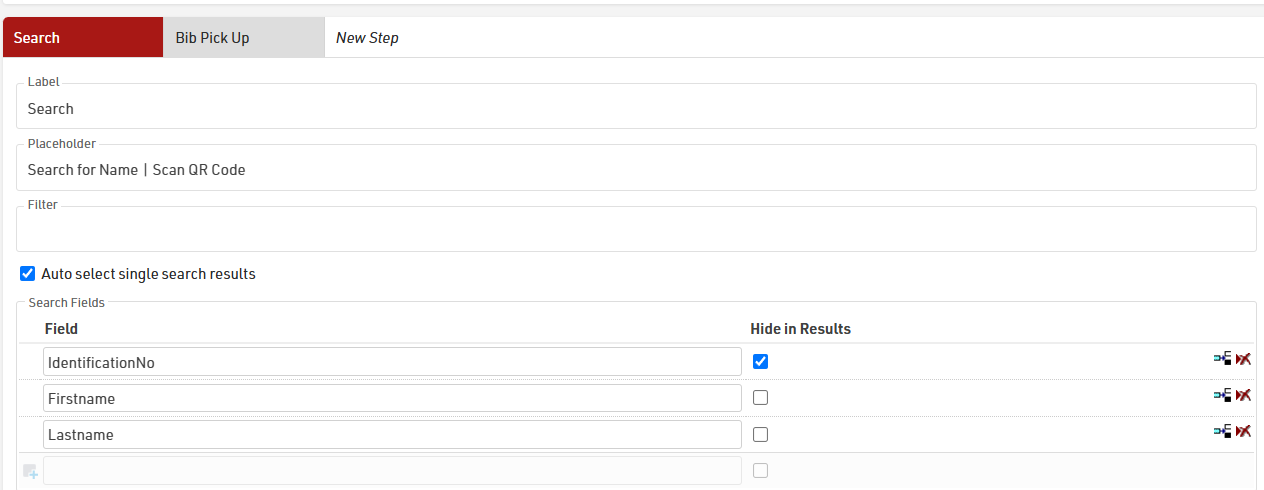
In the search step we determine the different fields that can be used for searching, e.g. firstname, lastname or a personal identification number that is evaluated during the registration process. By using the Event Tools App it would be even possible to scan a QR code which is for example encoded after the registration for each participant in order to identify the participant uniquely. How to use the App and the QR scan to do so, can be read in this article: Search for Participants Using a Unique QR Code.
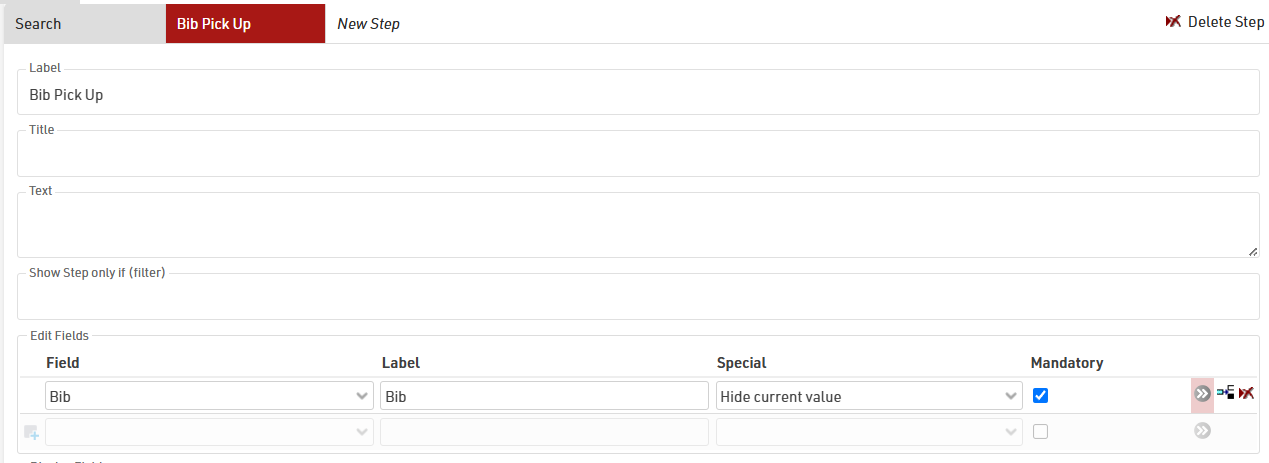
In the second step, the only editable field is the Bib field. By using the Special function "Hide current value", the current bib number (which is an invalid number) will not be shown:
After the search step and selecting the correct participant, it is possible to enter the new bib number manually:
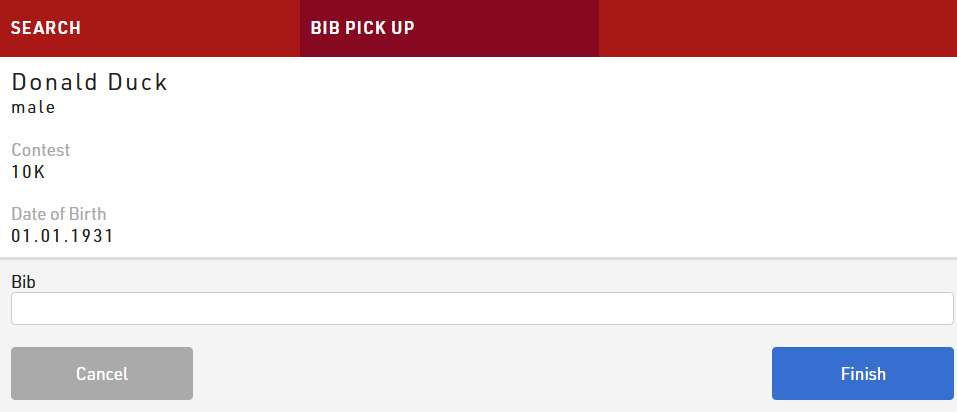
After clicking Finish the new bib number is assigned to the participant.
Again, when using the Event Tools App to assign the bibs dynamically, it is also possible to use the app in combination with the BLE Reader. In the details for the the Bib entry-field we can determine the BLE Reader as an input device, when using the Event Tools App:
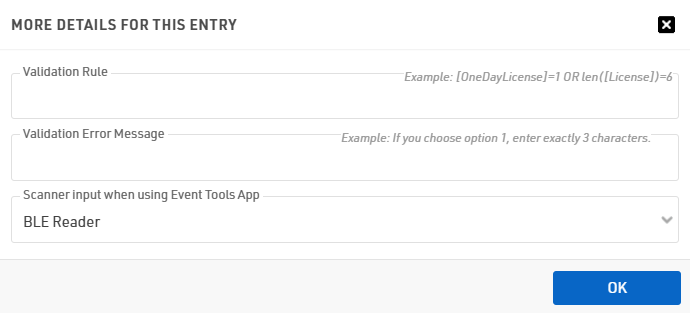
By doing so, the volunteer can just take the bib out of the box, scan the transponder once and the Reader will instantly read the bib number and will automatically fill the corresponding field. This way is a bit less error-prone, as the volunteer has no need to type in any numbers, however it does require that you are using bibs with matching transponder codes. Alternatively you could combine the bib assignment with Dynamically Transponder Assignment.