This event is meant to be used for an Event Series, where registration, timing and result presentation are all in the same event. We will be focusing on the main features of the event file, which allows you to make the participant's experience unique.
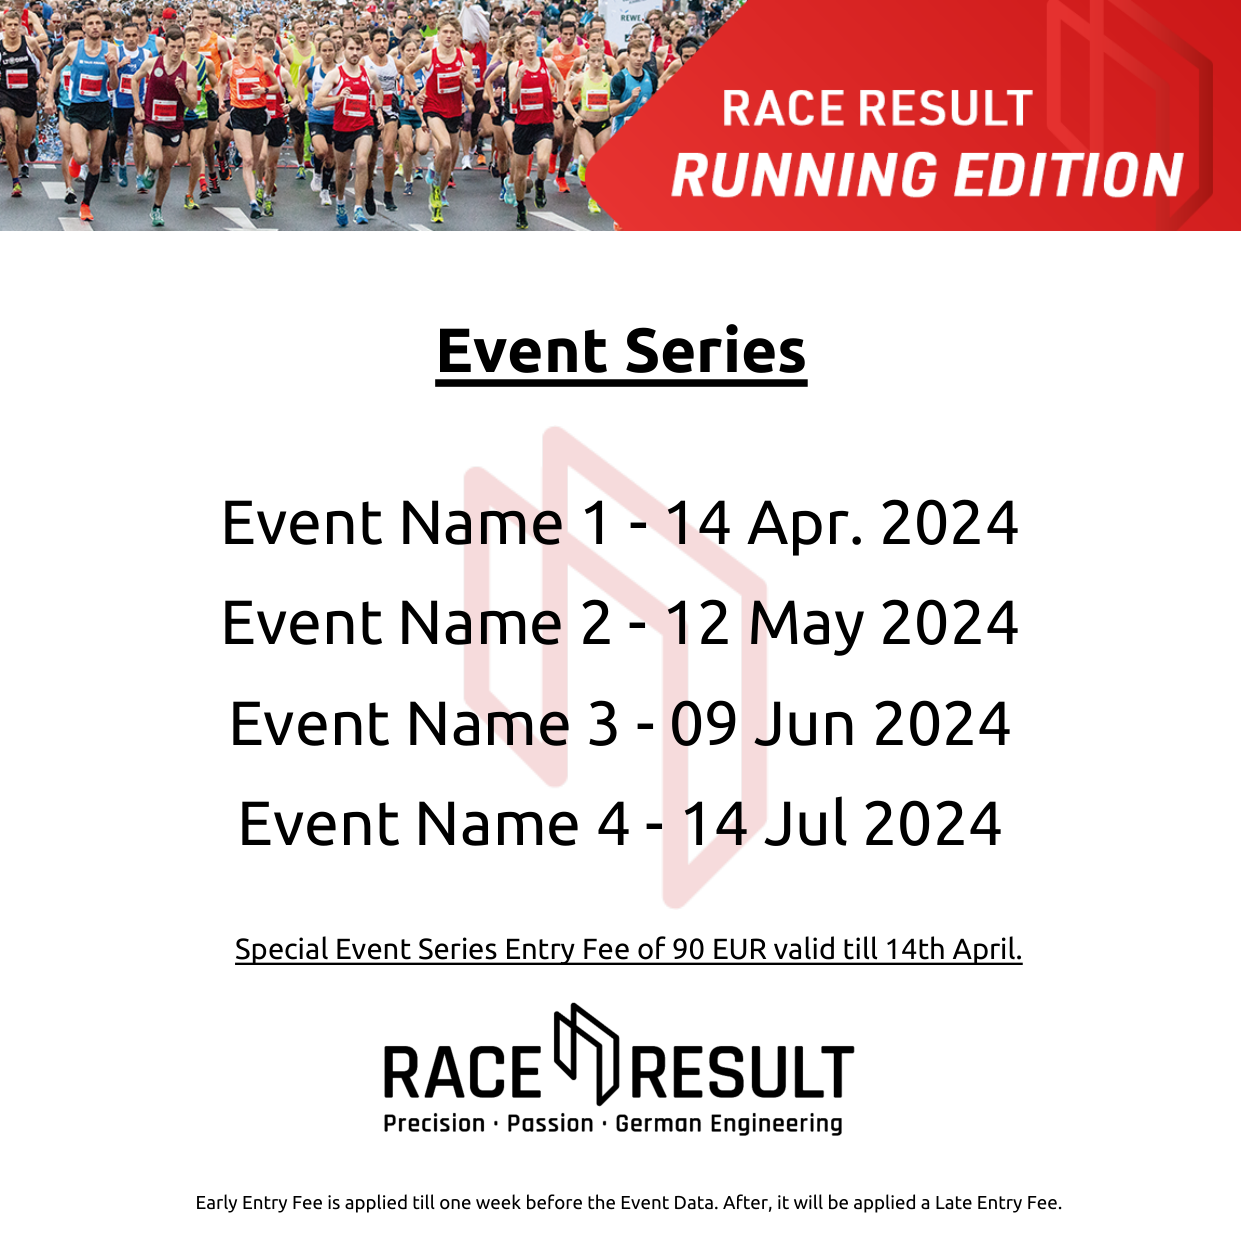
In this example, we will build a Series with 4 events, which will take place the second Sunday of each month from April to July 2024.
Data Preparation
Event Attributes
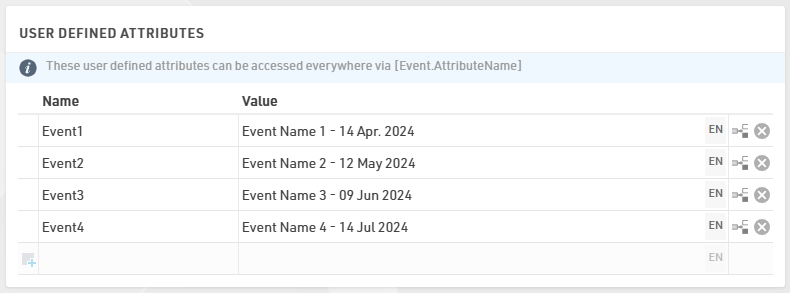
Having a Series, you are in the need of storing values for each event which have to be cross-linked to all participants no matter on which event they apply for.
Under Basic Settings > Event Settings > User Defined Attributes it is possible to store information which can be called in the Registration Forms, Output lists and Certificates later on.
Additional Fields
For the creation of the Registration Form and for assigning the right entry fee to each participant, we first need to create additional fields which will allow us to evaluate the participant's registration and calculate the proper entry fee.
Under Basic Settings > Participants Data > Additional Fields, we can create a group and store as many checkboxes as the number of events we have in our Event Series. The WholeSeries checkbox is to simplify the registration of a participant who wants to participate in all events, profiting from the special price for it.
The use of a checkbox is preferred due to the fact that only two choices are possible. A dropdown with a YES/NO menu could also do the job, but it would require more work on our side and more action from the participant when registering to the event.

Entry Fees
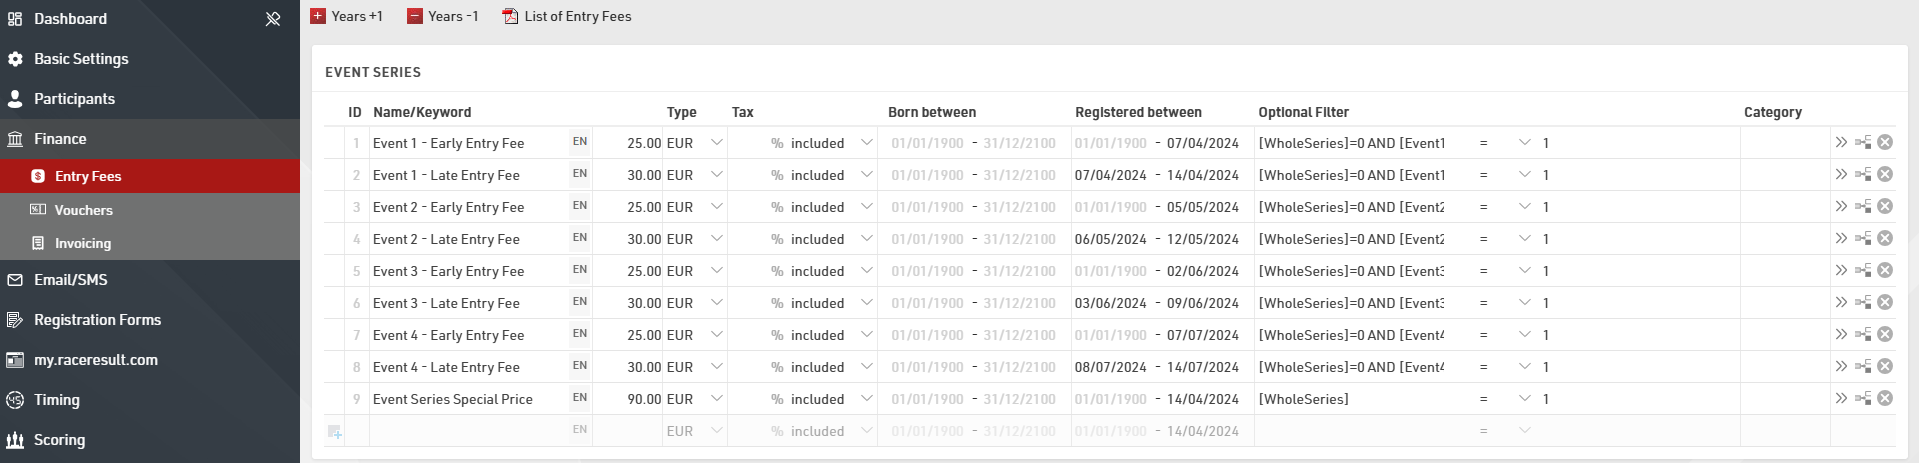
In relation to the series, each event entails two fees - a discounted early fee applicable until one week before the race day and a late fee incurred for registrations made within seven days of the race.
To make this possible, we fill the "Registered between" date-span field according to the fee and the event in account.
All fees will be applied based on a filter which looks if the [WholeSeries]/[EventX] checkboxes are ticked/unticked.
Registration
For this section, two steps are required:
- Create a Registration Form;
- Publish the form on my.raceresult platform, to let participants register to the Event Series.
Registration Form
In this example we decided to include, within the same step, the input fields for participants' data and address, an HTML table as a recap of all the entry fees available for the Series, and the Entry Fee Table summary which updates itself automatically based on the user's choices.
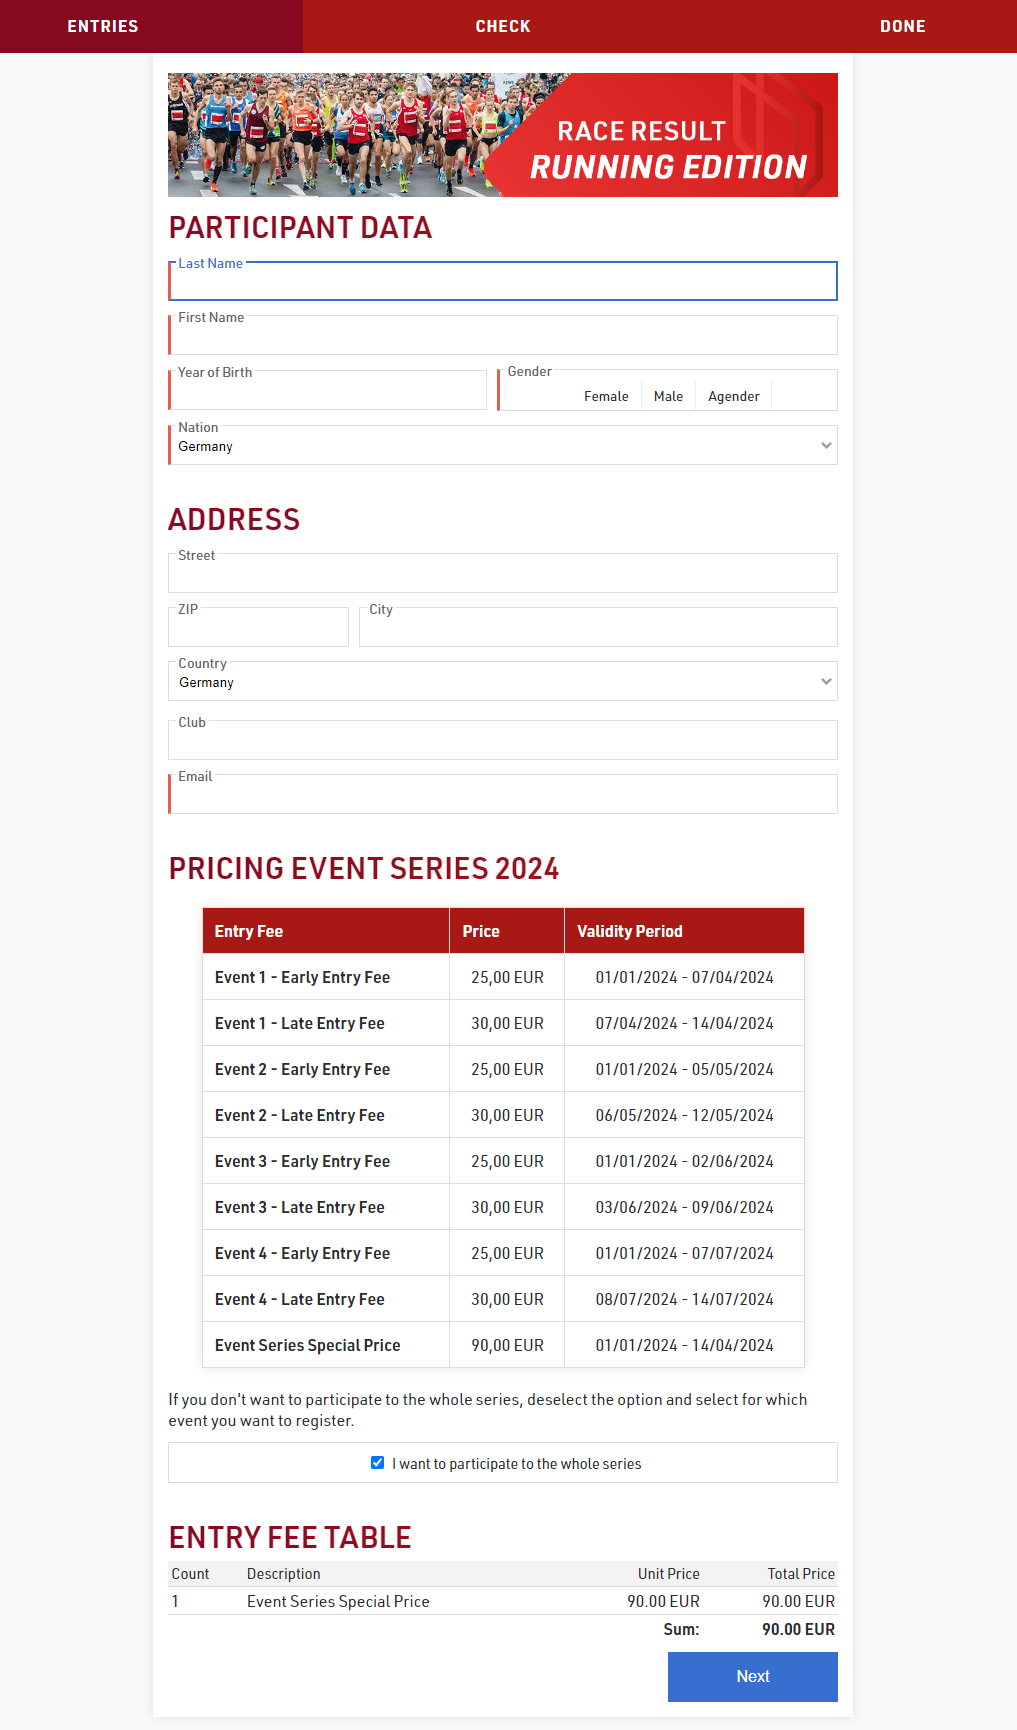
By default, the checkbox WholeSeries is ticked, but as soon as the participant unticks it, the 4 checkboxes created as Additional Fields will appear giving the participant the ability to select specific events one by one.
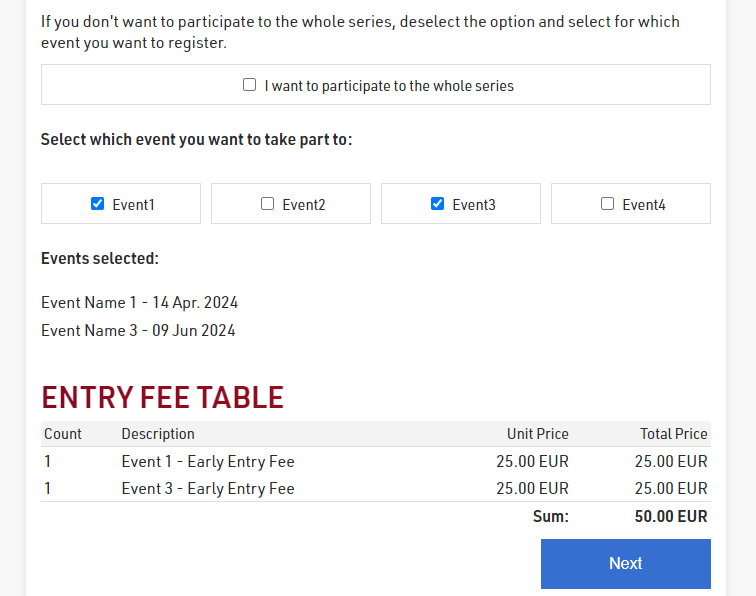
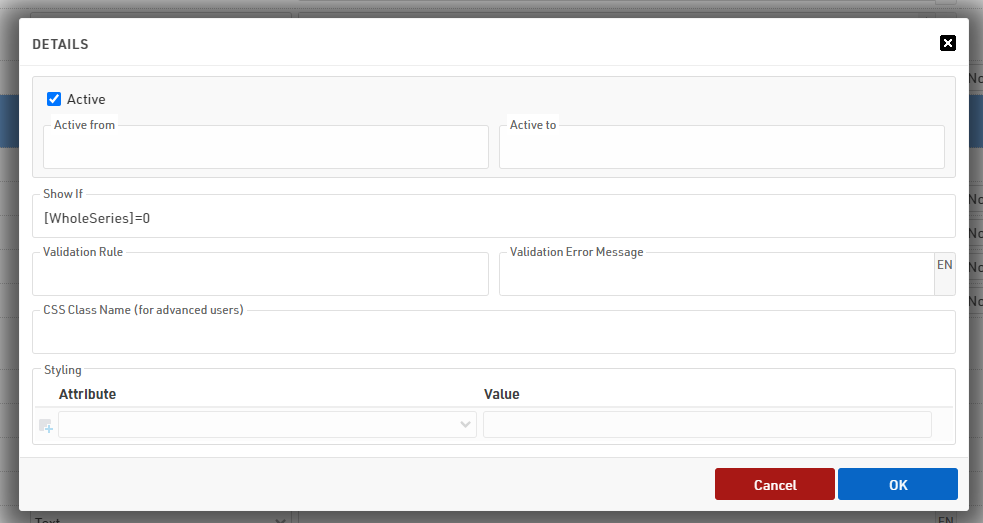
To display/hide fields based on other fields' value, you can use the advanced setting SHOW IF.
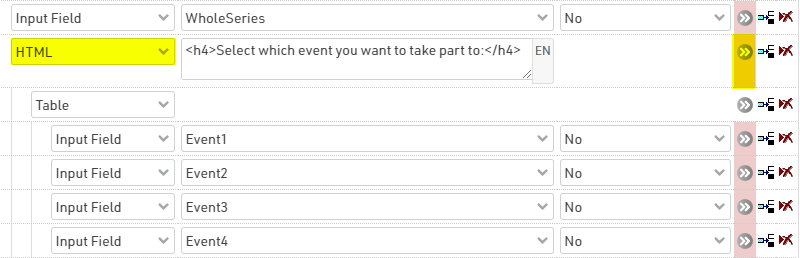
To avoid applying the show if to all elements, we have indented all the EventX fields under the parent element HTML highlighted, and applied to it the show if filter:
my.raceresult
For this step, we forward you to the relevant my.rr article, which describes all the steps for enabling the platform for the registration.
Timing and Scoring
For the timing of each event, we will use the same two devices, one for the start and one for the finish.
To define each time which device goes where, we create one single timing point for each event.
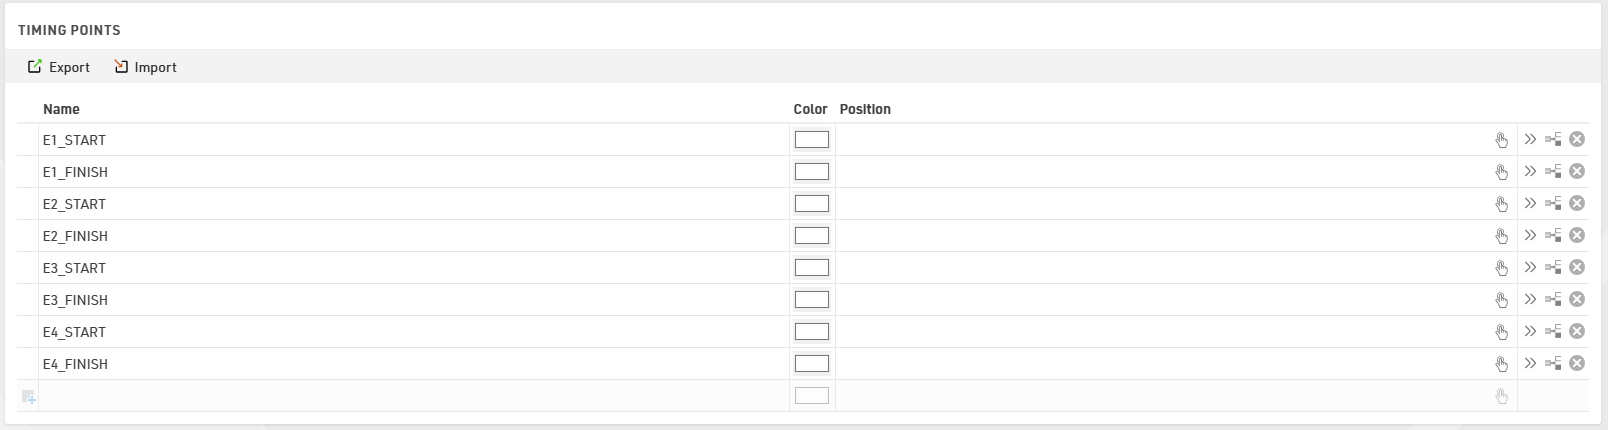
This will allow us to associate each detection of a specific timing point of a specific event into a "timing container" which will be then used in the Special Results to run calculations.
Special Results
To better work with special results, when having multiple events/races on the same file, it's highly suggested to structure the results with some sort of logic.
In this case, we decided to store each result of a specific event in a block of 100.
And all similar results have the same unit: for example, the EventX_Time has always result ID X01.
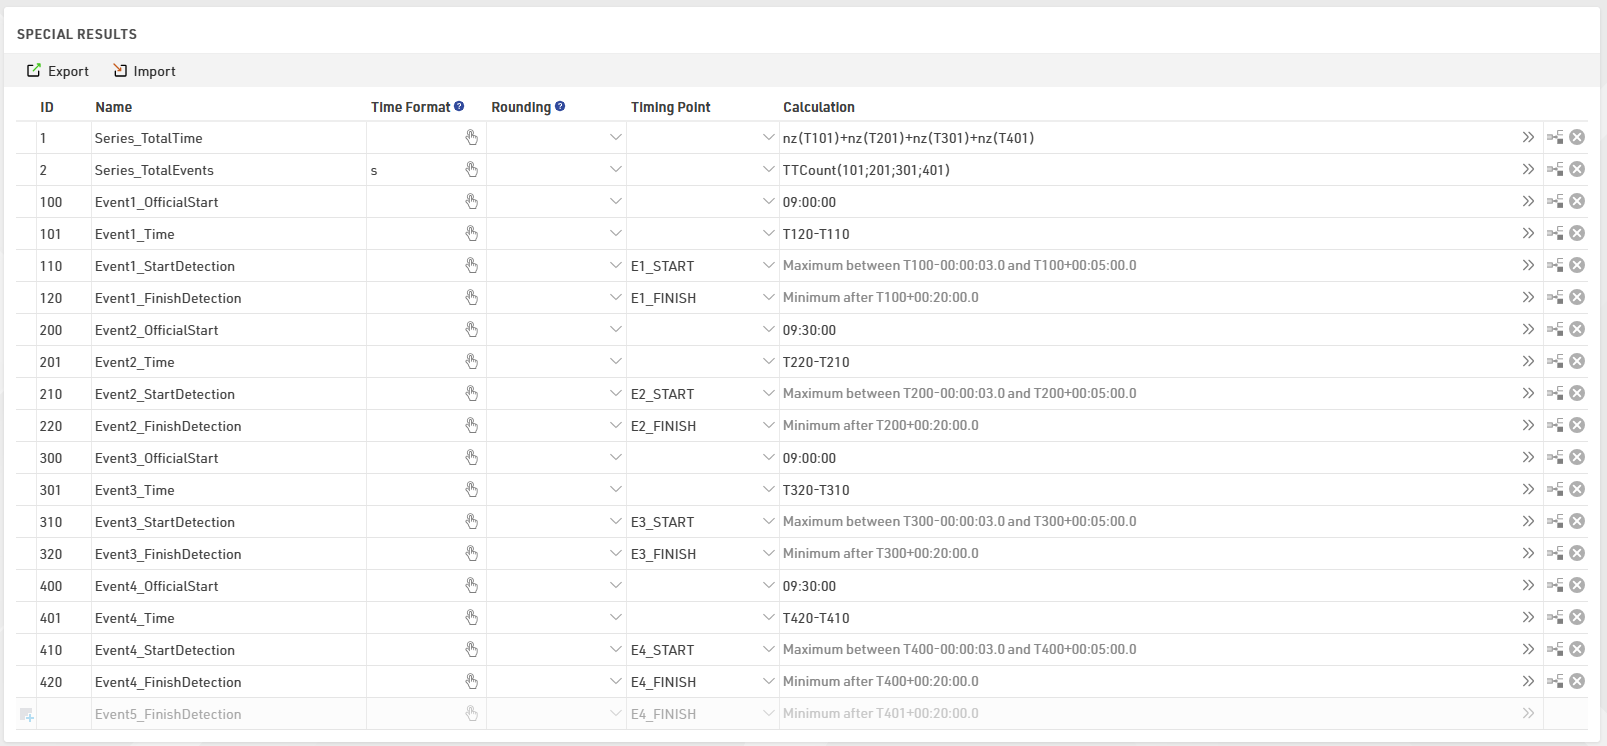
In results 100-200-300-400 you can enter the official start time of each event, and the EventX_Start/Finishdetection will look at them to take the right timing detection from each timing point.
In result 1 we store for each participant the sum of all the times of each event, and in result 2 we count how many events have been completed.
These two results will be then used for sorting and ranking participants in the result lists.
Scoring
Under Scoring ⇒ Rankings it is possible to create an indefinite number of ranks based on filter/grouping/sorting values applied.
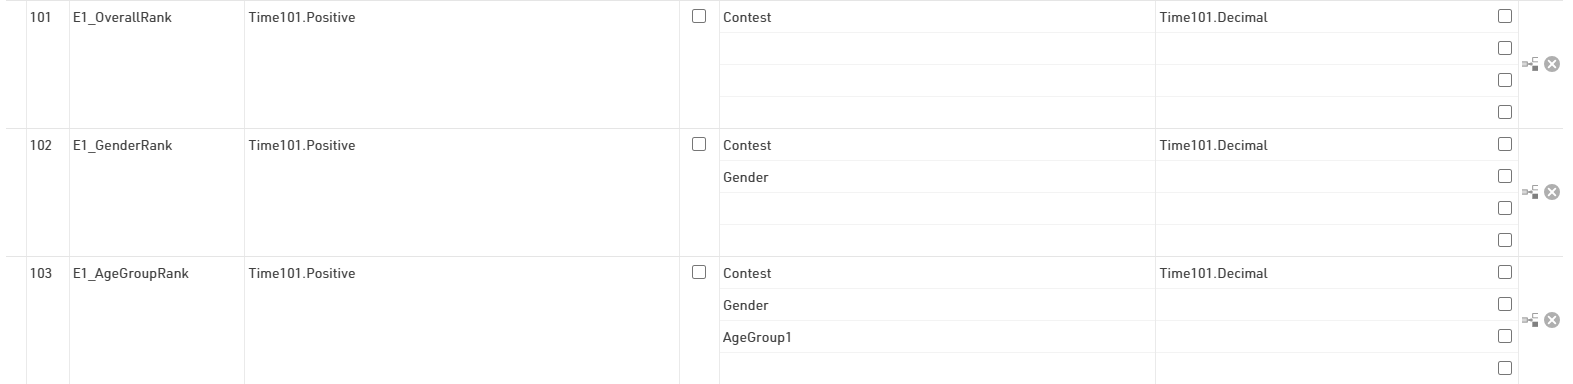
For each event, we have followed the same block structure used in the special results with blocks of 100.
Each event has 3 specific rankings, which are the Overall/Gender/AgeGroup: they all have the same filter and order, but they differ by the grouping used.
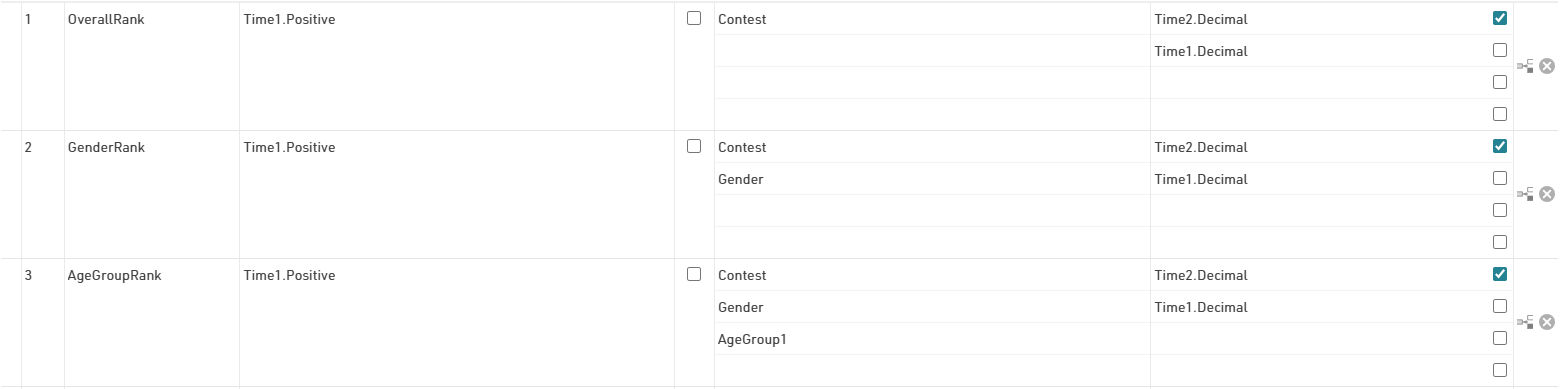
For the Event Series, we have ranks 1-3 which take in account the special results IDs 1 and 2.
The checkbox ticked on the first line of each ranking tells the software to order participants by highest number of events completed to lowest. Only when participants have participated in the same number of events, the software will then sort by fastest to slowest.
Lists
Under Lists it is possible to define an indefinite number of lists, useful to create participants lists, results lists and internal lists which will help you to proof check data.
In this template, you will find participant lists and result lists for each event.
The participant lists are each filtered by the additional field EventX, in order to display only the relevant participants;
The result lists are instead filtered by the TimeX01.Positive field, which returns 1 when a participant has a valid finish time.
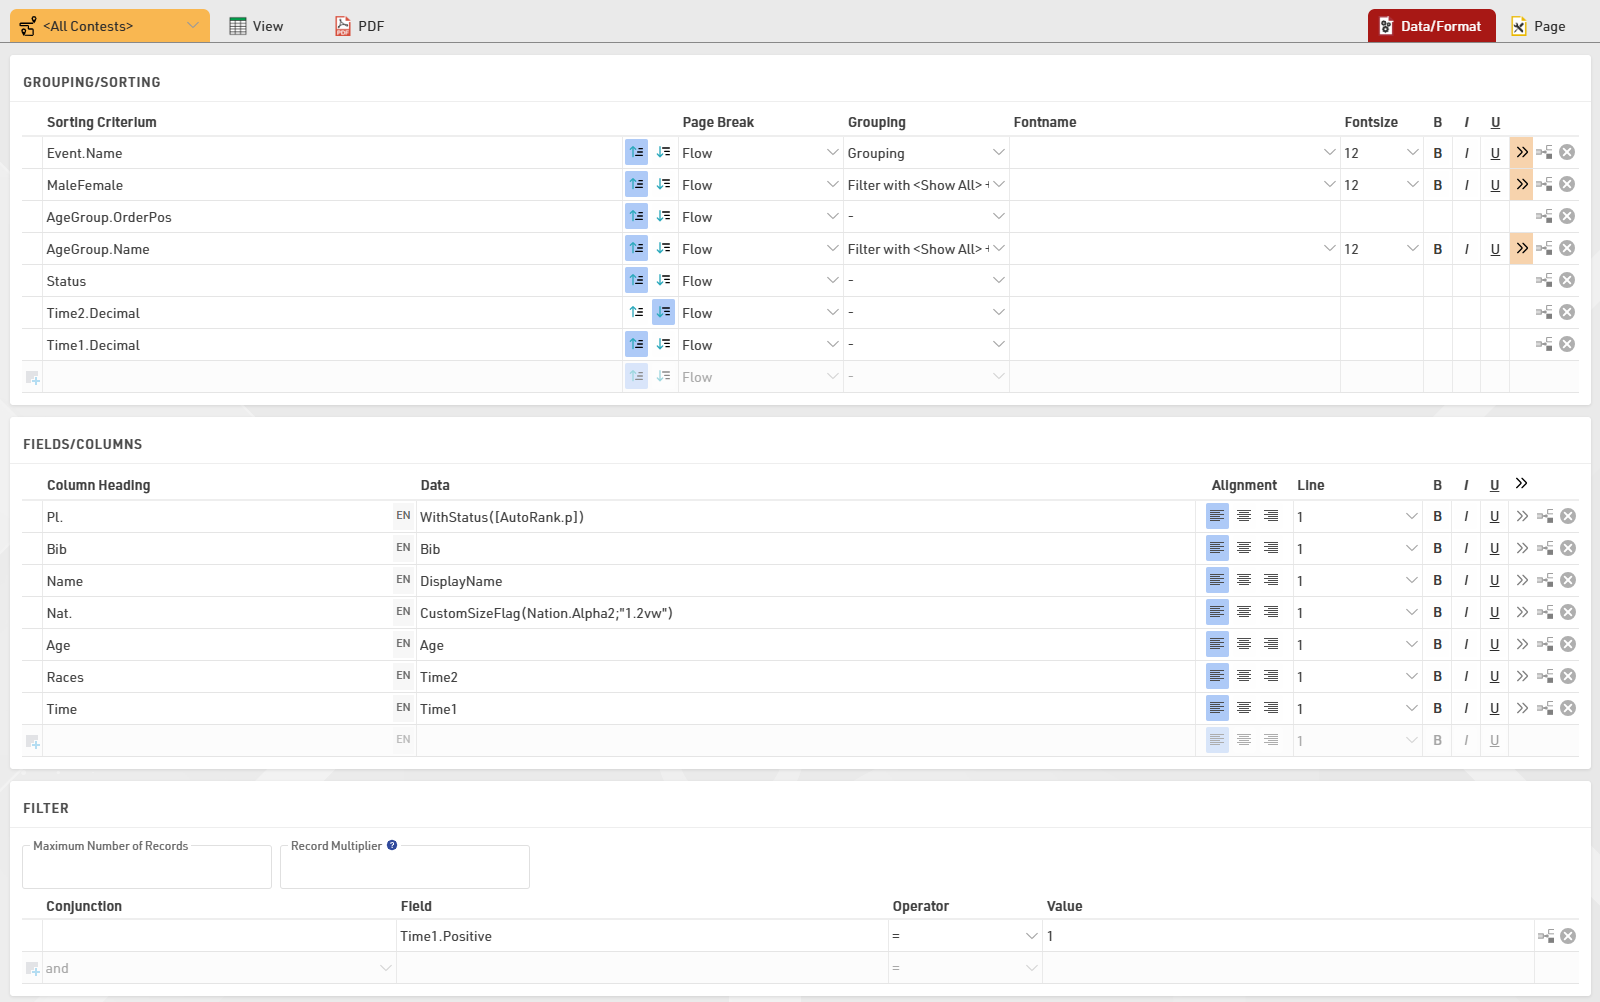
The Final list displays the ranking of the whole series, by filtering only those participants who have at least participated to one event (thus they have a [Time1.Positive]=1), and sorts them by number of events completed (Z>A) and then by fastest to slowest(A>Z).
my.rr
In this section of the software, you can define all the content you want to make visible online, to let participants be able to check the event info, register and later on check their results.
Basic Settings
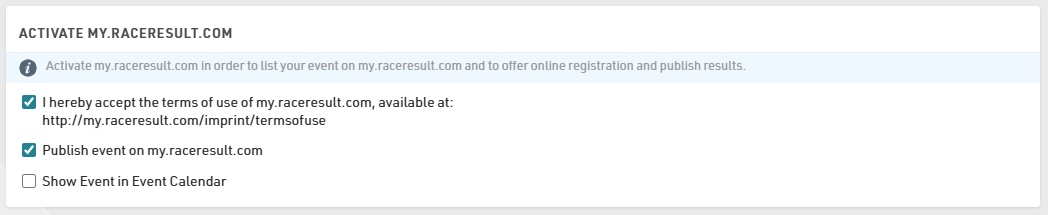
By flagging the first two checkboxes you accept the terms and publish the event online on my.raceresult.com/EVENTID.
Publish the Registration
Under Page "Registration" there are a few things to take care of in order to be able to publish the registration form created in the previous chapter.
Basic Settings

Ticking the checkbox will activate the page, and entering the date-range will make this page available for the selected time period.
The registration page, in this case, is active from the first day of 2024: participants will always be able to see this page and register to the event up till the registration forms won't expire.
Info Text
In this section, it's possible to enter plain text or any HTML code, in order to give additional info to participants regarding the Event. For HTML code, you need to press on the Source icon in the top-left corner of the text-editor: this will facilitate any special formatting you want to apply to the info text.

Publish Registration Forms
To finally publish the registration form created, you can choose it from the dropdown menu. You can also add additional info text for each form, as well as change the Button Text to make it more personalized.

This is the final result on my.raceresult.com

Publish lists
Lists in my.raceresult can be published into different pages like the Participants page, the Live page and the Results page.
In this KB article you can see how to publish lists on my.rr.
Presenter
Under Presenter, you can create one or more presenters which are useful to display results on-site during the event.
Here in this KB article you can read how to setup the presenter.
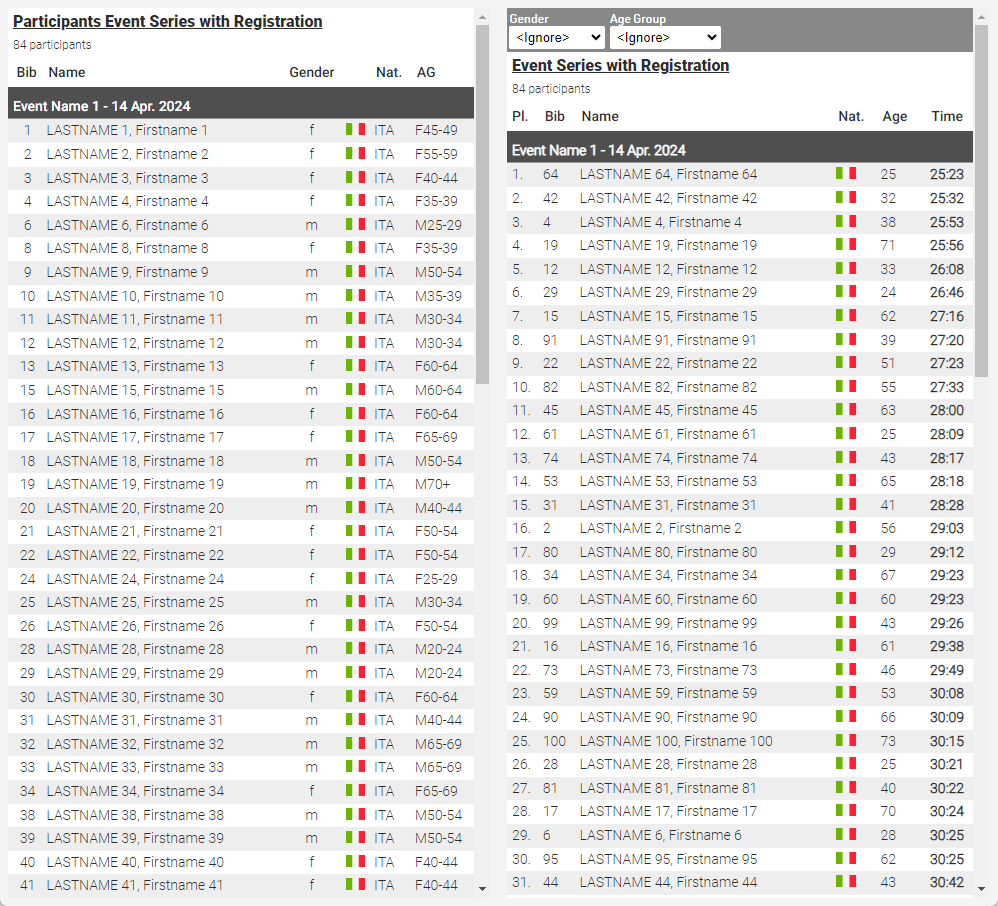
In the event file attached, the presenter "Present Results" is set to display in screen 1 the Participant list on the left half and the Final Results on the right half, both referring to the Event 1.