The my.raceresult.com page is used to configure the registration and results platform my.raceresult.com and to handle inquiries from my.raceresult.com
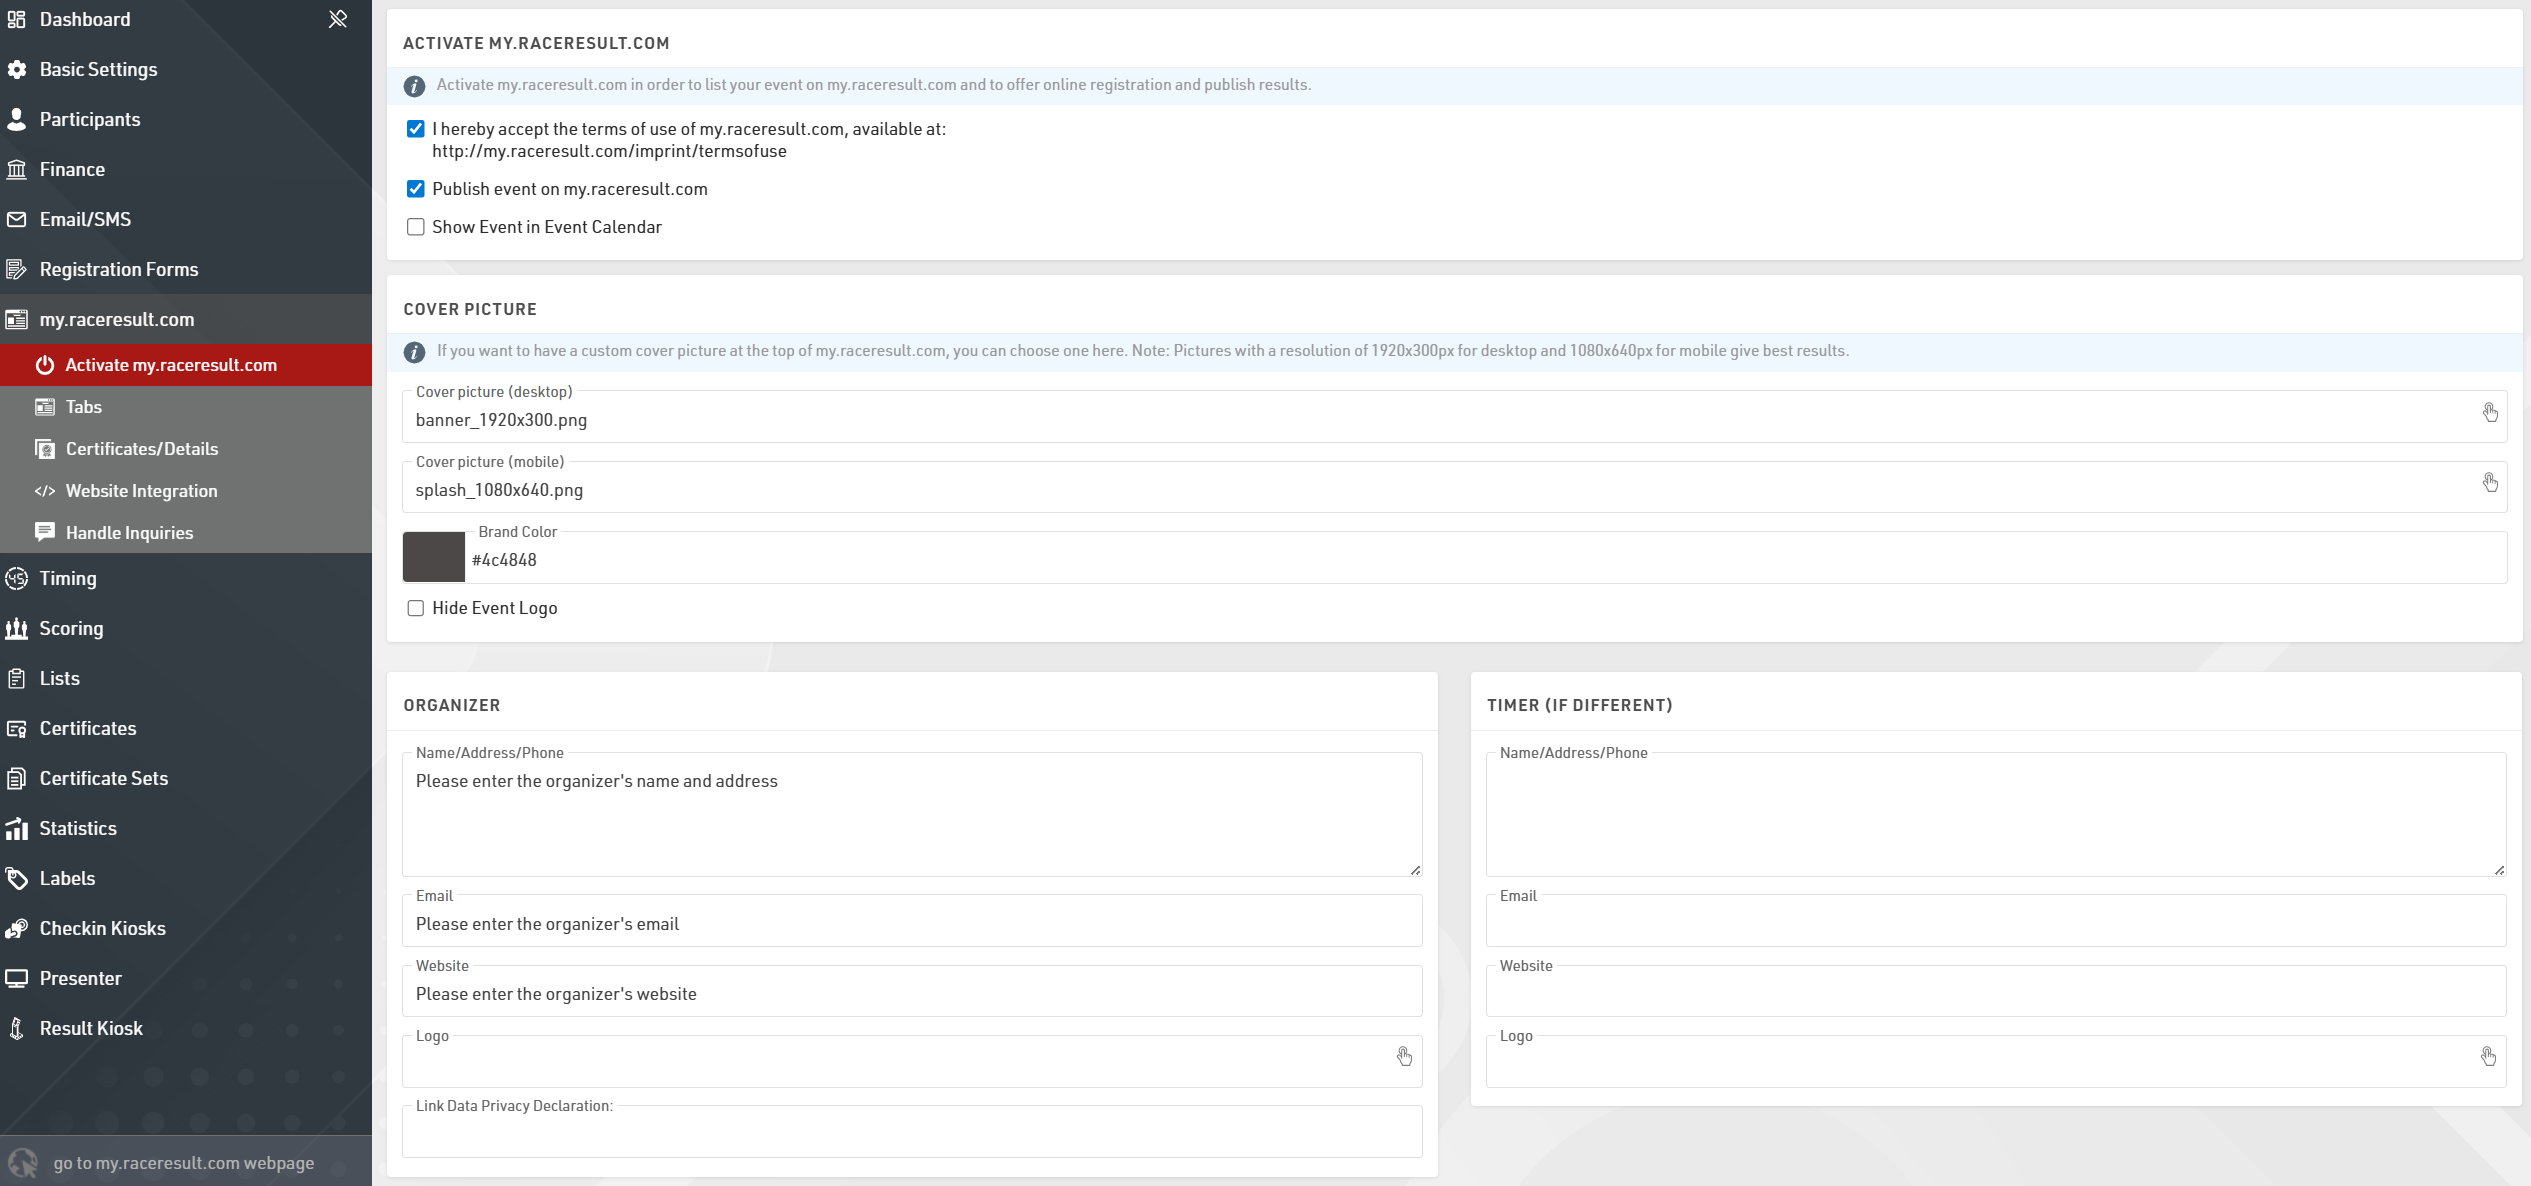
Activate my.raceresult.com
In order to show your event in the calendar on my.raceresult.com, to use the online registration, and to publish results, you need to first accept the terms of use as advertised and then publish the event using the checkboxes.

By default the event will be published in the main event calendar on my.raceresult.com, if you wish to hide it from these lists you can untick the box to show the event in the event calendar.
When viewing the event a banner is shown at the top of the page, by default a standard cover picture is used, depending on the type of event you have selected in Basic Settings > Event settings.
You can choose to upload your own banner images to use here instead. The size of the banner for desktop is 1920x300px and mobile is 1080x640px, images which do not conform to this size may be stretched or compressed in order to fit.

The color for the menu items can be defined using the Brand Color function. Best practice is to use darker colors for the Brand Color so it shows up on the lighter background. The apply contest color will use the Contest color setting to indicate the contest for results boxes and favorites on my.raceresult.com.
If you uploaded an event logo, it will display. As the event logo will overlap with the banner, you can hide it by ticking the box to "hide event logo".
Note that the cover picture is cached by your browser, if the image does not change after updating this then you may need to clear your browser cache, or alternatively try to open the page in a private/incognito window or a different browser.
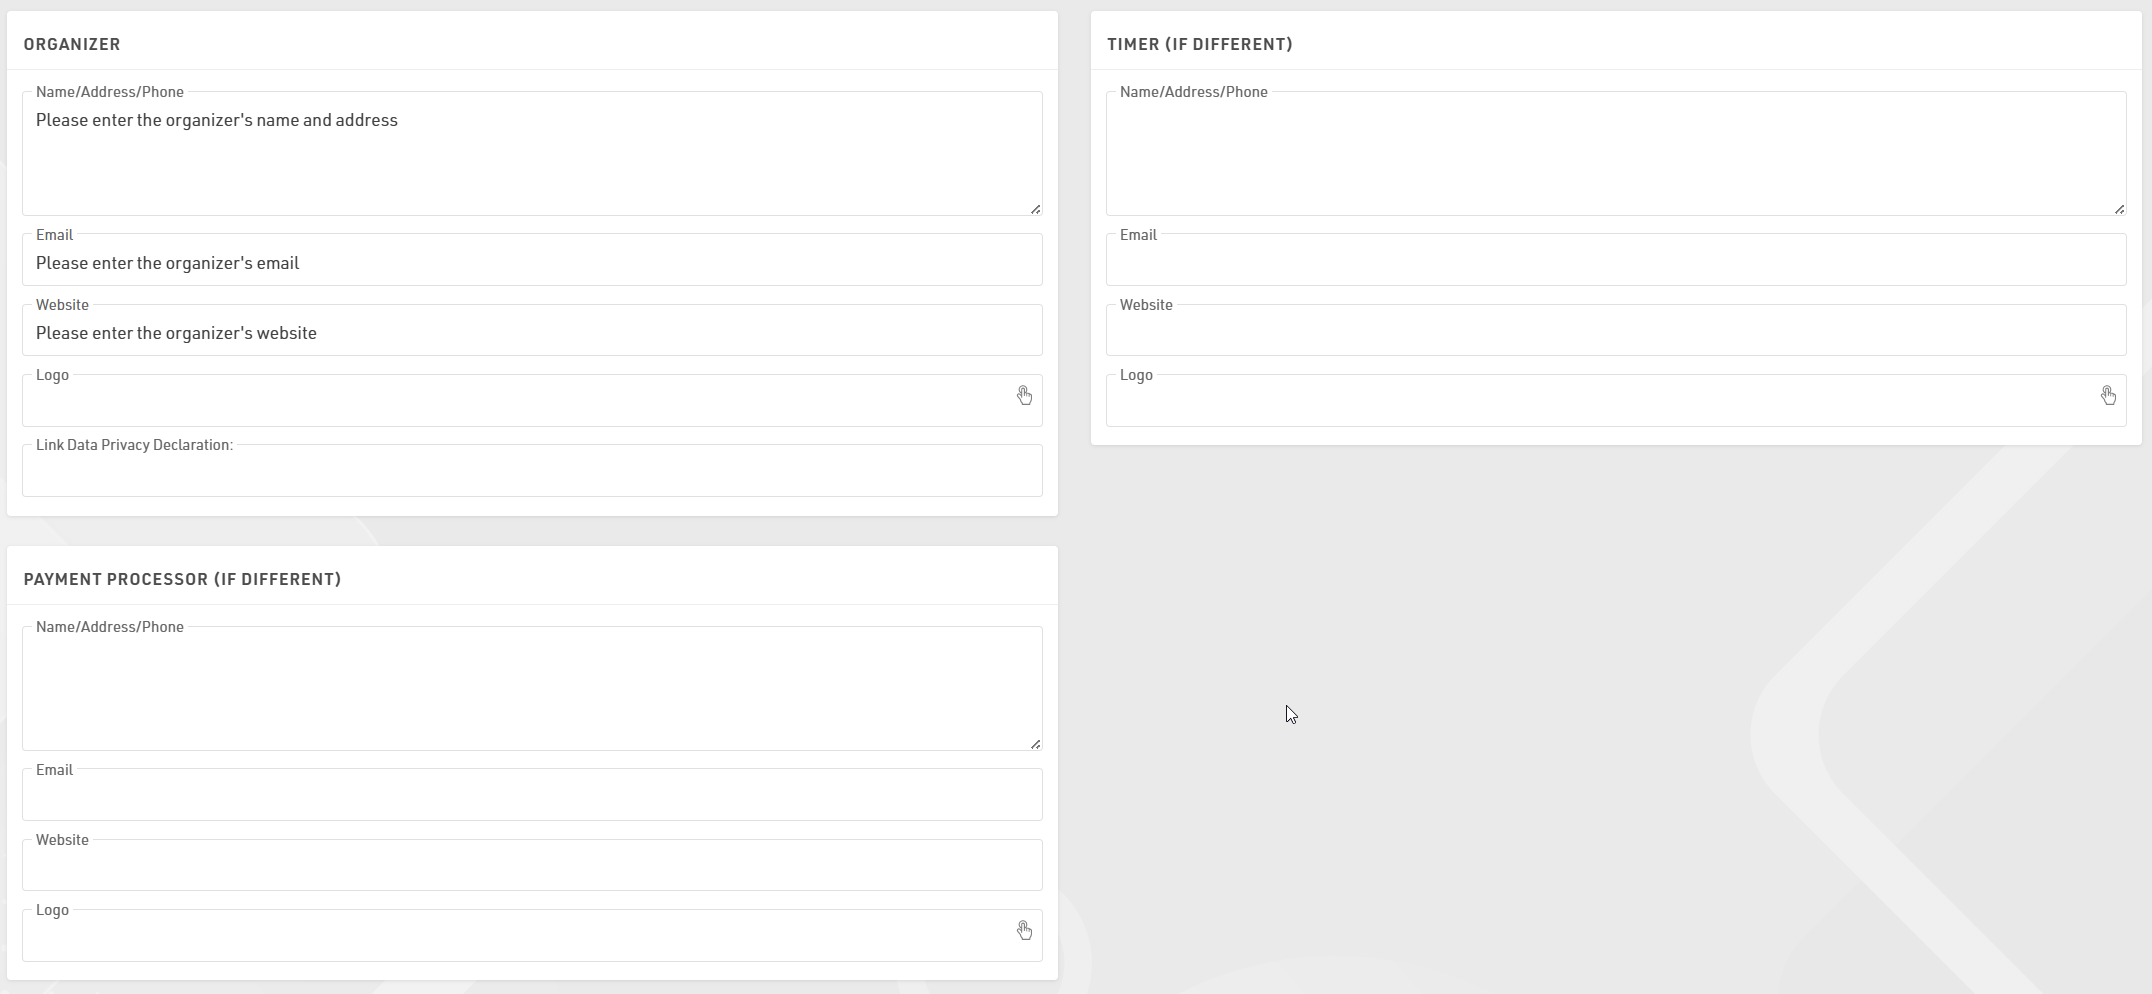
Contact information for the race director, timer, and 3rd party payment processor can be entered on this page. This information will be shown on the contact tab, which is the only tab that can not be deleted if publish is enabled.
In the Additional Features section it is possible to configure tracking via Google Analytics/ Meta Pixel on your my.raceresult.com webpage. Select the tracking platform and enter your specific ID to setup the configuration. To ensure compliance with data privacy regulations, these tools will only be active for visitors who have explicitly accepted third-party cookies via the cookie consent popup.

Tabs
The my.raceresult.com event page has been redesigned from a fixed set of sub-pages to a more flexible tab-based system. Tabs can be set up with different names, types, and timing so you can better control the design of the event page on my.raceresult.com. Existing event files are automatically converted to this new structure. New events will populate with a standard set of default tabs, including Info, Registration, Participants, Live, Results, Reviews, and Contact. Each of these can now be moved, renamed, or scheduled independently.

Title / URL Settings
This box defines how the tab appears in the navigation menu, what template is used, and the web address.
URL Preset: Select a standard template and path. This automatically sets the tab's behavior.
Title: If you want a custom name in the menu (e.g. "See Your Times" instead of "Results"), enter it here. Translation is possible by selecting the chosen languages and adding the text. If left empty, the URL Preset name is used.
Custom URL: When using a Custom URL preset, you can define a custom url here.
General Settings
These controls manage page status and visibility. The Publish button enables the tab's public URL. Menu Visibility determines how users navigate to the tab:
- Never: Always hidden from the menu; accessible via direct link or embed.
- When Active: Visible only during Page Active From/To dates.
- Always: Always visible; appears greyed out outside of Page Active From/To dates.
Use the Page Active From / to fields to automate access to the tab based on a schedule, for example turning Registration off and Live Results on at the event start.
Adding a New Tab
When adding a new tab you first select the type of content for the tab. The new tab's template will depend on your selection. Text will use the info template and external content will embed content or video from outside sources.
Info / Text
Events on my.raceresult.com can have an "Info" tab that can display text, HTML or embed a website, this is the default landing page for the event if configured.
Inside the Info text it is possible to use a limited set of specific fields for dynamically displaying data, the supported fields are as follows:
- [Event.Name]
- [Event.Location]
- [Event.Zip]
- [Event.State]
- [Event.Street]
- [Event.Date]
- [Event.AttributeName] - The user-defined attributes for the Event.
- [CounterX] - Where X should be replaced by a Contest ID to display the number of participants currently registered for that Contest.
These fields can also be used in the Info text on the Registration page.
Note that some websites may not permit embedding and so will not load, you will need to check the hosting settings for your website in this case.
Registration
Your Registration Forms can be included in the my.raceresult event to accept registrations and payment online.
Basic Settings
The registration page must be activated by checking Activate Online Registration, and a date range can be entered to define when the registration page should be available, according to the time zone set in your event file basic settings. Note that this is separate from the individual Registration Form active date range.
Info Text
The Info Text is displayed at the top of the registration page to provide additional information to participants looking to register, this can be entered as HTML allowing for complete customisation.
Registration Forms
Multiple Registration forms can be added to the registration page, each of which already defines the available dates and contests for the form.
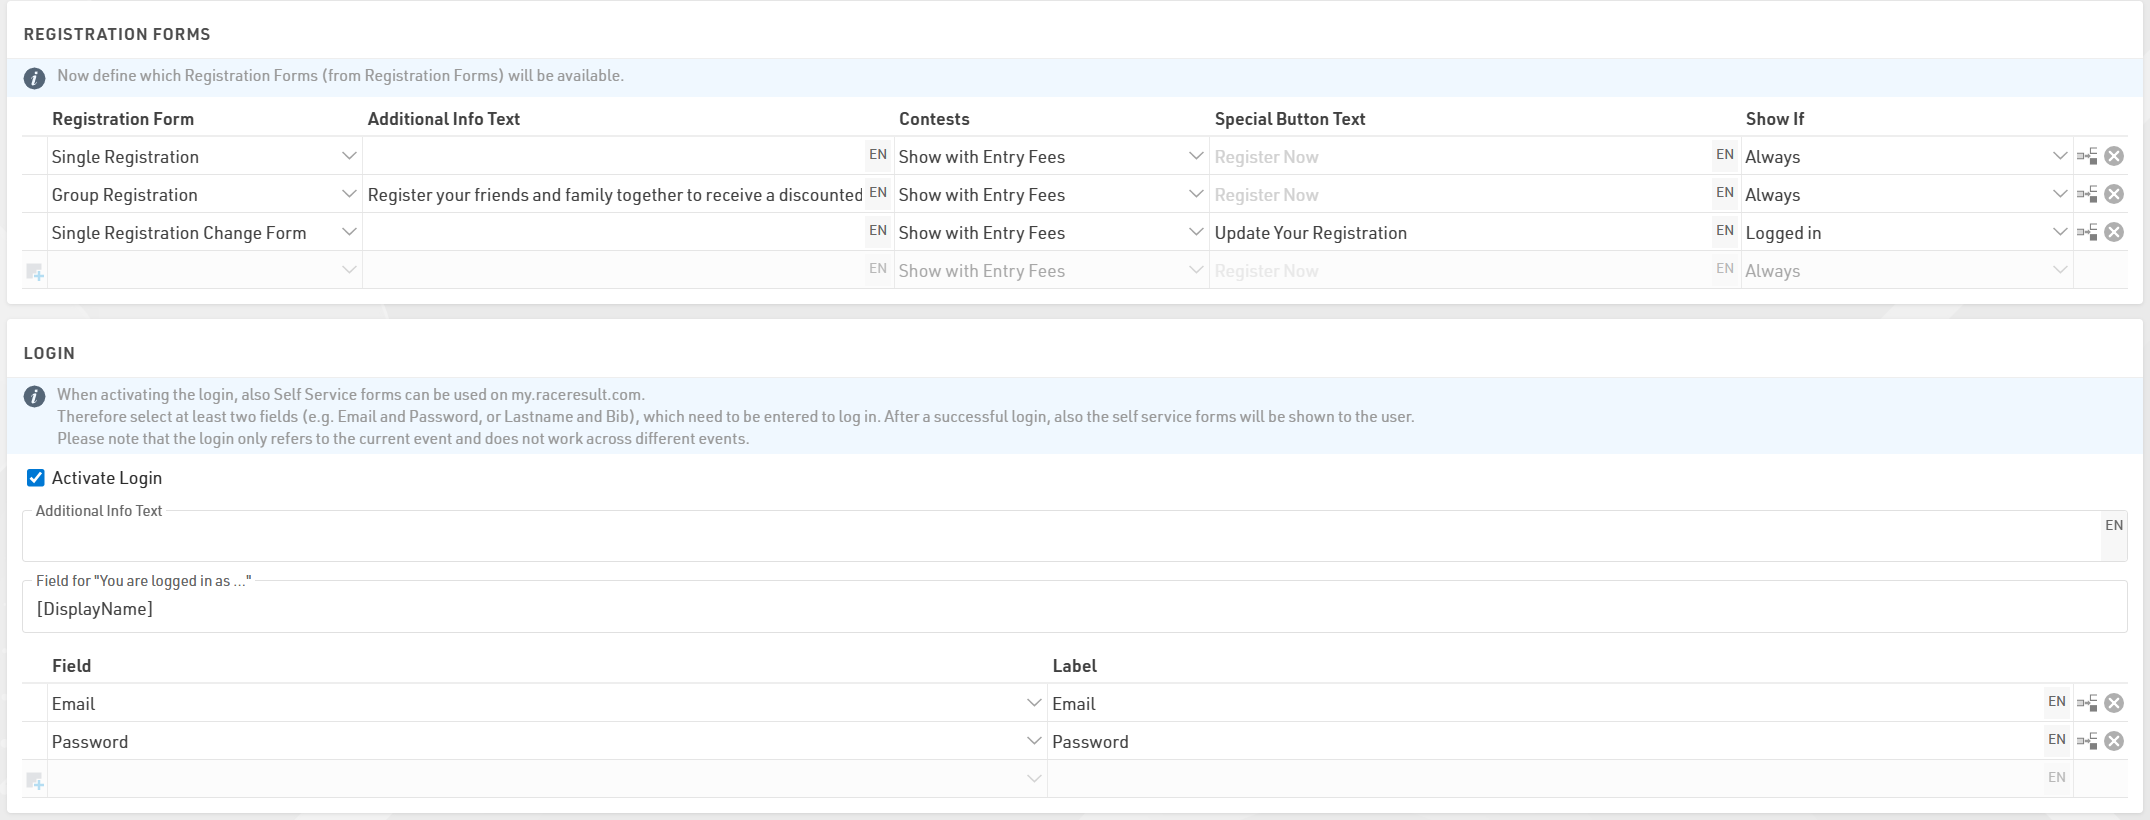
For each form you can define some additional info text to be displayed below the form title.
Selecting Show with Entry Fees will show a summary of the applicable entry fees for each available contest in that form.
You can also optionally relabel the button to start registration for each form.
If Login is activated then an additional dropdown will control which forms should be shown always, only when logged in, or only when not logged in.
Test Mode
Test mode allows you, or a third-party to test a registration form before the registration period, when in test mode the payment will not be captured.
It is advised to enter a date up to which the test mode is active to prevent this link from being used for an actual registration.
A link is available to open the registration page in test mode so this page can be accessed even before it is available according to the date range, note that it still must first be activated .
When in test mode it is possible to simulate specific dates by adding the query parameter &testDate= to the URL, this is useful for validating entry fees or active date ranges for specific fields.
e.g. &testDate=2026-12-25 would simulate registration on 25th December 2026.
Lists
The Lists templates allow you to publish lists on my.raceresult.com, each tab is intended to make it easier for viewers to find what they need.
The general use case for each template is as follows:
- Participants - Intended for start lists / information before the race.
- Live - Intended for Live Results DURING a race, to show leaderboards etc.
- Results - Intended for full results lists after a race.
Settings
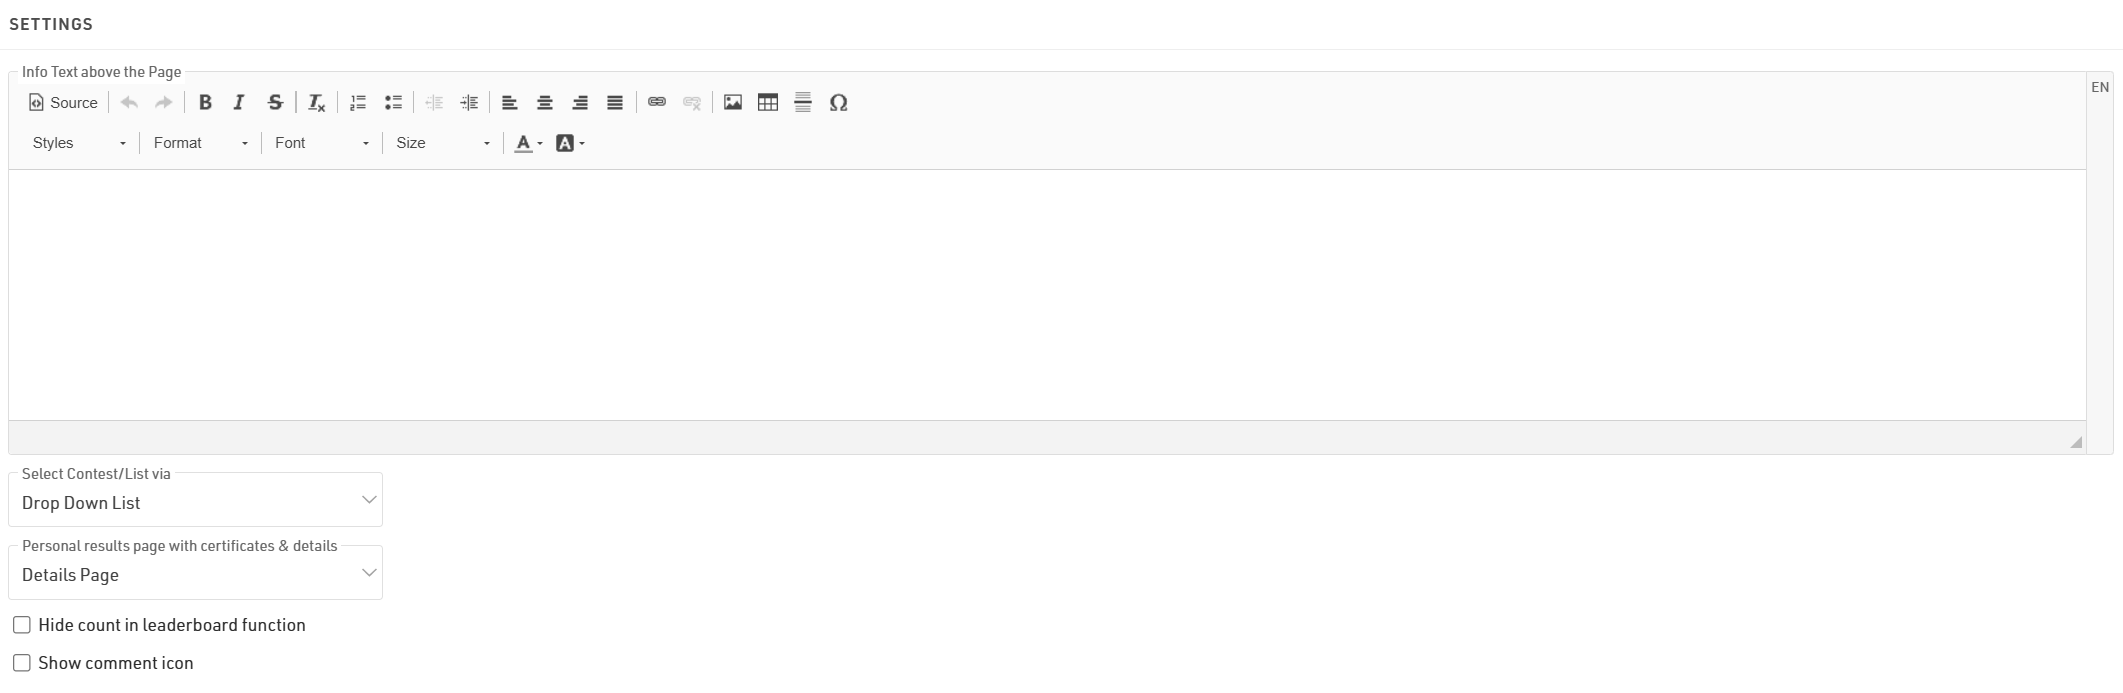
The info text will be shown above your lists and can contain additional HTML content.
If you have multiple lists they can be displayed / selected using either a drop-down list or selector boxes, the 2 options are explained in the below article.
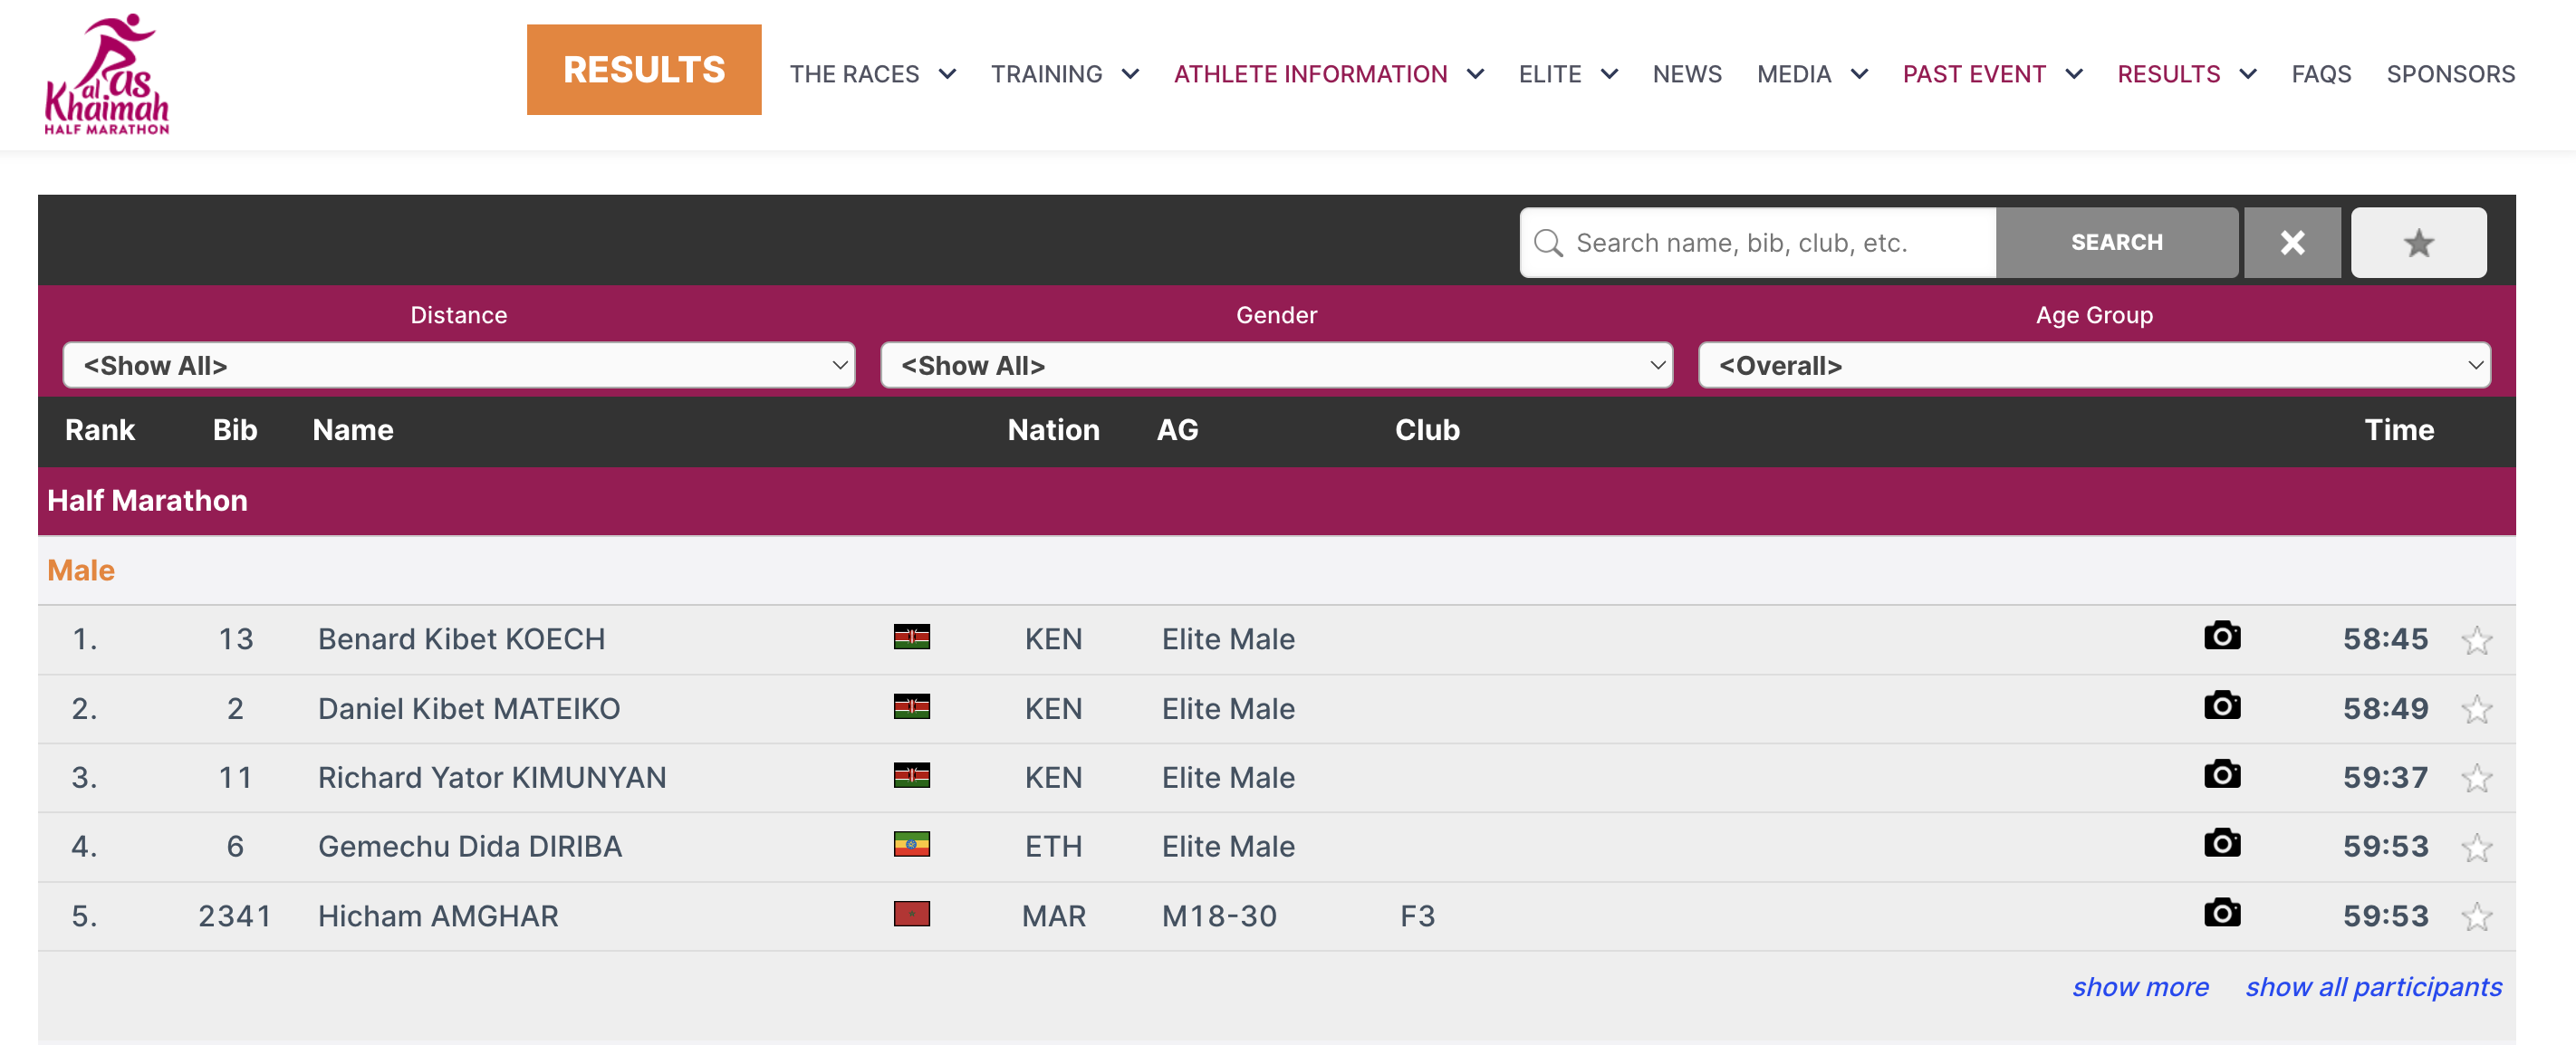
If you select a Personal results page with certificates & details it will enable a popup window when clicking a participant within a list, this popup contains the details list and additional details as configured in the Participant Views settings.
When using the Leaderboard function for a list it will have an option to "Show X participants" where x is the total number of participants within the group, hiding this will replace X with "all."
Selecting the Show comment icon will show a  next to each participant in the list. Allowing viewers to see and add comments for specific participants.
Publish Lists
You can publish multiple lists through my.raceresult.com, however in most cases it is recommended to publish a single list containing all the necessary information, this keeps the user-experience simple.
When publishing multiple lists on a tab the user will be able to select the list using either the drop-down menus or box selector according to the Select Contest/List via settings, the name of the list can be adapted using the optional label.

Lists can be activated / de-activated individually so they can be hidden until required. Clicking the link to open a list will open the page directly with that list opened, this will still work even if the list or tab is not active according to the published dates allowing you to preview a list before publishing.
You can apply Contest filters to lists, if you have multiple options selected for the Contests then filters / box selector will additionally include the Contest options before the list.
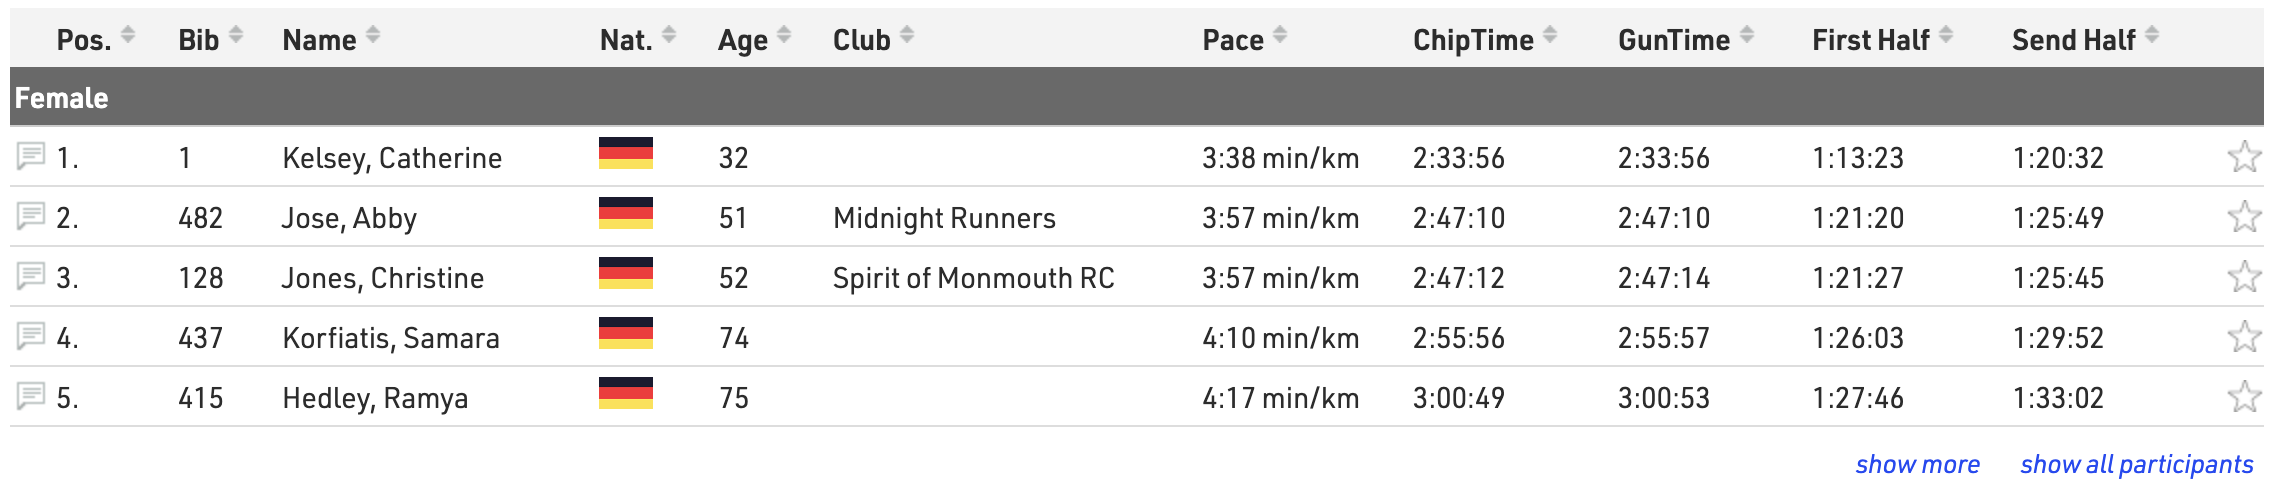
The leaderboard function for lists will reduce each group within the list to the corresponding number of records, buttons to show more or show all will be shown below each group.
With live update enabled lists will be automatically updated in real-time, most useful for live leaderboards. Note that this will only be active within the date range of the event according to the Basic Settings.
Advanced settings can be set for each list:

If you want to only show the Details Page on specific lists you can set use Overwrite Personal result page to enable or disable personal results pages for that specific list
If Preview for a list is disabled then selecting this list will instead automatically open a PDF of the list. Similarly if PDF is enabled then a link above will be shown allowing users to open the list in PDF format.
When List Sortable is enabled then users can sort each column in ascending / descending order by clicking the column headers.
Reviews
Visitors can leave comments in two places on my.raceresult.com:
- On the Reviews tab they can leave longer texts and rate the event with a 5-star-system.
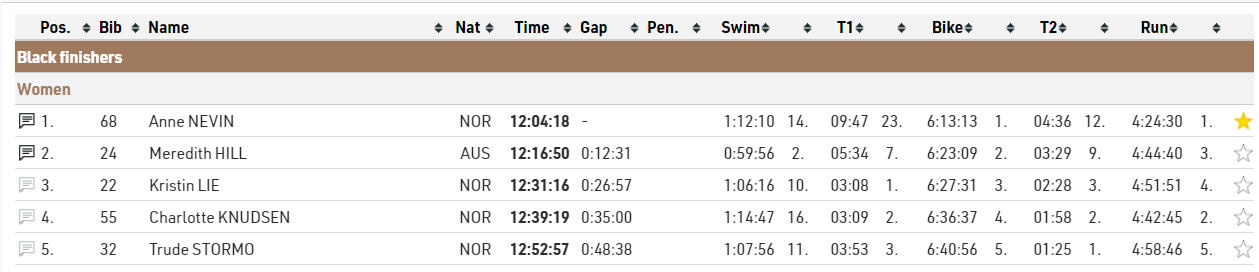
- Comments can be left for specific participants in the participant details window. If there are comments for a participant and the comment logo is enabled then the comment icon on the left side of the Output list will be solid.

Comments and Reviews can be disabled if you choose, and you can also moderate comments through the Reviews settings page too.
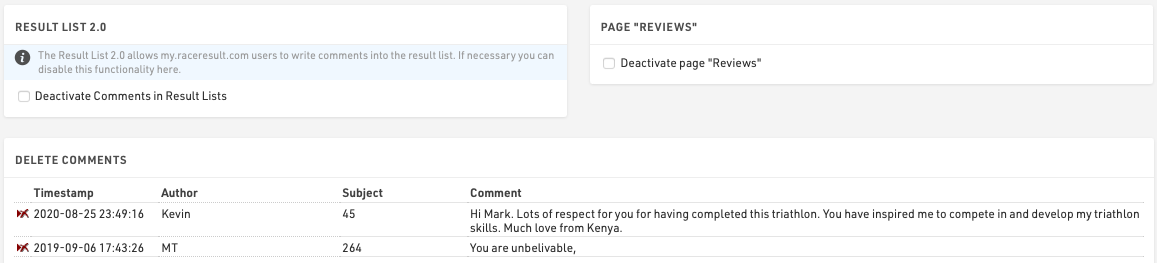
Note that new comments are checked on a daily basis by RACE RESULT and comments deemed improper will be removed.
Contact
Specific Contact Details for the race organizer, timer or payment processor can be listed in the Contact page, it is strongly advised to update these in Activate my.raceresult.com settings to ensure participants know who to contact for any queries - otherwise some may contact RACE RESULT who are unable to answer event specific queries.
The page also shows a Contact form through which participants can submit Inquiries or report missing/incorrect data, this can optionally be disabled if not wanted.
External Content
When adding a new External Content tab it is possible to embed content from a website or YouTube.

iFrame
To load a website directly in a tab, enter an embeddable URL in the iFrame field. Please avoid using standard website homepages or top-level URLs for this purpose, as most sites block this for security reasons, which may cause the tab to appear blank or function incorrectly.
YouTube Video
To display a YouTube video, enter the unique Video ID found at the end of the video's URL. Please note that if a user has not accepted third-party cookies in their browser, the video will not load automatically. Instead, a cover image will be displayed that allows the user to accept YouTube’s terms of use to view the video.
Favorites
The Favorites Tab enables spectators to search for participants and maintain a personalized tracking list. End users can add participants to their favorites directly when viewing lists or via the integrated search.
Search Settings

The favorites search is a global search across the entire event file, so you must define the search parameters to ensure relevant results.
- Search Fields: Add the specific participant fields that the system will query when a user types a search term.
- Filter: Apply a filter expression to restrict the searchable pool, for example, to exclude participants who canceled their registration
Visualisations Configuration
Use the Search Result Visualisation to adjust how users see the results of their search and look for athletes to add to their favorite list.
- Order by Field: Sort the search list in a logical order by adjusting the order by field.
- Elements: Construct the row layout by setting up the elements in the same way as in the Participant View to display relevant data for each participant

The Favorite List Visualisation configures the actual saved favorites list. Here you define how the list looks once a spectator has chosen their favorites and what happens when they click on a participant.
- Order by Field: Set the sorting logic for the active favorites list.
- Linked Participant View: Specify which detailed Participant View layout opens when a user clicks on a participant in the list.
- Elements: Build the list display layout, for example show latest split data so that spectators have relevant data for all favorites without having to click into indivual participant views.

Note: Favorites are stored locally in the user's browser cache. They do not sync across different devices or browsers (e.g., from a phone to a computer).
Participant Views
Display individual result details with the Participant Views either as a pop-up from within a published list, or from a direct URL. Create different views for different purposes, or adjust one view with filters to match what's required.
Preview a Participant View and verify the direct URL by entering a bib and click on 'Open tab'.
General settings

Activate the view and enable Live Update to allow an instant update of information when having the Participant View open, both in the pop-up and the direct view.
The name of the view is only used internally for better overview if there are several different views and to select a view in Tabs.
Provide a meaningful and concise URL. This is used as an extension for the direct URL and must not be reused in either tabs or participant views.
Lastly, define a date range during which the view shall be active.
Elements

The elements contain all the information that shall be displayed. In here, place and structure different types of information to make up for the participant view.
Drag & Drop to change the order of single elements by clicking on the left edge of an element line.
Select one or more elements by ticking the respective boxes. This opens a tool bar and allows to copy, cut and paste elements across different Participant Views and even across different event files. Copied or cut elements will be pasted above the currently selected element. Further, selecting multiple elements at once simplifies deleting, unindenting or indenting several elements.

Indenting certain elements makes the first element of a "higher" level the parent element. All display filters such as the 'Active selection' or the 'Show If' apply to children of an element accordingly.
Type
The type defines what sort of information is shown and how it is structured. Select from different options.
Structure - structure elements define how data and information is organized.
- Box: A box puts a white background and border around the children elements. Optionally, enter a box title in the 'Data' column. Box titles support fields and hence support both normal and full-text expressions.
- Adaptive Columns: In adaptive columns all children of the same level will be displayed in a new column as long as the available width allows. If the screen is too narrow, adaptive columns will break and display elements underneath each other.
- Fixed Columns: Fixed columns will always display children of the same level side-by-side. If the screen is too narrow, elements will overlap.
- Compact Row: In a compact row all children on the same level can be placed directly next to each on the same row and positioned based on the compact row alignment setting.
Content - content elements fully customize the Participant View with any personal, or event related data.
- Text: A text element is a fixed text-only element. It does not accept expressions. Enter the text in the 'Data' column.
- Field/Expression: This supports both normal and full-text expressions and allows tailoring the view to the participant who's viewing. Optionally, add a title for this field/expression or display it as a Badge. These settings are found under 'More Details'.
- HTML: Add an HTML element for full graphical flexibility. The HTML editor opens in the 'More Details' and support expressions.
- Picture: Add a picture to the participant view and display for example a sponsor banner, or some other event related pictures.
Adv. Content - advanced content uses pre-set options. For all advanced content elements an optional checkbox to Embed in box with header under 'More Details' simplifies the setup by displaying the element in a box, with a pre-defined multilingual header. Most advanced content elements require settings from the 'More Details'.
- Splits/Legs: Display an overview of all splits and/or legs. Customize which splits/legs details shall be shown.
- Links: Publish personal links to other websites. Customize the URL by using an expression to forward participants to a custom landing page, such as their personal race photos or videos.

- List: Select a list to be shown as details. The list will be filtered to the participant currently viewed.
- Ext. photo provider: Link directly to an individual participant's event photos with one of the available integrations. Select the platform to link to, enter the platform's Event ID, and it will show samples of the first 5 photos for that participant which also link to a unique gallery for that participant. If matching is done on an alpha-numeric bib number, do so using the optional field.
- Certificates: Select which certificate sets should be published and for which contests. Enable or disable Individual sets as required. By default a preview of the certificate is shown as visible in the designer. Alternatively, upload a custom image preview to be shown instead. Similarly the name of the certificate set will be shown or define a custom label.

- Comments: Add the ability to post comments to a participant.
- Favorite: Ability to mark a participant as favorite. This is the only advanced content element that comes without a header. Instead, define whether the star shall stand by itself, or accompanied by text.
Active
Define whether an element shall be active or not. Further, distinguish between availability of an element in a popup view or direct access only.
More Details
Apply a date range under 'More Details' during which the element is active. Further, display fields dynamically, e.g. based on input in participant data, by entering any expression as a filter under 'Show If'.
Lastly, find a range of pre-set CSS styling options at the bottom. These may vary between element styling and title styling options. Element always refers to the data of this line, title refers to the title only. The title comes either from the 'Data' column or the title entered in the 'More Details' section, depending on the used element type.
Website Integration
RACE RESULT offers numerous options to embed online registration and results seamlessly in your event website.
This is done through small Javascript snippets that load the results directly into your website (no iframes). All CSS styles from your website will be applied to the online registration and results as well. Where needed, you can add CSS to fine-tune the appearance.
The Javascript code that needs to be copied and pasted to your website can be found in my.raceresult.com→Website Integration.
The below articles explain the different types of embed code in more detail.
For the results this may look like this:
<div id="divRRPublish" class="RRPublish"></div>
<script type="text/javascript" src="//my.raceresult.com/RRPublish/load.js.php?lang=en"></script>
<script type="text/javascript">
<!--
   var rrp=new RRPublish(document.getElementById("divRRPublish"), 58385, "results");
-->
</script>
<style>
   /* Add custom CSS here or elsewhere to change the design */
</style>
In the screenshot above, some of the colors of the results frame have been modified, this is done using custom CSS in the style tags.
Embed Lists
In order to embed the lists you need to copy the corresponding source code. You might notice that all of these are very similar. There are a few key things to note that make them different and some features that allow you to customize these lists.
Here is the source code for reference.
<div id="divRRPublish" class="RRPublish"></div>
<script type="text/javascript" src="https://my.raceresult.com/RRPublish/load.js.php?lang=en"></script>
<script type="text/javascript">
<!--
    var rrp=new RRPublish(document.getElementById("divRRPublish"), 123456, "results");
    rrp.ShowTimerLogo=true;
    rrp.ShowInfoText=false;
-->
</script>
<style>
  /* Add custom CSS here or elsewhere to change the design */
</style>
This source code loads data based on the Event ID specified and the tab url specified. All of the sections in red are variables you can change to customize the embedded code. The above example will load the Results list for event 123456. If you want to load the Participants or Live lists you will need to change "results" in red to either "participants" or "live". In the case of a custom list tab you would simply use the custom url.
There are also two boolean options to turn on and off features.
- rrp.ShowTimerLogo - when set to true will show the timer's logo at the bottom of the results.
- rrp.ShowInfoText - when set to true will show the info text defined for the specified page.
Embed Registration and Online Self-Service
The online registration source code allows you to embed the registration portal directly on your site. This also allows you to link the ChangeLink for Online Self Service directly to your site when using the ChangeLink() function.
To start you will need to embed the online registration source code on your site, the same code will enable both standard registration and online self service.
<div id="divRRRegStart" class="RRRegStart"></div>
<script type="text/javascript" src="https://my.raceresult.com/RRRegStart/load.js.php?lang=en"></script>
<script type="text/javascript">
<!--
  var rrp=new RRRegStart(document.getElementById("divRRRegStart"), 230672);
  rrp.ShowInfoText=false;
-->
</script>
<style>
  /* Add custom CSS here or elsewhere to change the design */
</style>
There are 2 variables here as highlighted in red.
- EventID - the ID of the event to be embedded.
- rrp.ShowInfoText - Either true or false to define whether the info text of the registration page should also be included.
Handle Inquiries
Athletes can file inquiries by filling out the inquiry form on the Contact page of an event on my.raceresult.com. It serves to standardize communication between participant and race director/timer.
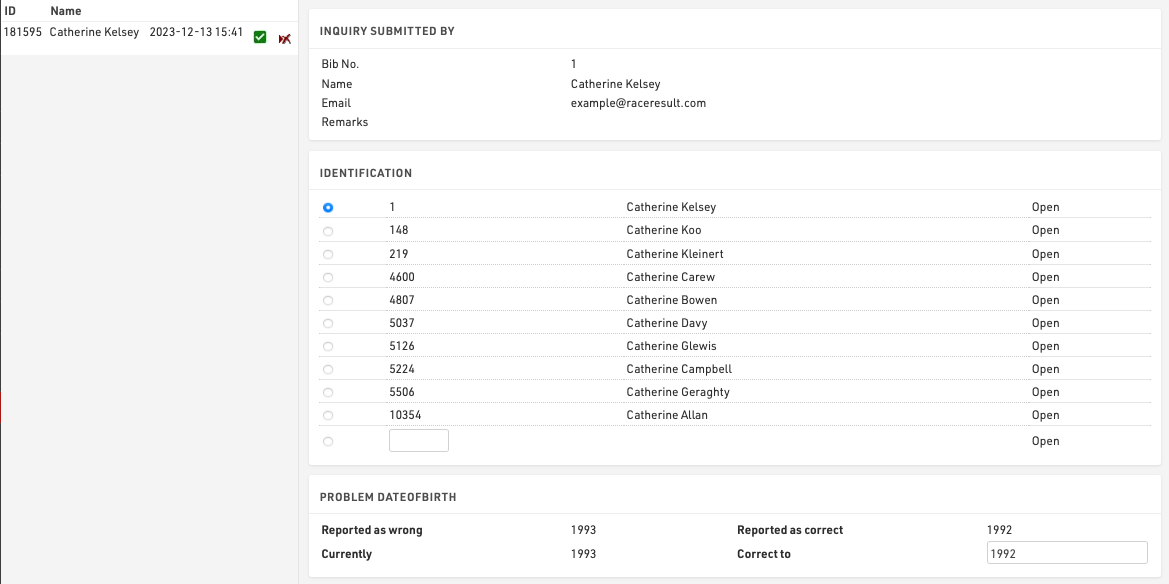
On the left side you can see all the inquiries which were submitted for this event. By clicking on an entry in the list the inquiry is shown on the right side. By clicking on the delete-icon in the list you can remove the inquiry completely or mark it as 'done' (in case you have already responded to it by email or phone).
There are five steps to handle an inquiry.
- Determine which participant sent the inquiry. Under Identification you can find some suggestions.
- The reported problems are displayed. Determine how to correct these.
- Optionally choose to send a response email and fill up the text.
- Optionally enter some notes (for internal reference)
- Click on Correct to finish editing, correct the problem and send the response email.