The my.raceresult.com page is used to configure the registration and results platform my.raceresult.com and to handle inquiries from my.raceresult.com
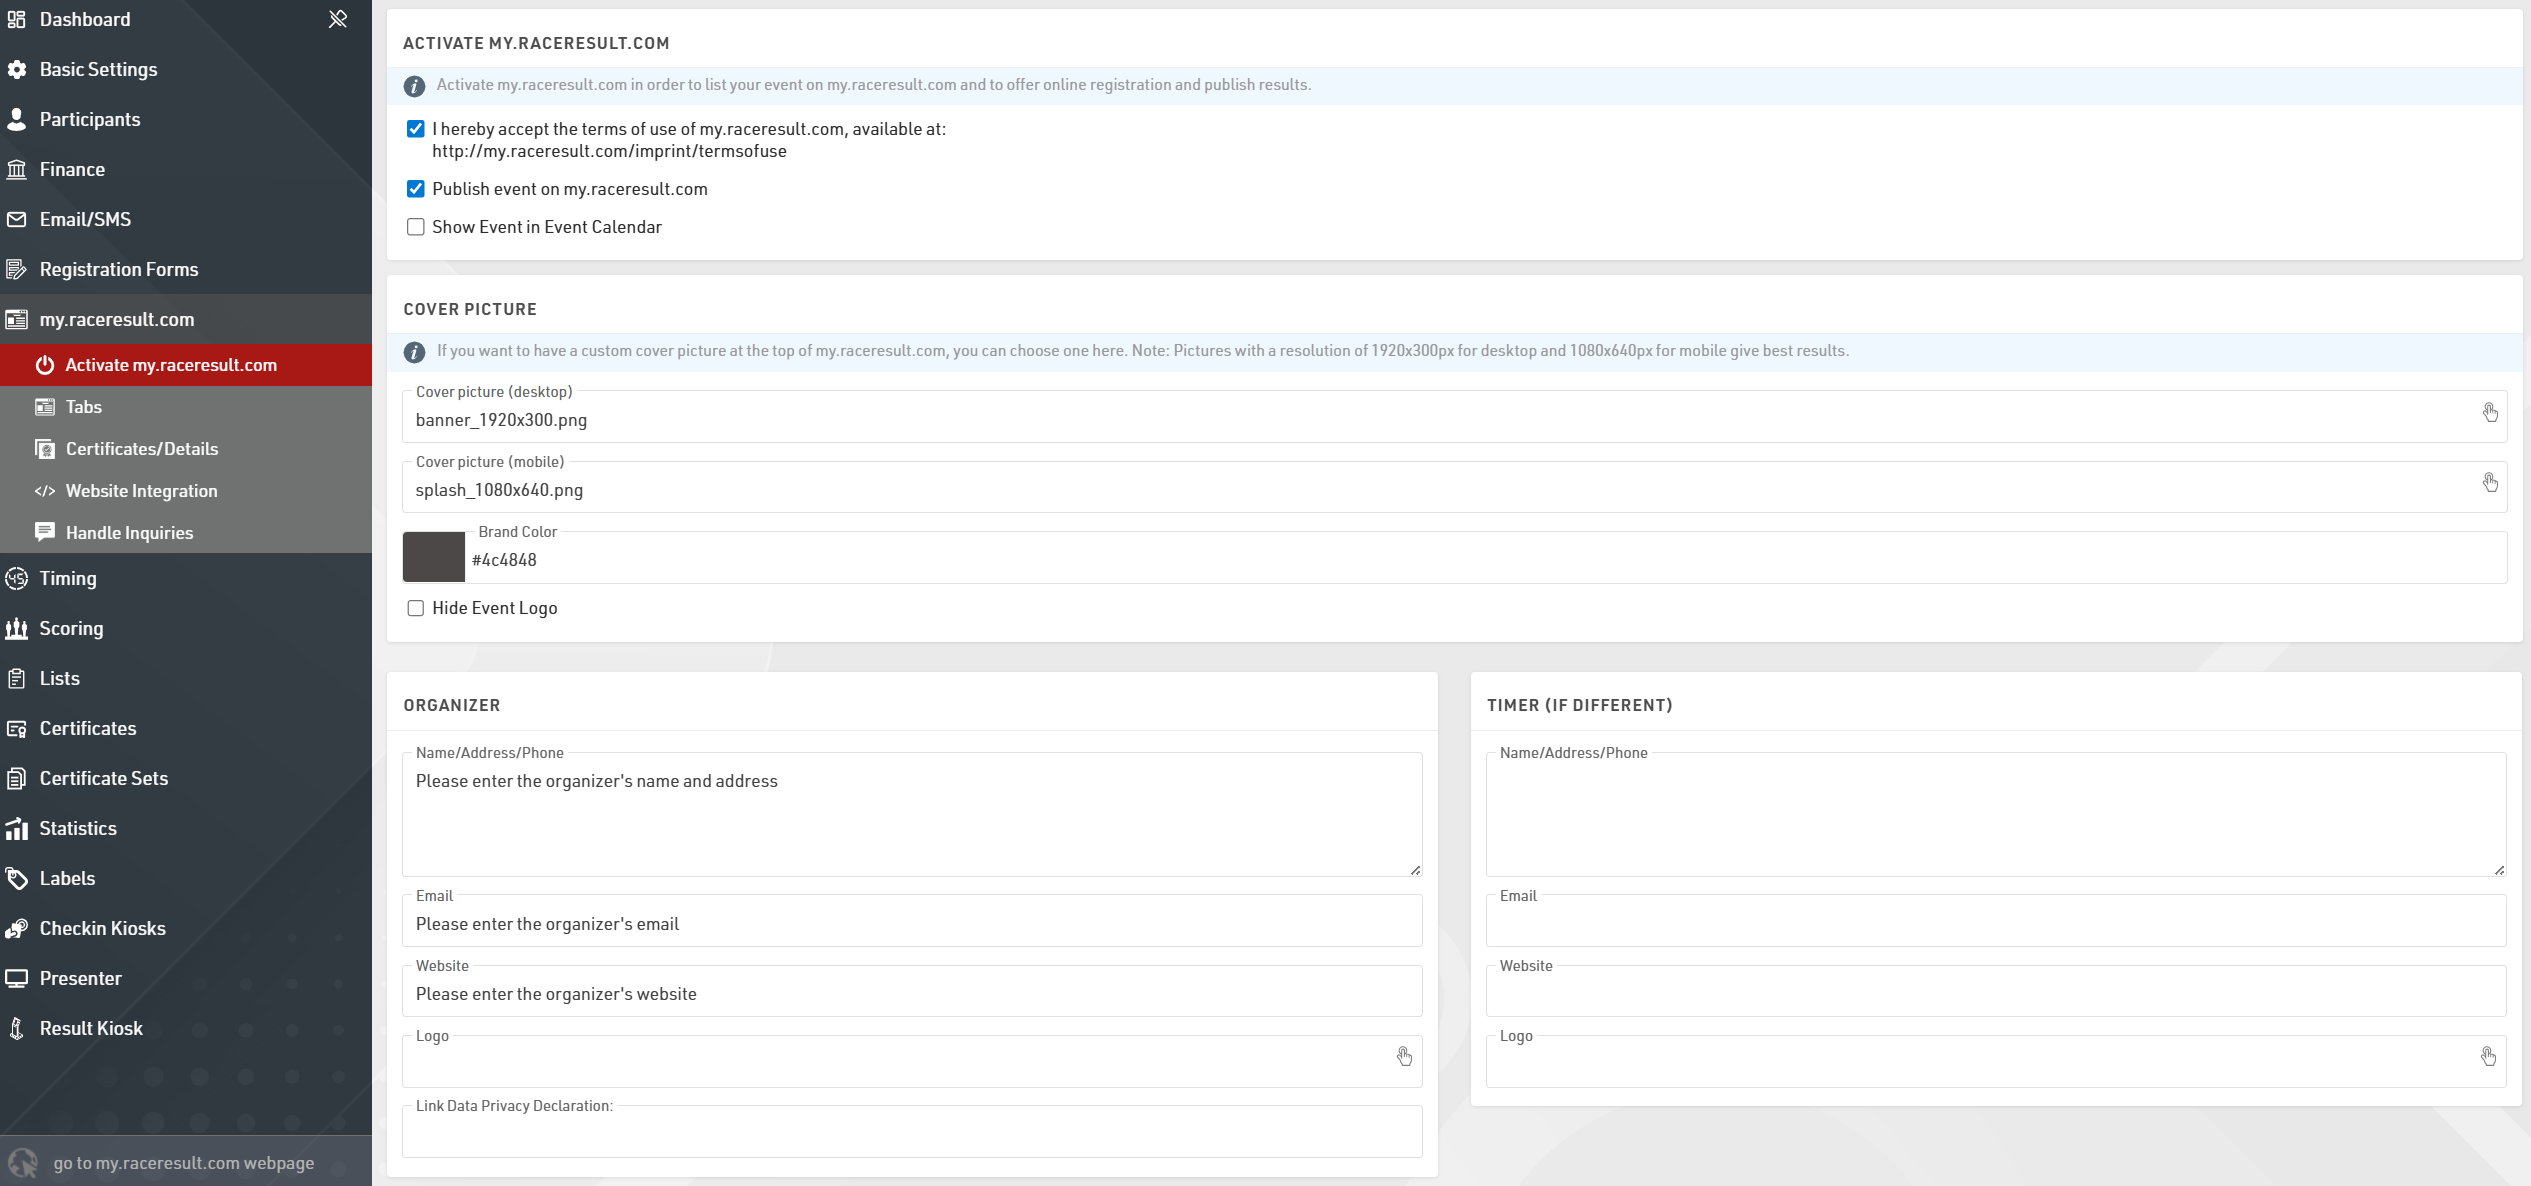
Activate my.raceresult.com
In order to show your event in the calendar on my.raceresult.com, to use the online registration, and to publish results, you need to first accept the terms of use as advertised and then publish the event using the checkboxes.

By default the event will be published in the main event calendar on my.raceresult.com, if you wish to hide it from these lists you can untick the box to show the event in the event calendar.
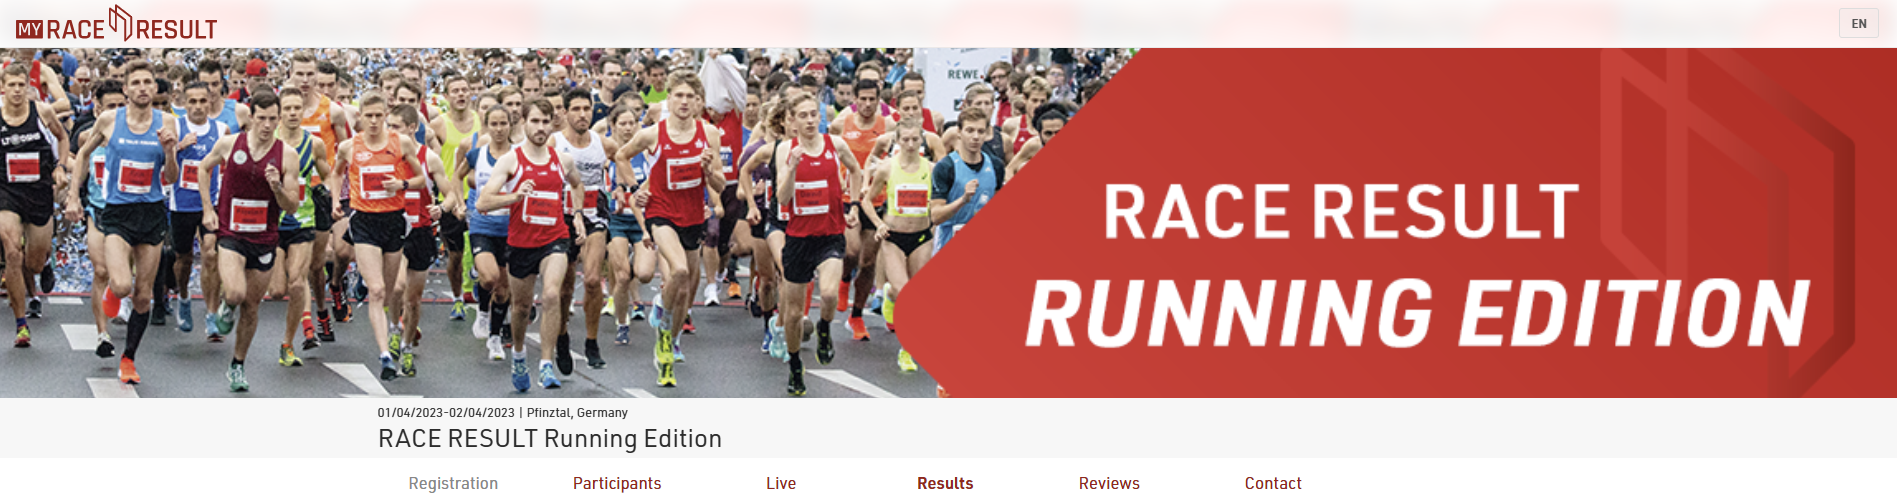
When viewing the event a banner is shown at the top of the page, by default a standard cover picture is used, depending on the type of event you have selected in Basic Settings > Event settings.
You can choose to upload your own banner images to use here instead. The size of the banner for desktop is 1920x300px and mobile is 1080x640px, images which do not conform to this size may be stretched or compressed in order to fit.

The color for the menu items can be defined using the Brand Color function. Best practice is to use darker colors for the Brand Color so it shows up on the lighter background. Any custom CSS edits in the Additional Code, E.G. Google Analytics section will be applied only to the area below the menu.
If you uploaded an event logo, it will display. As the event logo will overlap with the banner, you can hide it by ticking the box to "hide event logo".
Note that the cover picture is cached by your browser, if the image does not change after updating this then you may need to clear your browser cache, or alternatively try to open the page in a private/incognito window or a different browser.
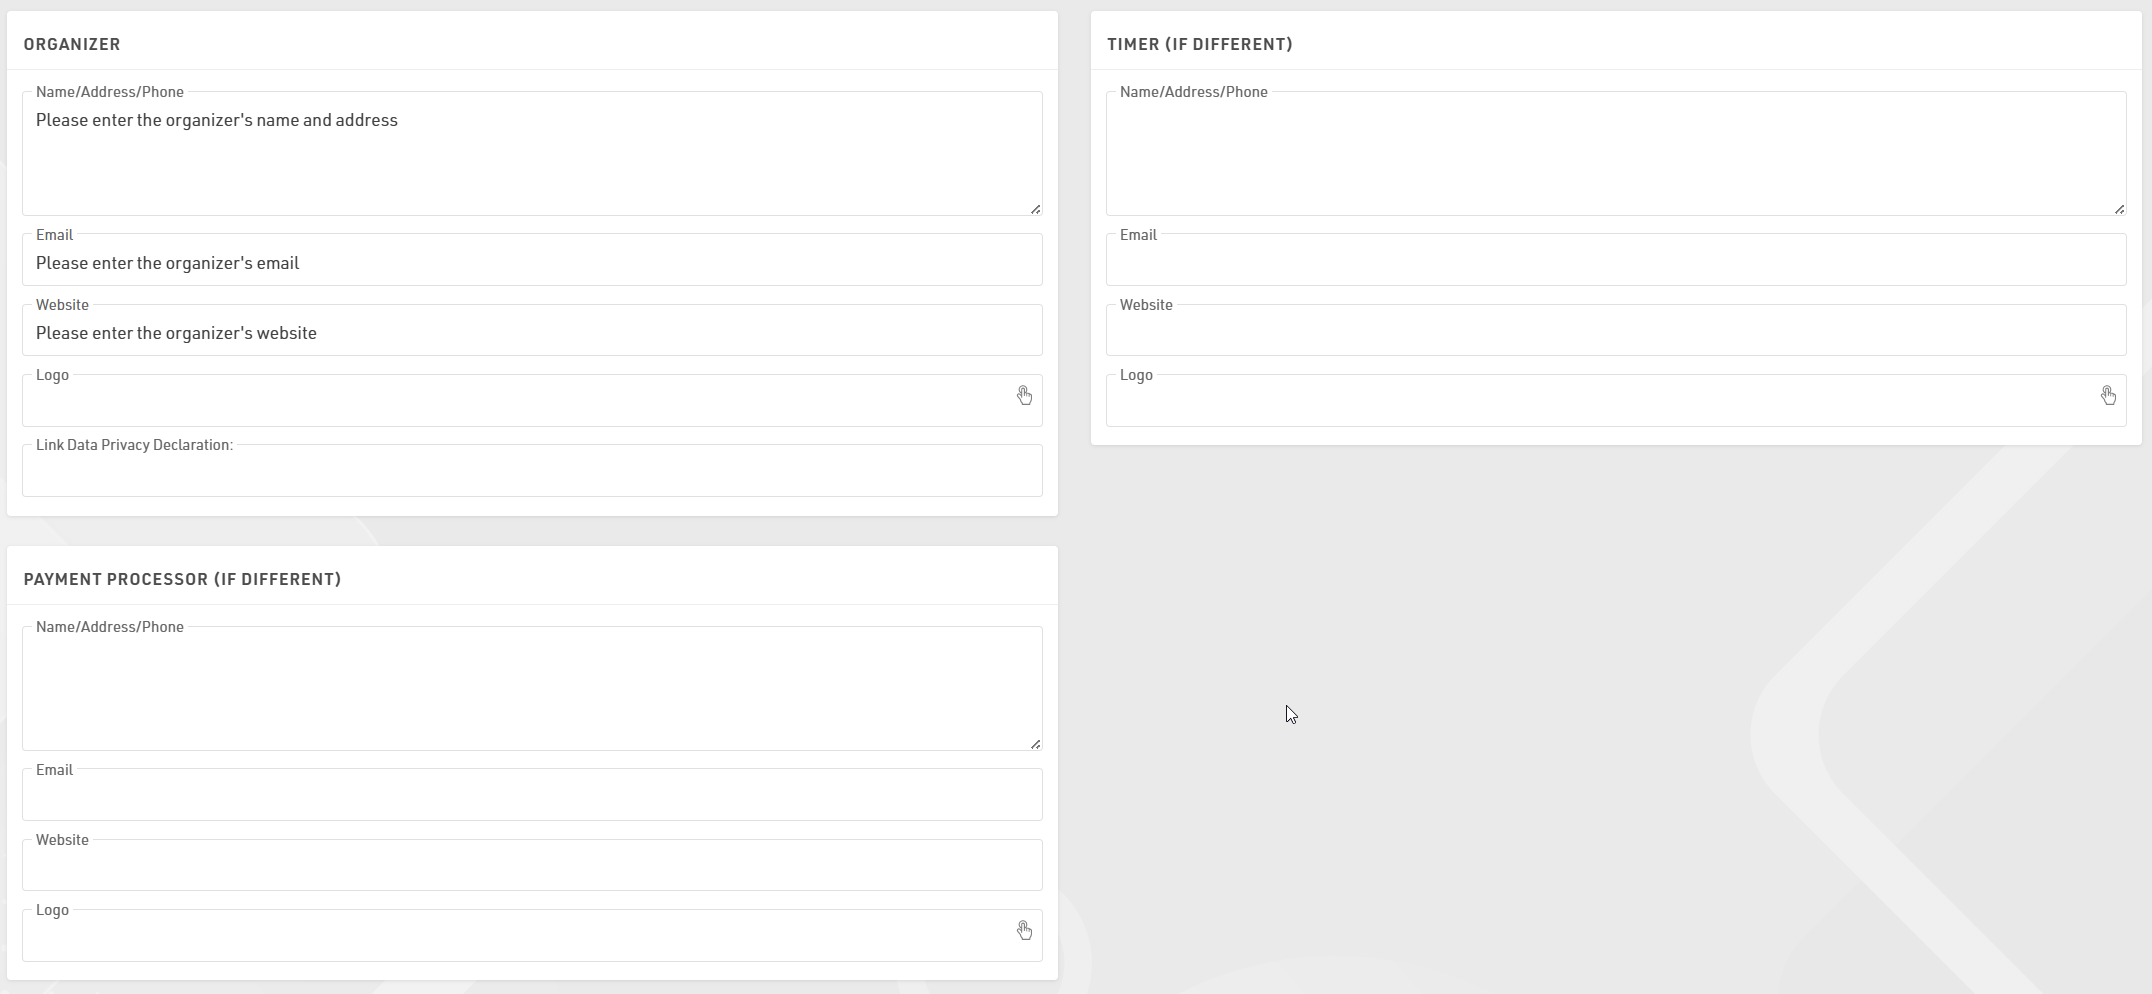
Contact information for the race director, timer, and 3rd party payment processor can be entered on this page. This information will be shown on the contact tab, which is the only tab that can not be deleted if publish is enabled.
Tabs
The my.raceresult.com event page has been redesigned from a fixed set of sub-pages to a more flexible tab-based system. Tabs can be set up with different names, types, and timing so you can better control the design of the event page on my.raceresult.com. Existing event files are automatically converted to this new structure. New events will populate with a standard set of default tabs, including Info, Registration, Participants, Live, Results, Reviews, and Contact. Each of these can now be moved, renamed, or scheduled independently.

Title / URL Settings
This box defines how the tab appears in the navigation menu, what template is used, and the web address.
URL Preset: Select a standard template and path. This automatically sets the tab's behavior.
Title: If you want a custom name in the menu (e.g. "See Your Times" instead of "Results"), enter it here. Translation is possible by selecting the chosen languages and adding the text. If left empty, the URL Preset name is used.
Custom URL: When using a Custom URL preset, you can define a custom url here.
General Settings
These controls manage page status and visibility. The Publish button enables the tab's public URL. Menu Visibility determines how users navigate to the tab:
- Never: Always hidden from the menu; accessible via direct link or embed.
- When Active: Visible only during Page Active From/To dates.
- Always: Always visible; appears greyed out outside of Page Active From/To dates.
Use the Page Active From / to fields to automate access to the tab based on a schedule, for example turning Registration off and Live Results on at the event start.
Adding a New Tab
When adding a new tab you first select the type of content for the tab. The new tab's template will depend on your selection. Text will use the info template and external content will embed content or video from outside sources.
Info
Udalosti na stránke my.raceresult.com môžu mať kartu „Informácie“, ktorá môže zobrazovať text, HTML alebo vložiť webovú stránku. Toto je predvolená vstupná stránka pre udalosť, ak je nakonfigurovaná.
V informačnom texte je možné použiť obmedzenú množinu špecifických polí na dynamické zobrazovanie údajov, podporované polia sú nasledovné:
- [Event.Name]
- [Udalosť. Miesto]
- [Event.Zip]
- [Event.State]
- [Event.Street]
- [Event.Date]
- [Event.AttributeName] – používateľom definované atribúty pre udalosť.
- [CounterX] – kde X by malo byť nahradené ID súťaže, aby sa zobrazil počet účastníkov aktuálne zaregistrovaných v danej súťaži.
Tieto polia možno použiť aj v texte Informácie na stránke Registrácia.
Upozorňujeme, že niektoré webové stránky nemusia povoliť vkladanie, a preto sa nenačítajú. V tomto prípade budete musieť skontrolovať nastavenia hosťovania pre váš web.
Registrácia
Vaše Registračné formuláre môžu byť zahrnuté do udalosti my.raceresult, aby ste mohli prijímať registrácie a platby online.
Základné nastavenia
Registračnú stránku je potrebné aktivovať začiarknutím políčka Aktivovať online registráciu a možno zadať rozsah dátumov, aby ste určili, kedy by mala byť registračná stránka dostupná, podľa časového pásma nastaveného v základných nastaveniach súboru udalosti. Upozorňujeme, že toto je oddelené od individuálneho aktívneho rozsahu dátumov Registračný formulár.
Info Text
V hornej časti registračnej stránky sa zobrazuje informačný text, ktorý účastníkom, ktorí sa chcú zaregistrovať, poskytuje dodatočné informácie, ktoré možno zadať ako HTML, čo umožňuje úplné prispôsobenie.
Registračný formulár
Na registračnú stránku je možné pridať viacero registračných formulárov, pričom každý z nich už definuje dostupné dátumy a súťaže pre daný formulár.

Pre každý formulár môžete definovať nejaký dodatočný informačný text, ktorý sa zobrazí pod názvom formulára.
Zaškrtávacia súťaž zobrazí súhrn príslušných vstupných poplatkov pre každú dostupnú súťaž v tomto formulári.
Môžete tiež voliteľne zmeniť označenie tlačidla na spustenie registrácie pre každý formulár.
Ak je aktivované Prihlásenie, ďalšia rozbaľovacia ponuka bude kontrolovať, ktoré formuláre sa majú zobrazovať vždy, iba keď ste prihlásení, alebo iba keď nie ste prihlásení.
Test Mode
Testovací režim umožňuje vám alebo tretej strane otestovať registračný formulár pred registračným obdobím, keď v testovacom režime nebude platba zachytená.
Odporúča sa zadať dátum, do ktorého je testovací režim aktívny, aby sa zabránilo použitiu tohto odkazu na skutočnú registráciu.
K dispozícii je odkaz na otvorenie registračnej stránky v testovacom režime, takže táto stránka môže byť prístupná ešte predtým, ako bude dostupná podľa rozsahu dátumov, všimnite si, že ju musíte najskôr aktivovať.
Keď je v testovacom režime možné simulovať konkrétne dátumy pridaním parametra dopytu &testDate= do adresy URL, je to užitočné na overenie vstupných poplatkov alebo aktívnych rozsahov dátumov pre konkrétne polia.
napr. &testDate=2023-12-25 bude simulovať registráciu 25. decembra 2023.
Lists
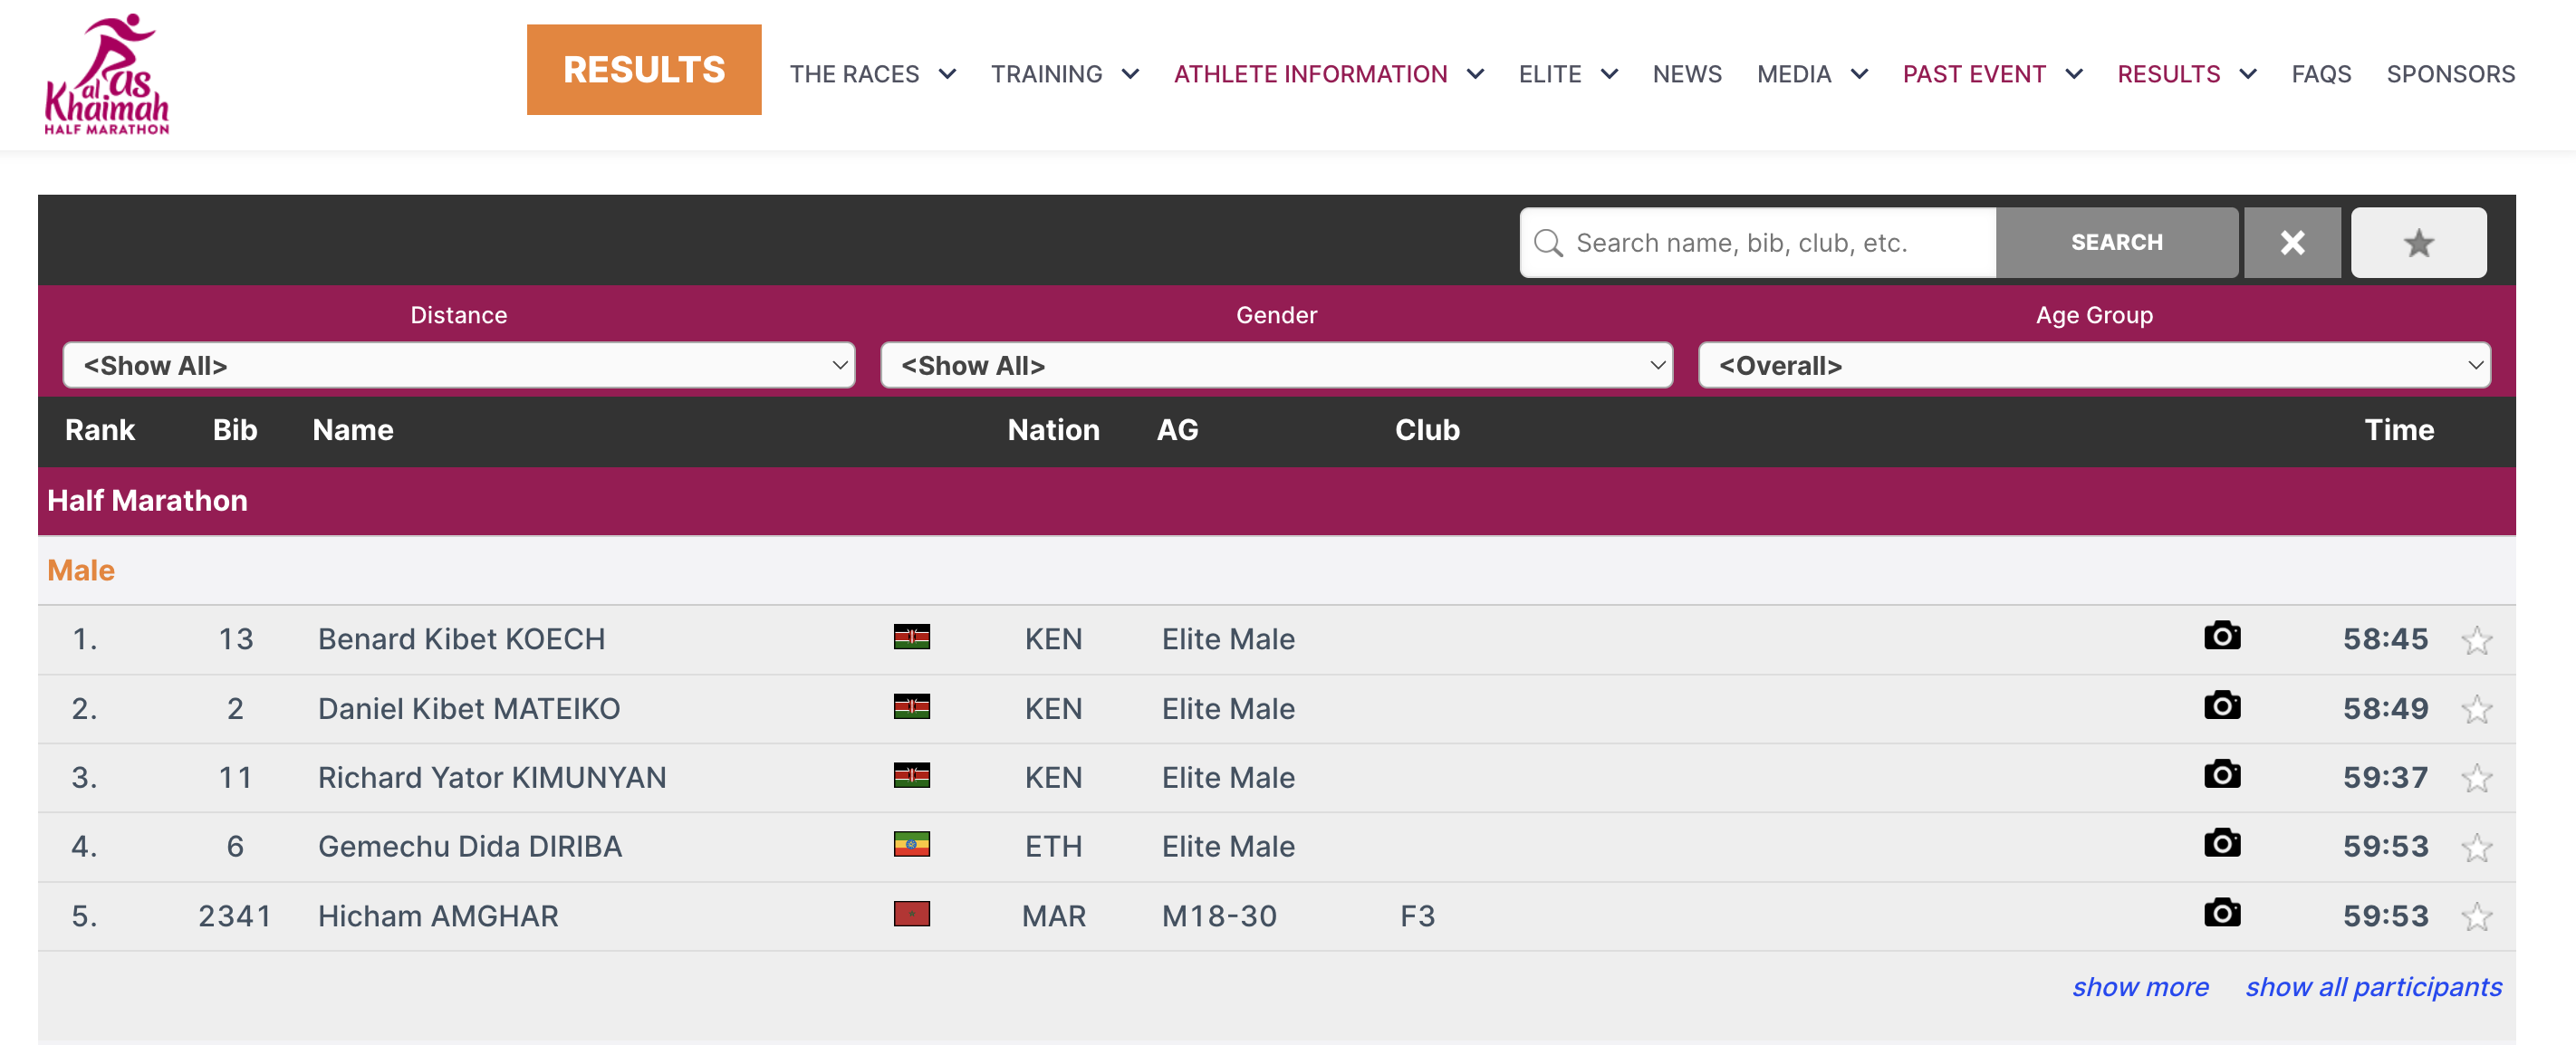
The Lists templates allow you to publish lists on my.raceresult.com, each tab is intended to make it easier for viewers to find what they need.
The general use case for each template is as follows:
- Participants - Intended for start lists / information before the race.
- Live - Intended for Live Results DURING a race, to show leaderboards etc.
- Results - Intended for full results lists after a race.
Settings
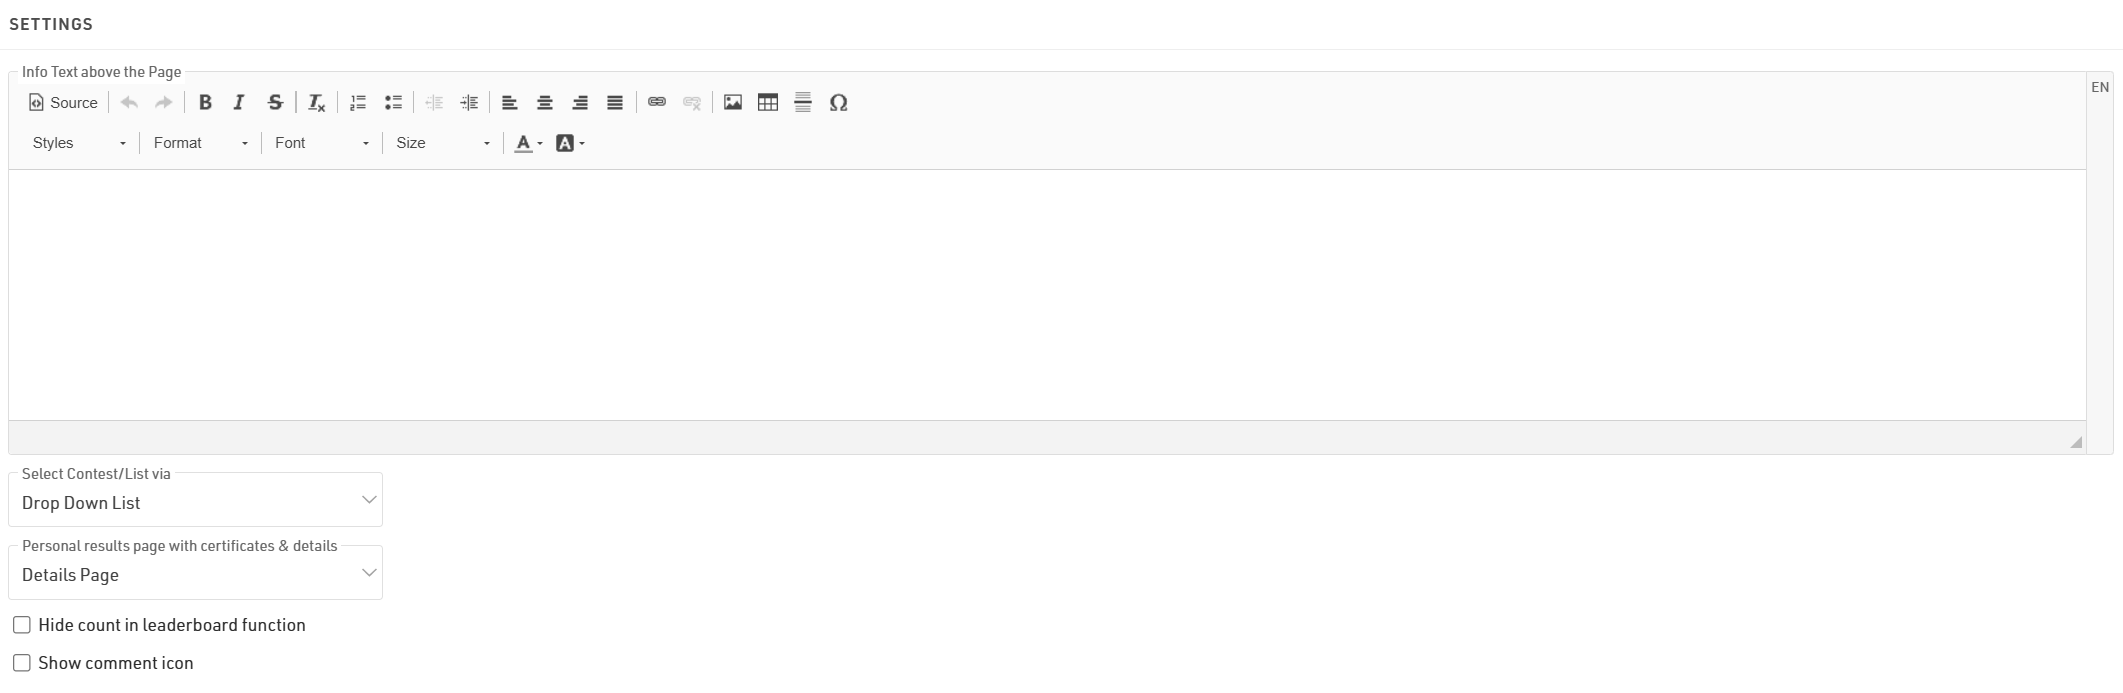
The info text will be shown above your lists and can contain additional HTML content.
If you have multiple lists they can be displayed / selected using either a drop-down list or selector boxes, the 2 options are explained in the below article.
If you select a Personal results page with certificates & details it will enable a popup window when clicking a participant within a list, this popup contains the details list and additional details as configured in the Participant Views settings.
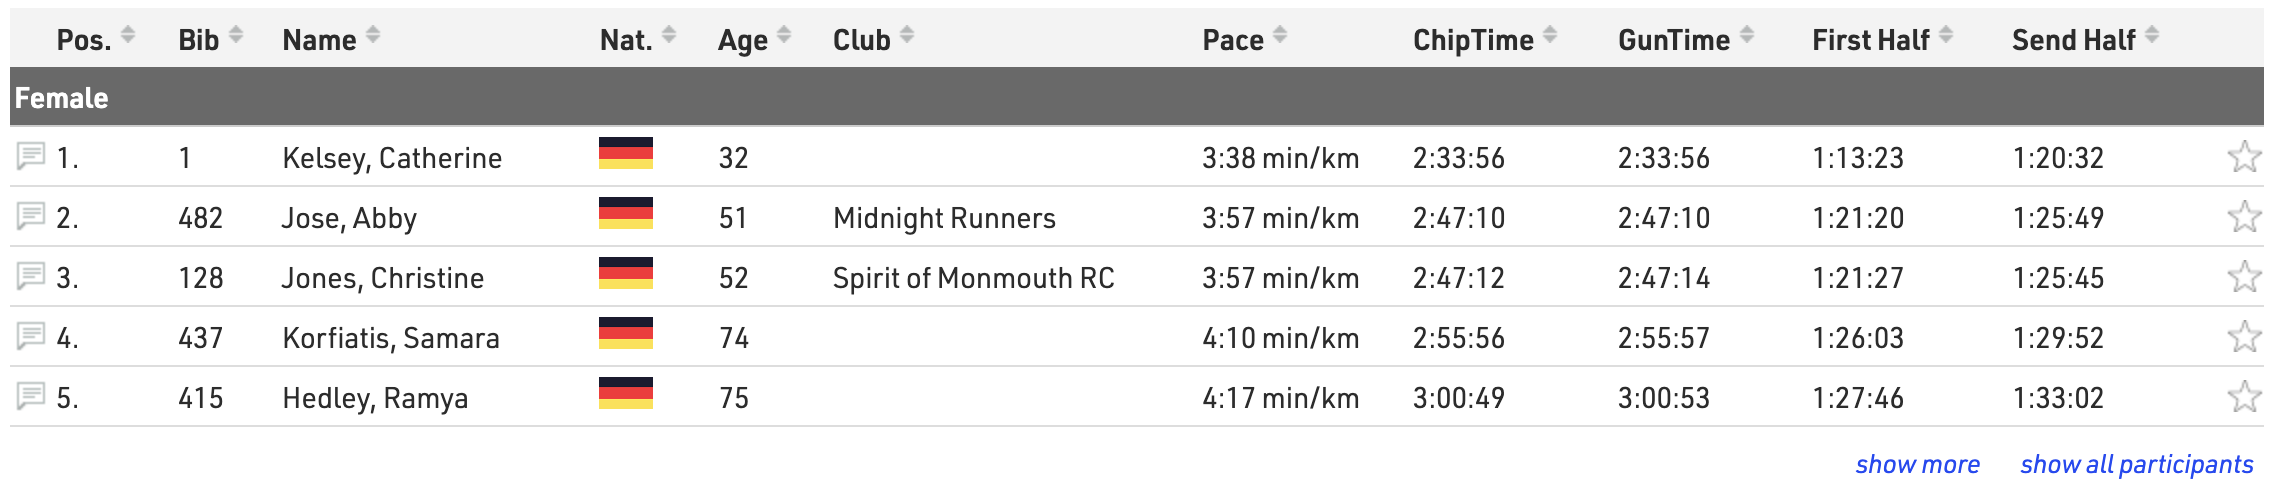
When using the Leaderboard function for a list it will have an option to "Show X participants" where x is the total number of participants within the group, hiding this will replace X with "all."
Selecting the Show comment icon will show a  next to each participant in the list. Allowing viewers to see and add comments for specific participants.
Publish Lists
You can publish multiple lists through my.raceresult.com, however in most cases it is recommended to publish a single list containing all the necessary information, this keeps the user-experience simple.
When publishing multiple lists on a tab the user will be able to select the list using either the drop-down menus or box selector according to the Select Contest/List via settings, the name of the list can be adapted using the optional label.

Lists can be activated / de-activated individually so they can be hidden until required. Clicking the link to open a list will open the page directly with that list opened, this will still work even if the list or tab is not active according to the published dates allowing you to preview a list before publishing.
You can apply Contest filters to lists, if you have multiple options selected for the Contests then filters / box selector will additionally include the Contest options before the list.
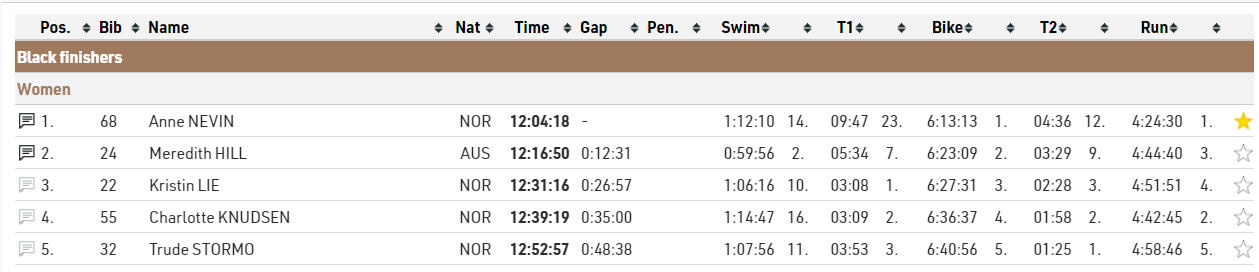
The leaderboard function for lists will reduce each group within the list to the corresponding number of records, buttons to show more or show all will be shown below each group.
With live update enabled lists will be automatically updated in real-time, most useful for live leaderboards. Note that this will only be active within the date range of the event according to the Basic Settings.
Advanced settings can be set for each list:

If you want to only show the Details Page on specific lists you can set use Overwrite Personal result page to enable or disable personal results pages for that specific list
If Preview for a list is disabled then selecting this list will instead automatically open a PDF of the list. Similarly if PDF is enabled then a link above will be shown allowing users to open the list in PDF format.
When List Sortable is enabled then users can sort each column in ascending / descending order by clicking the column headers.
Reviews
Visitors can leave comments in two places on my.raceresult.com:
- On the Reviews tab they can leave longer texts and rate the event with a 5-star-system.
- Comments can be left for specific participants in the participant details window. If there are comments for a participant and the comment logo is enabled then the comment icon on the left side of the Output list will be solid.

Comments and Reviews can be disabled if you choose, and you can also moderate comments through the Reviews settings page too.
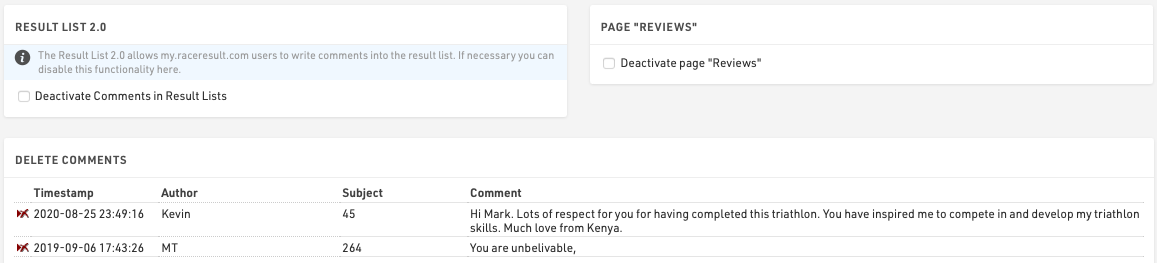
Note that new comments are checked on a daily basis by RACE RESULT and comments deemed improper will be removed.
Contact
Specific Contact Details for the race organizer, timer or payment processor can be listed in the Contact page, it is strongly advised to update these in Activate my.raceresult.com settings to ensure participants know who to contact for any queries - otherwise some may contact RACE RESULT who are unable to answer event specific queries.
The page also shows a Contact form through which participants can submit Inquiries or report missing/incorrect data, this can optionally be disabled if not wanted.
External Content
When adding a new External Content tab it is possible to embed content from a website or YouTube.

iFrame
To load a website directly in a tab, enter an embeddable URL in the iFrame field. Please avoid using standard website homepages or top-level URLs for this purpose, as most sites block this for security reasons, which may cause the tab to appear blank or function incorrectly.
YouTube Video
To display a YouTube video, enter the unique Video ID found at the end of the video's URL. Please note that if a user has not accepted third-party cookies in their browser, the video will not load automatically. Instead, a cover image will be displayed that allows the user to accept YouTube’s terms of use to view the video.
Participant Views
Display individual result details with the Participant Views either as a pop-up from within a published list, or from a direct URL. Create different views for different purposes, or adjust one view with filters to match what's required.
Preview a Participant View and verify the direct URL by entering a bib and click on 'Open tab'.
General settings

Activate the view and enable Live Update to allow an instant update of information when having the Participant View open, both in the pop-up and the direct view.
The name of the view is only used internally for better overview if there are several different views and to select a view in Tabs.
Provide a meaningful and concise URL. This is used as an extension for the direct URL and must not be reused in either tabs or participant views.
Lastly, define a date range during which the view shall be active.
Elements

The elements contain all the information that shall be displayed. In here, place and structure different types of information to make up for the participant view.
Drag & Drop to change the order of single elements by clicking on the left edge of an element line.
Select one or more elements by ticking the respective boxes. This opens a tool bar and allows to copy, cut and paste elements across different Participant Views and even across different event files. Copied or cut elements will be pasted above the currently selected element. Further, selecting multiple elements at once simplifies deleting, unindenting or indenting several elements.

Indenting certain elements makes the first element of a "higher" level the parent element. All display filters such as the 'Active selection' or the 'Show If' apply to children of an element accordingly.
Type
The type defines what sort of information is shown and how it is structured. Select from different options.
Structure - structure elements define how data and information is organized.
- Box: A box puts a white background and border around the children elements. Optionally, enter a box title in the 'Data' column. Box titles support fields and hence support both normal and full-text expressions.
- Adaptive Columns: In adaptive columns all children of the same level will be displayed in a new column as long as the available width allows. If the screen is too narrow, adaptive columns will break and display elements underneath each other.
- Fixed Columns: Fixed columns will always display children of the same level side-by-side. If the screen is too narrow, elements will overlap.
Content - content elements fully customize the Participant View with any personal, or event related data.
- Text: A text element is a fixed text-only element. It does not accept expressions. Enter the text in the 'Data' column.
- Field/Expression: This supports both normal and full-text expressions and allows tailoring the view to the participant who's viewing. Optionally, add a title for this field/expression or display it as a Badge. These settings are found under 'More Details'.
- HTML: Add an HTML element for full graphical flexibility. The HTML editor opens in the 'More Details' and support expressions.
- Picture: Add a picture to the participant view and display for example a sponsor banner, or some other event related pictures.
Adv. Content - advanced content uses pre-set options. For all advanced content elements an optional checkbox to Embed in box with header under 'More Details' simplifies the setup by displaying the element in a box, with a pre-defined multilingual header. Most advanced content elements require settings from the 'More Details'.
- Splits/Legs: Display an overview of all splits and/or legs. Customize which splits/legs details shall be shown.
- Links: Publish personal links to other websites. Customize the URL by using an expression to forward participants to a custom landing page, such as their personal race photos or videos.

- List: Select a list to be shown as details. The list will be filtered to the participant currently viewed.
- Ext. photo provider: Link directly to an individual participant's event photos with one of the available integrations. Select the platform to link to, enter the platform's Event ID, and it will show samples of the first 5 photos for that participant which also link to a unique gallery for that participant. If matching is done on an alpha-numeric bib number, do so using the optional field.
- Certificates: Select which certificate sets should be published and for which contests. Enable or disable Individual sets as required. By default a preview of the certificate is shown as visible in the designer. Alternatively, upload a custom image preview to be shown instead. Similarly the name of the certificate set will be shown or define a custom label.

- Comments: Add the ability to post comments to a participant.
- Favorite: Ability to mark a participant as favorite. This is the only advanced content element that comes without a header. Instead, define whether the star shall stand by itself, or accompanied by text.
Active
Define whether an element shall be active or not. Further, distinguish between availability of an element in a popup view or direct access only.
More Details
Apply a date range under 'More Details' during which the element is active. Further, display fields dynamically, e.g. based on input in participant data, by entering any expression as a filter under 'Show If'.
Lastly, find a range of pre-set CSS styling options at the bottom. These may vary between element styling and title styling options. Element always refers to the data of this line, title refers to the title only. The title comes either from the 'Data' column or the title entered in the 'More Details' section, depending on the used element type.
Integrácia webových stránok
RACE RESULT ponúka množstvo možností na bezproblémové vloženie online registrácie a výsledkov na webovú stránku podujatia.
To sa deje prostredníctvom malých útržkov JavaScriptu, ktoré načítajú výsledky priamo na vašu webovú stránku (bez prvkov iframe). Všetky CSS štýly z vášho webu sa použijú aj pri online registrácii a výsledkoch. V prípade potreby môžete pridať CSS na doladenie vzhľadu.
Kód Javascript, ktorý je potrebné skopírovať a vložiť na vašu webovú stránku, nájdete v časti Základné nastavenia->Integrácia webovej lokality.
V nižšie uvedených článkoch sú podrobnejšie vysvetlené rôzne typy kódu na vloženie.
Pre výsledky to môže vyzerať takto:
<div id="divRRPublish" class="RRPublish"></div>
<script type="text/javascript" src="//my.raceresult.com/RRPublish/load.js.php?lang=en"></script>
<script type="text/javascript">
<!--
   var rrp=new RRPublish(document.getElementById("divRRPublish"), 58385, "results");
-->
</script>
<style>
   /* Add custom CSS here or elsewhere to change the design */
</style>
Na snímke obrazovky vyššie boli upravené niektoré farby rámca výsledkov, a to pomocou vlastného CSS v značkách štýlu.
Embed Lists
In order to embed the lists you need to copy the corresponding source code. You might notice that all of these are very similar. There are a few key things to note that make them different and some features that allow you to customize these lists.
Here is the source code for reference.
<div id="divRRPublish" class="RRPublish"></div>
<script type="text/javascript" src="https://my.raceresult.com/RRPublish/load.js.php?lang=en"></script>
<script type="text/javascript">
<!--
    var rrp=new RRPublish(document.getElementById("divRRPublish"), 123456, "results");
    rrp.ShowTimerLogo=true;
    rrp.ShowInfoText=false;
-->
</script>
<style>
  /* Add custom CSS here or elsewhere to change the design */
</style>
This source code loads data based on the Event ID specified and the tab url specified. All of the sections in red are variables you can change to customize the embedded code. The above example will load the Results list for event 123456. If you want to load the Participants or Live lists you will need to change "results" in red to either "participants" or "live". In the case of a custom list tab you would simply use the custom url.
There are also two boolean options to turn on and off features.
- rrp.ShowTimerLogo - when set to true will show the timer's logo at the bottom of the results.
- rrp.ShowInfoText - when set to true will show the info text defined for the specified page.
Vložená registrácia a online samoobsluha
Zdrojový kód online registrácie vám umožňuje vložiť registračný portál priamo na vašu stránku. To vám tiež umožňuje prepojiť [ChangeLink] pre Online samoobsluhu priamo s vašou stránkou pri použití funkcie ChangeLink().
Na začiatok budete musieť vložiť zdrojový kód online registrácie na vašu stránku, rovnaký kód umožní štandardnú registráciu aj online samoobsluhu.
<div id="divRRRegStart" class="RRRegStart"></div>
<script type="text/javascript" src="https://my.raceresult.com/RRRegStart/load.js.php?lang=en"></script>
<script type="text/javascript">
<!--
  var rrp=new RRRegStart(document.getElementById("divRRRegStart"), 230672);
  rrp.ShowInfoText=false;
-->
</script>
<style>
  /* Add custom CSS here or elsewhere to change the design */
</style>
Sú tu 2 premenné zvýraznené červenou farbou.
- EventID – ID udalosti, ktorá sa má vložiť.
- rrp.ShowInfoText – buď true alebo false, aby sa určilo, či má byť zahrnutý aj informačný text registračnej stránky.
Handle Inquiries
Athletes can file inquiries by filling out the inquiry form on the Contact page of an event on my.raceresult.com. It serves to standardize communication between participant and race director/timer.
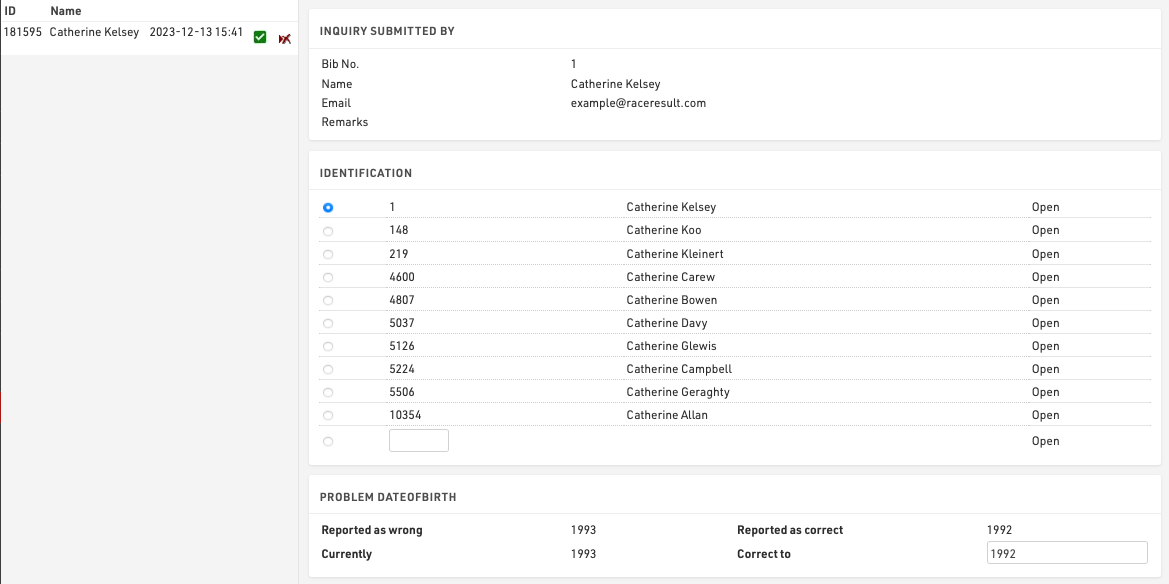
On the left side you can see all the inquiries which were submitted for this event. By clicking on an entry in the list the inquiry is shown on the right side. By clicking on the delete-icon in the list you can remove the inquiry completely or mark it as 'done' (in case you have already responded to it by email or phone).
There are five steps to handle an inquiry.
- Determine which participant sent the inquiry. Under Identification you can find some suggestions.
- The reported problems are displayed. Determine how to correct these.
- Optionally choose to send a response email and fill up the text.
- Optionally enter some notes (for internal reference)
- Click on Correct to finish editing, correct the problem and send the response email.