Here you will find documentation about the clock we started selling in early 2018. For the previous model, read the instructions for the LED Clock (old).
The current version of the clock has been further improved in November 2018, with the following improvements and modifications:
- 3.5 mm jack input for start / stop impulses added
- Easier selection and automatic switching between time formats.
- Countdown allows unlimited repetition
- Improved accuracy in all modes
- Unnecessary modes removed.
This manual details the functions of the latest version, with notes for the former version where functions differ. If you have purchased your clock before November 2018 and it does not have a 3.5 mm jack output on the side, you will need to refer to these notes.
The quick start guide gathers all the necessary information for simple use. Read further if you want to find out about the more advanced features of the clock.
Quick Start Guide
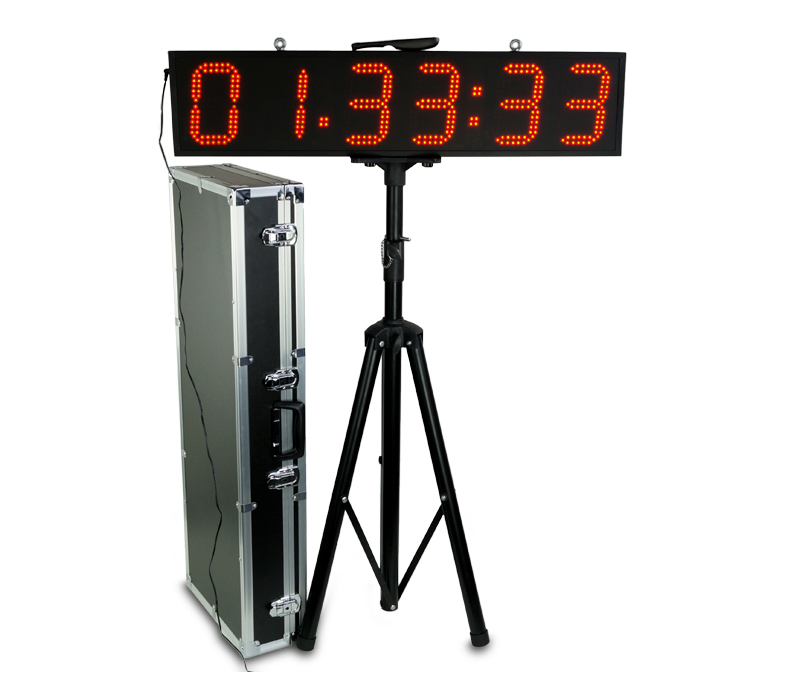
1. Set up the clock on the tripod using the thumbscrews and plug in the power supply.
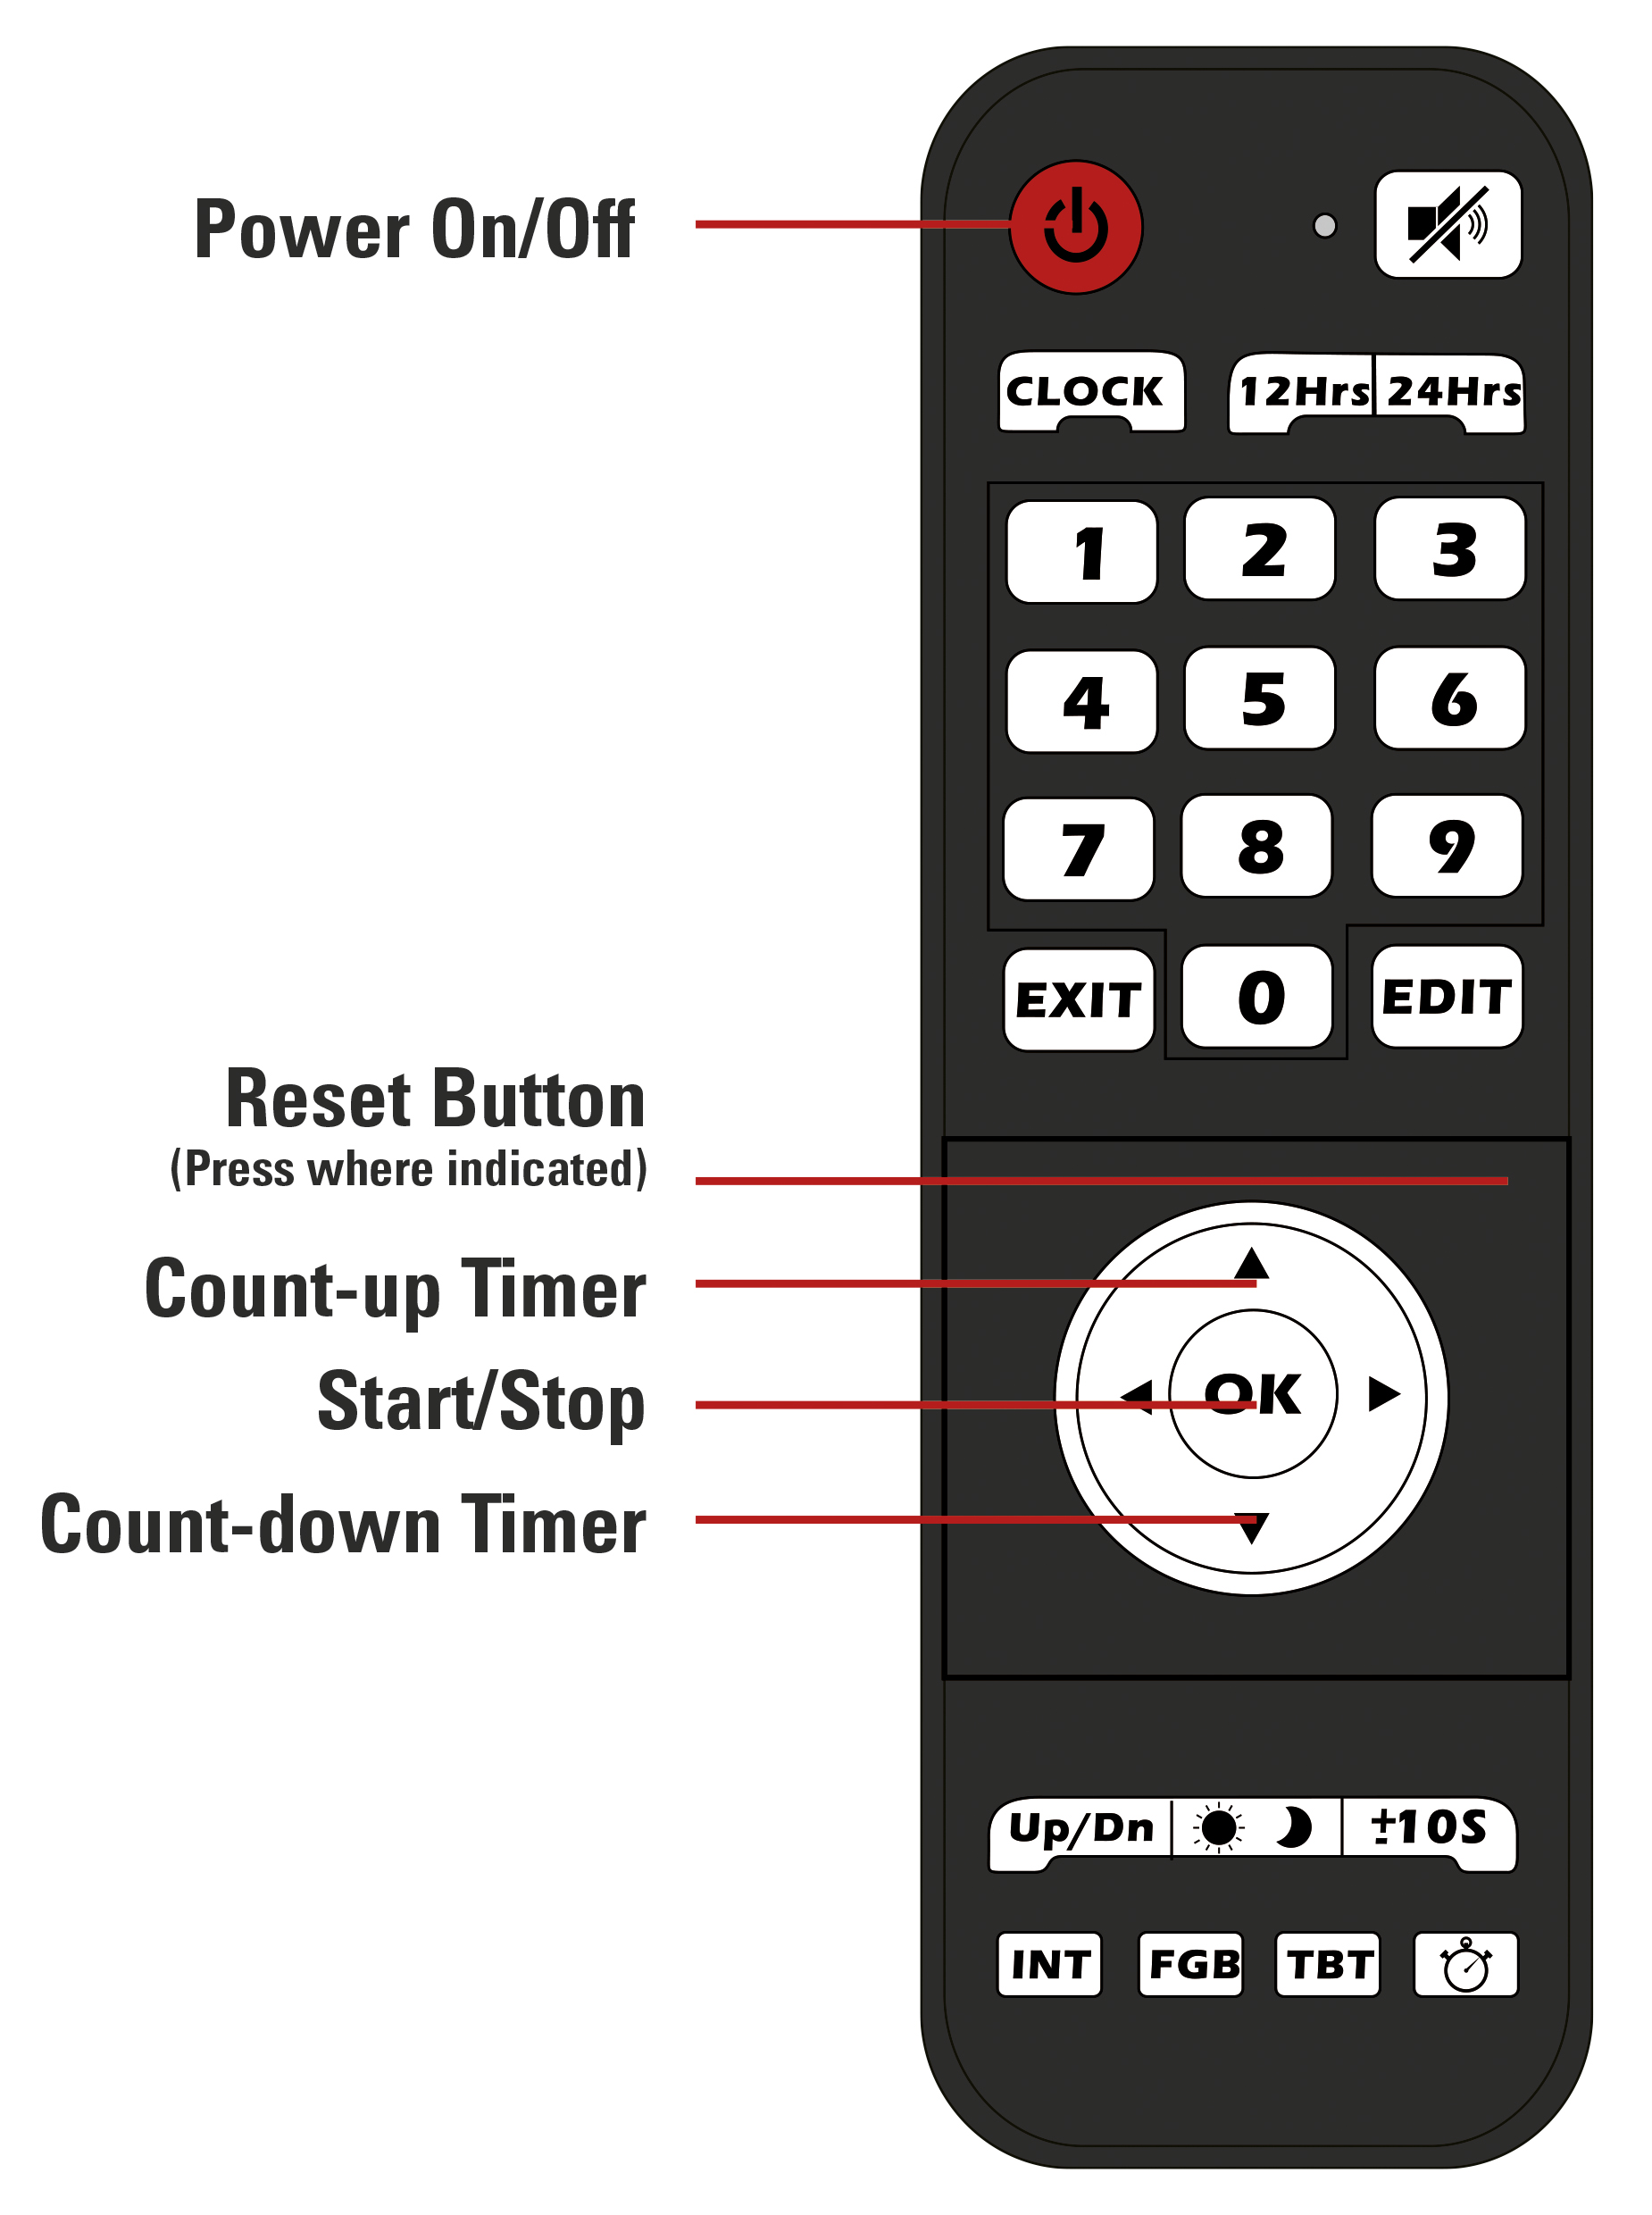
2. Press the red On/Off button of the remote to turn on the clock.
3. Press the Up or the Down Arrow to enter the count up or count down mode.
a) If you want to start with a preset time, press the "Edit" button.
b) Use the number pad to enter the desired time.
c) press "Edit" again to save the time.
4. Press "OK" to start the timer.
5. Press "OK" again to pause the timer.
6. Press the reset button (not labeled) to reset to the preset time.
Remote and Modes
Note: the remote and modes have been modified in November 2018. If you have purchased your clock before then and it does not have a 3.5 mm jack input on the side, please refer to the sub-section for your version below.
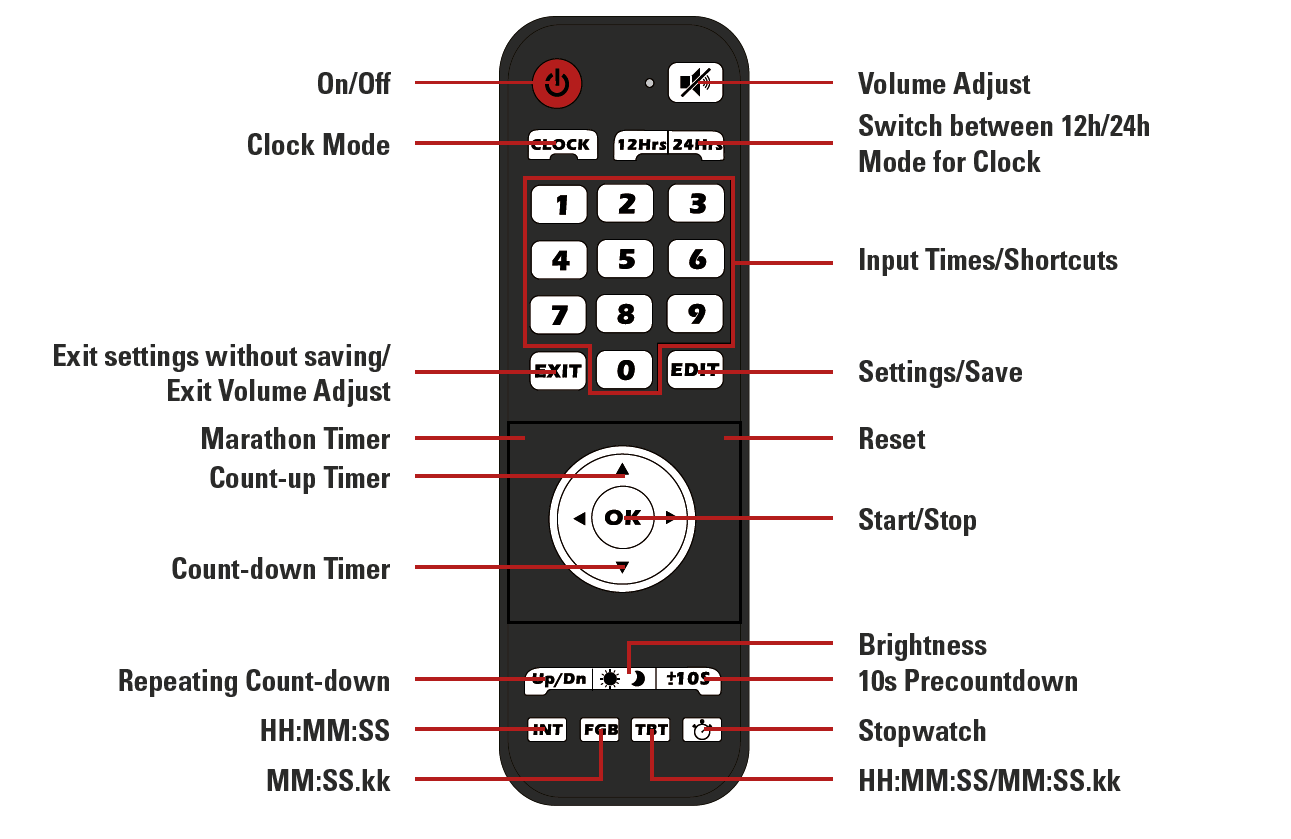
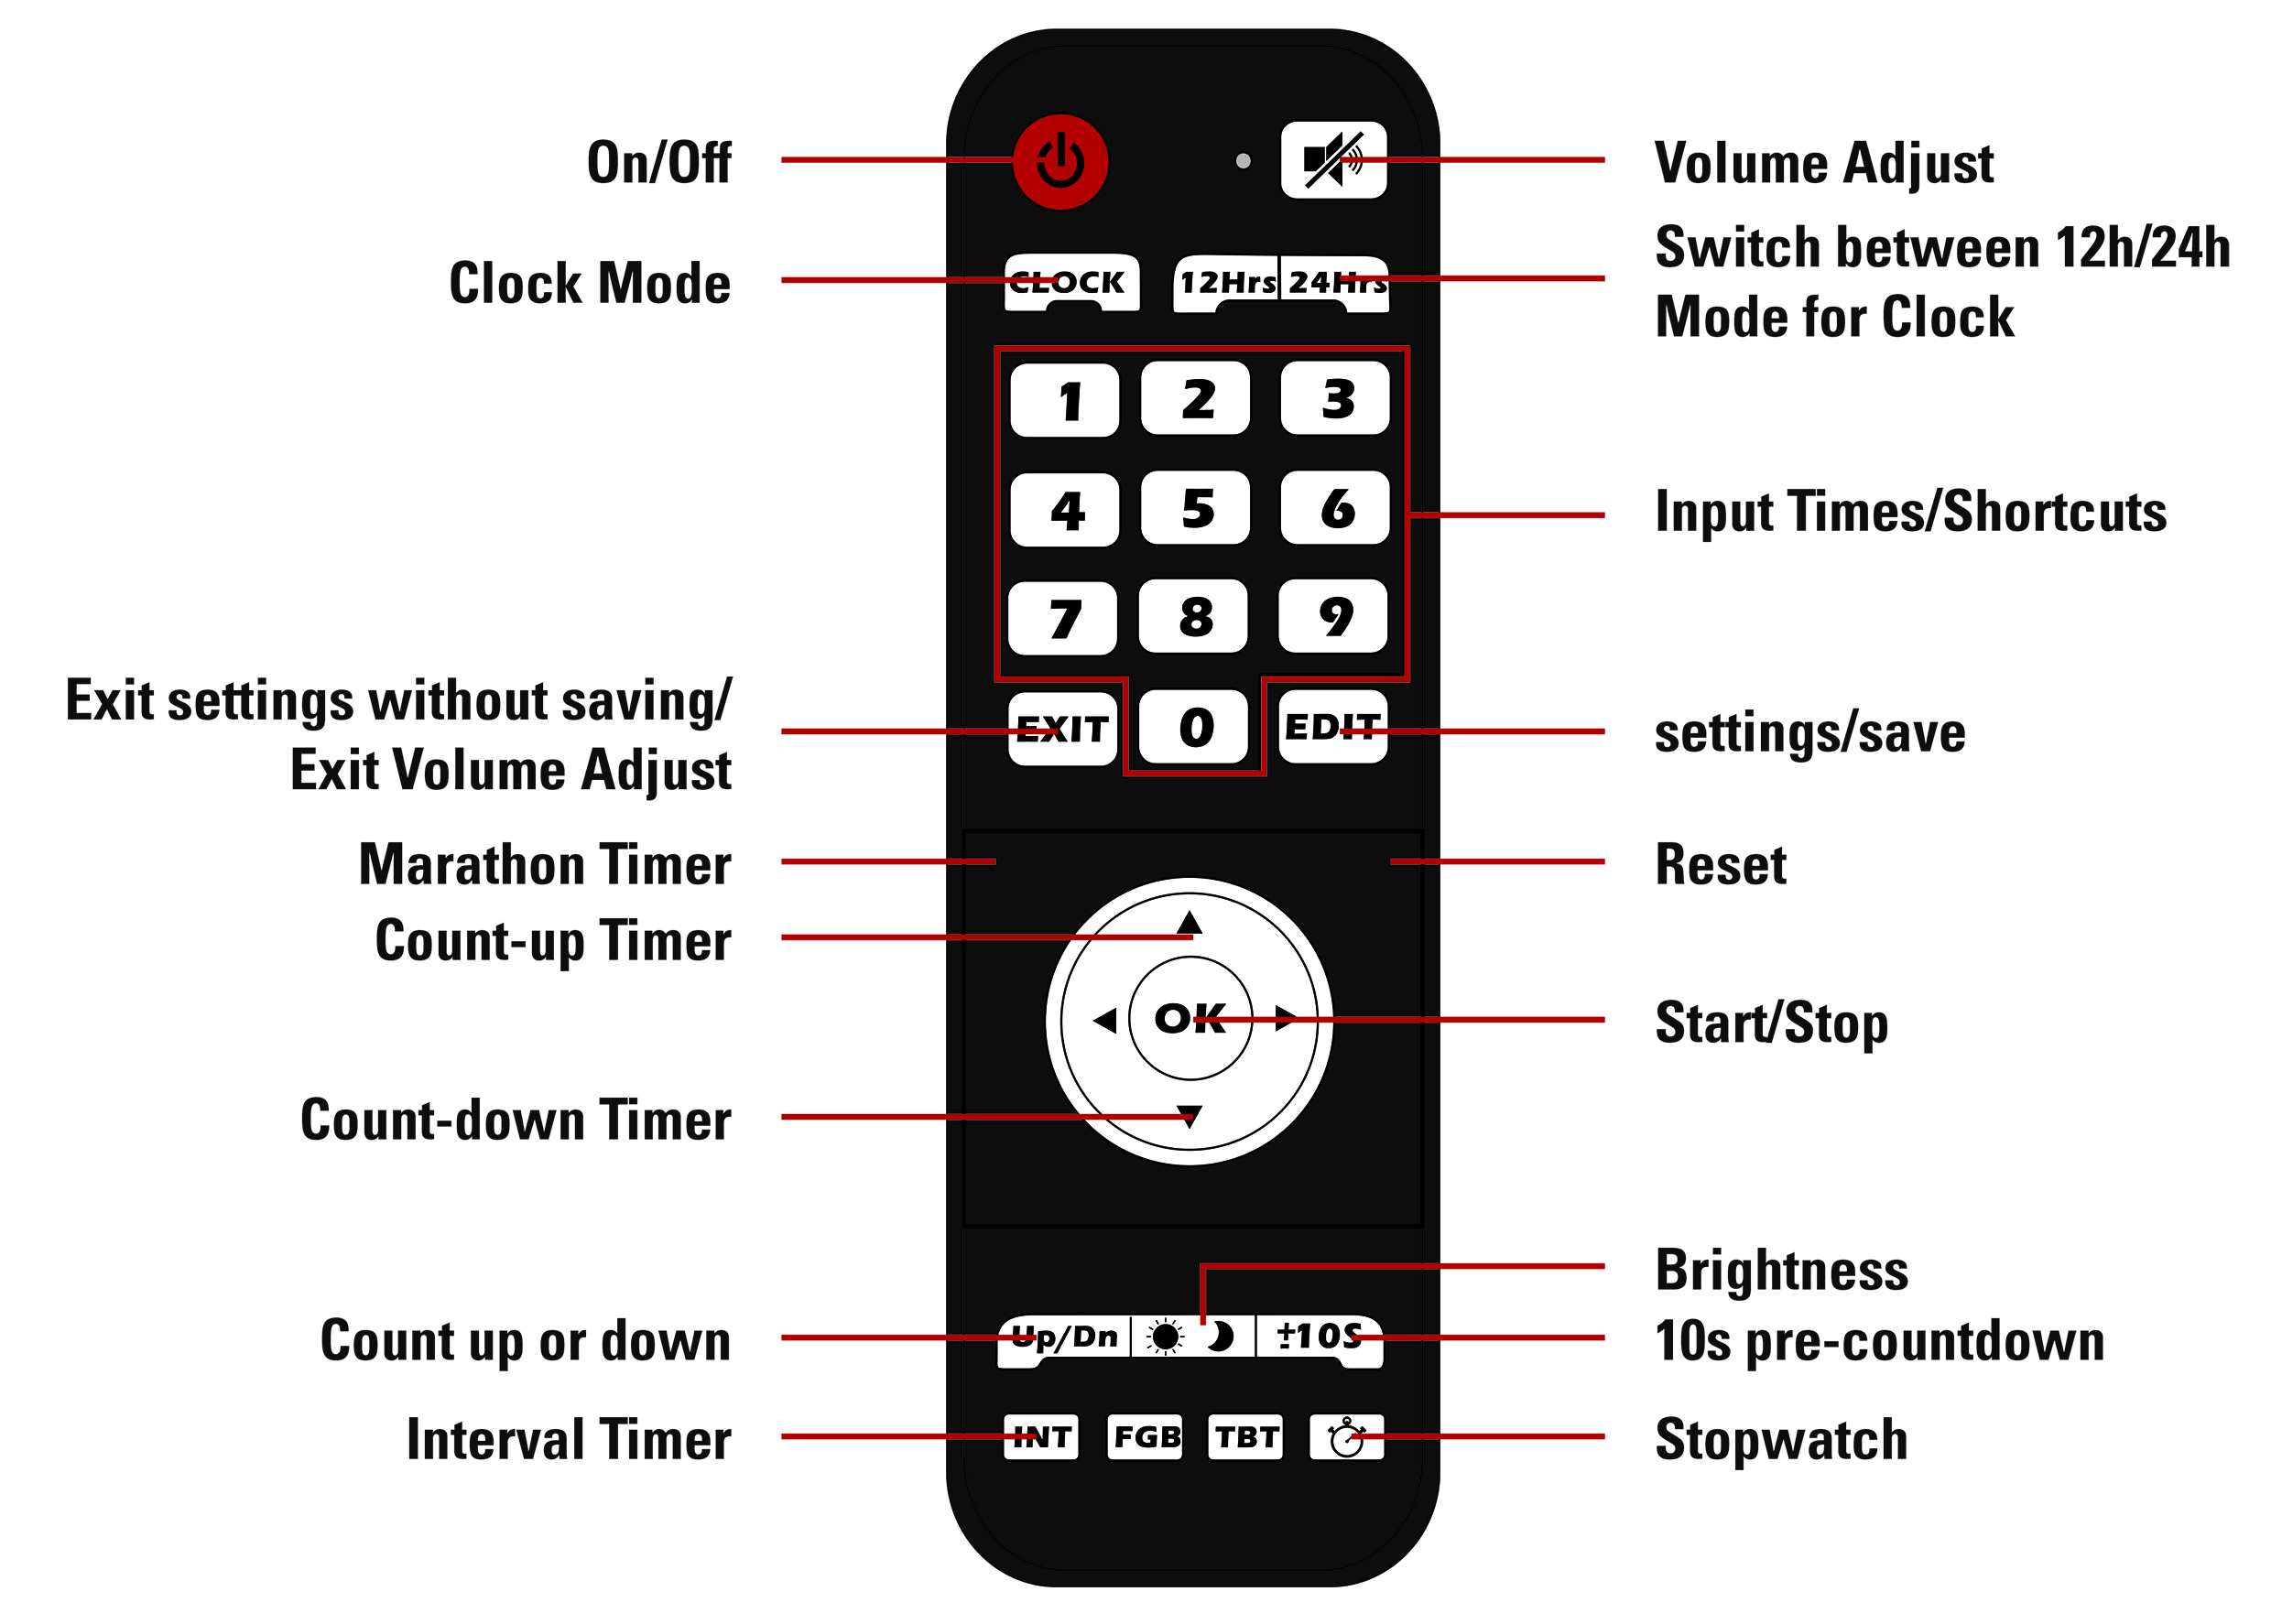
Remote:
Display Format
During setup the clock always uses the HH:MM:SS format.
For the Count-up and Count-down mode the desired display format can be chosen with the INT, FGB and TBT buttons.
- INT: HH:MM:SS (max 99:59:59)
- FGB: MM:SS.kk (max 99:59.99)
- TBT: automatically switches between the two modes when 1 hour is reached
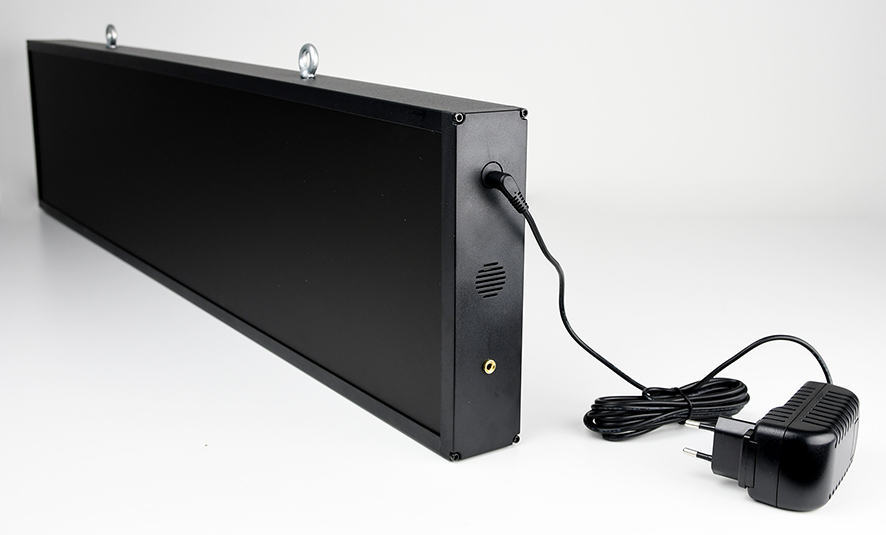
Input Jack
A 3.5 mm jack input is accessible on the side of the clock, under the connector for the power supply.
This input can be used to collect impulses from any kind of device to start and stop the clock, just as if you were pressing the OK button.
Modes:
Countdown / -up
Function: count down from or up to a specified time
Time format: HH:MM:SS
Accuracy: ±140 ppm
To access and use countdown / - up:
- Press the "Up" button to count up, or the “Down” button to count down
- Use the “Edit” button to set the time to count up or down from
- Enter the desired time using the number pad
- Press “Edit” again to save
- Use the “±10S” button to turn the 10 second pre-countdown on or off
- “-10” stands for no pre-countdown
- “10” stands for 10 second pre-countdown
- Select desired display format using the INT, FGB, or TBT button
- Press “OK” to start/pause the timer
Clock
Function: displays a normal clock in either 12h or 24h format
Time format: HH:MM:SS
Accuracy: ±20 ppm
To access and use the Clock mode:
- Press the “Clock” button
- Use the “12Hrs” and “24Hrs” buttons to switch between 12 and 24-hour format
- Use the “Edit” button to set the clock
- the first digit will start flashing and can be set using the number pad
- when done setting the time press “Edit” again to save the time
Stopwatch
Function: stopwatch
Maximum time: 99:59.99
Time format: MM:SS.kk
Accuracy: ±20 ppm
To access and use the stopwatch:
- Press the stopwatch button to enter Stopwatch mode
- Use the “±10S” button to turn the 10 second pre-countdown on or off
- “-10” stands for no pre-countdown
- “10” stands for 10 second pre-countdown
- Press “OK” to start/pause the stopwatch
- Use the reset (not labeled) button to reset the stopwatch when it is paused
Marathon Timer
Function: stopwatch with internal backup (the time continues to run even if the clock is unplugged)
Time format: HH:MM:SS
Accuracy: ±20 ppm
To access and use the Marathon Timer:
- Press the marathon timer button (not labeled)
- Use the “±10S” button to turn the 10 second pre-countdown on or off
- “-10” stands for no pre-countdown
- “10” stands for 10 second pre-countdown
- Press “OK” to start/pause the stopwatch
- Use the reset (not labeled) button to reset the stopwatch when it is paused
Repeated Countdown
Function: repeats the set count-down timer
Time format: HH:MM:SS
Maximum time: 99:59:59
Accuracy: ±20 ppm
To access and use the Interval Timer:
- Press the “Up/Dn” button to enter interval mode
- Press the “Edit” button
- Enter the desired time using the number pad
- Press “Edit” again to save
- Use the “±10S” button to turn the 10 second pre-countdown on or off
- “-10” stands for no pre-countdown
- “10” stands for 10 second pre-countdown
- Press “OK” to start/pause the timer
Remote and modes (pre-November 2018, no 3.5 mm jack input)
Countdown / -up
Function: count up to or down from a specified time
Time format: hh:mm:ss
Accuracy: ±40 ppm
Caution: it is possible to enter non valid minutes (over 59) on the next full minute the minutes will jump to 00
To access and use countdown / - up:
- Press the "Up" button to count up, or the “Down” button to count down
- Use the “Edit” button to set the time to count up or down from
- Enter the desired time using the number pad
- Press “Edit” again to save
- Use the “±10S” button to turn the 10 second pre-countdown on or off
- “-10” stands for no pre-countdown
- “10” stands for 10 second pre-countdown
- Press “OK” to start/pause the timer
Clock
Function: displays a normal clock in either 12h or 24h format
Time format: hh:mm:ss
Accuracy: ±120 ppm
To access and use the Clock mode:
- Press the “Clock” button
- Use the “12Hrs” and “24Hrs” buttons to switch between 12 and 24-hour format
- Use the “Edit” button to set the clock
- the first digit will start flashing and can be set using the number pad
- when done setting the time press “Edit” again to save the time
Stopwatch
Function: stopwatch
Maximum time: 99:59.99
Time format: mm:ss.kk
Accuracy: ±40 ppm
To access and use the stopwatch:
- Press the stopwatch button to enter Stopwatch mode
- Use the “±10S” button to turn the 10 second pre-countdown on or off
- – “-10” stands for no pre-countdown
- – “10” stands for 10 second pre-countdown
- Press “OK” to start/pause the stopwatch
- Use the reset (not labeled) button to reset the stopwatch when it is paused
Marathon Timer
Function: stopwatch
Time format: hh:mm:ss
Accuracy: ±120 ppm
To access and use the Marathon Timer:
- Press the marathon timer button (not labeled)
- Use the “±10S” button to turn the 10 second pre-countdown on or off
- “-10” stands for no pre-countdown
- “10” stands for 10 second pre-countdown
- Press “OK” to start/pause the stopwatch
- Use the reset (not labeled) button to reset the stopwatch when it is paused
Interval Timer
Function: repeats timer until count is reached
Time format: cc.mm:ss
Maximum time: 99.99:59
Accuracy: ±40 ppm
To access and use the Interval Timer:
- Press the “Int” button to enter interval mode
- Press the “Edit” button
- Set the number of intervals using the number pad
- Press the “Edit” button
- Set the time for the f rst interval using the number pad
- Press the “Edit” button
- Set the time for the second interval using the number pad
- Press the “Edit” button
- Use the “Up/Dn” button to decide if the timer should count up to or down from the set times
- Use the “±10S” button to turn the 10 second pre-countdown on or off
- “-10” stands for no pre-countdown
- “10” stands for 10 second pre-countdown
- Press “OK” to start/pause the timer
Technical specifications
Weatherproof
Input 12V, 2A 
Clock: 88 x 20 x 5 cm; 3,2kg
Case: 101 x 39 x 17,5 cm
Power supply
Plug in the LED clock using the included 12V power supply or equivalent. The power supply comes with an adapter for different countries.
5,5mm Barrel connector
You can also use a 12V car battery with and adapter.
The remote uses 2 AAA batteries