Timing Tab
Decoder Not Shown Automatically in the Timing Tab
Why does my decoder in the LAN not pop up in the Timing Module?
The logic about finding systems automatically in the LAN is the following: Each Decoder sends a Broadcast message into the LAN. This message can be received by any other computer in the LAN looking for this message. Such a broadcast is however not repeated by routers. This is a protection so that broadcasts are not endlessly repeated into the internet and around the world. Normally a broadcast is repeated to other computers in the same Sub-Net. This means the same first 3 parts of the IP e.g. 192.168.1.(something) or 10.0.1.(something).
So first make sure your computer and the decoders connected to the router are on the same subnet (have the same first 3 parts in the IP).
If that does not help you could try to see if you can change the settings on your router to forward broadcast messages in the LAN. You could also get an unmanaged network switch and connect your computer, decoders and router.
Another reason for automatic detection not to work is the Decoder Firmware Version. You should update to the latest firmware (in the decoder menu) since very old versions do not send any broadcasts. To check if your decoder sends broadcasts connect it directly to your computer, set static IPs and check if it shows up in the timing module.
The Windows Firewall might also be blocking the broadcast messages if not set up correctly. Normally this is configured correctly by the installer but this might have been changed meanwhile. To work properly the RRWS needs the following ports open for incoming communication:
- TCP: 35300 and 35301
- UDP: 3601
You may need to restart the RRWS after changing the firewall settings.
Why does my Online Decoder not pop up in the Timing Module?
Decoders connected to the Internet but not to the computer directly will send their data to a server called RRSProxy (raceresult system proxy). If the decoders send data successfully to this server their connection is registered by the RRSProxy. The LocalAdapter will ask the RRSProxy for a list of connected decoders to show them in the timing module.
There are 3 criteria for ensuring an online connection to the timing module.
Upload Target
In order for this to work you need to ensure your decoder is has upload enabled and is uploading to the RACE RESULT servers using the TCP protocol. In the upload menu the upload target must be set to raceresult.
Customer ID
The decoder and timing module must both be connected to the same customer ID. In the timing module on the systems page you can see the current customer number above the online decoders on the right. The Decoder has to have the same customer number. If it does not have the same customer number you can add the customer number in the timing module by using the green plus icon. For this you need to know the password of the customer. Then all online systems of that customer will also be visible. The preferable solution is to set the correct customer number (visible in the timing module) in the decoder.
Firewall
In rare cases routers, in particular mobile routers, may impose firewall restrictions which prevent the timing module from creating a connection to the online system. You will need to reduce the firewall settings of your router or create an exception for outgoing calls on port 3601.
How to Connect to an Online Decoder When Working Offline
If you create an event offline and you want to connect to an online decoder you need to ensure to do the following:
- Set your Customer ID on the Decoder - you can only access decoders uploading to your ID
- Link the software to your customer ID
Set CustomerID on the decoder
- Open the Menu and navigate to Upload
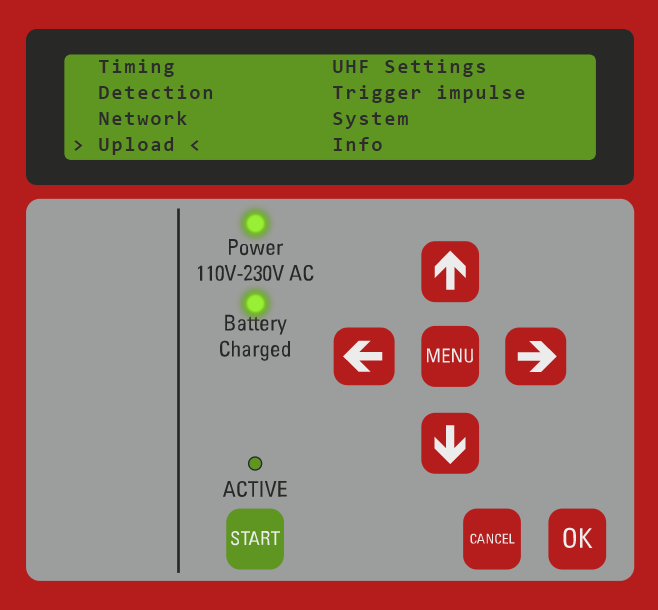
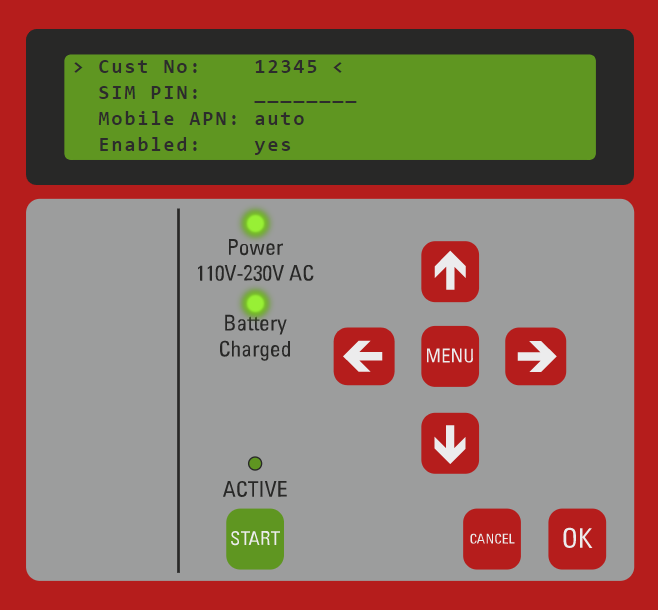
- Set CustomerID (i.e. 12345) and enable GSM upload. You may also need to set the SIM pin, auto APN supports most major networks globally however you may need to set manual APN settings via the Browser Interface
Add Customer ID to the software
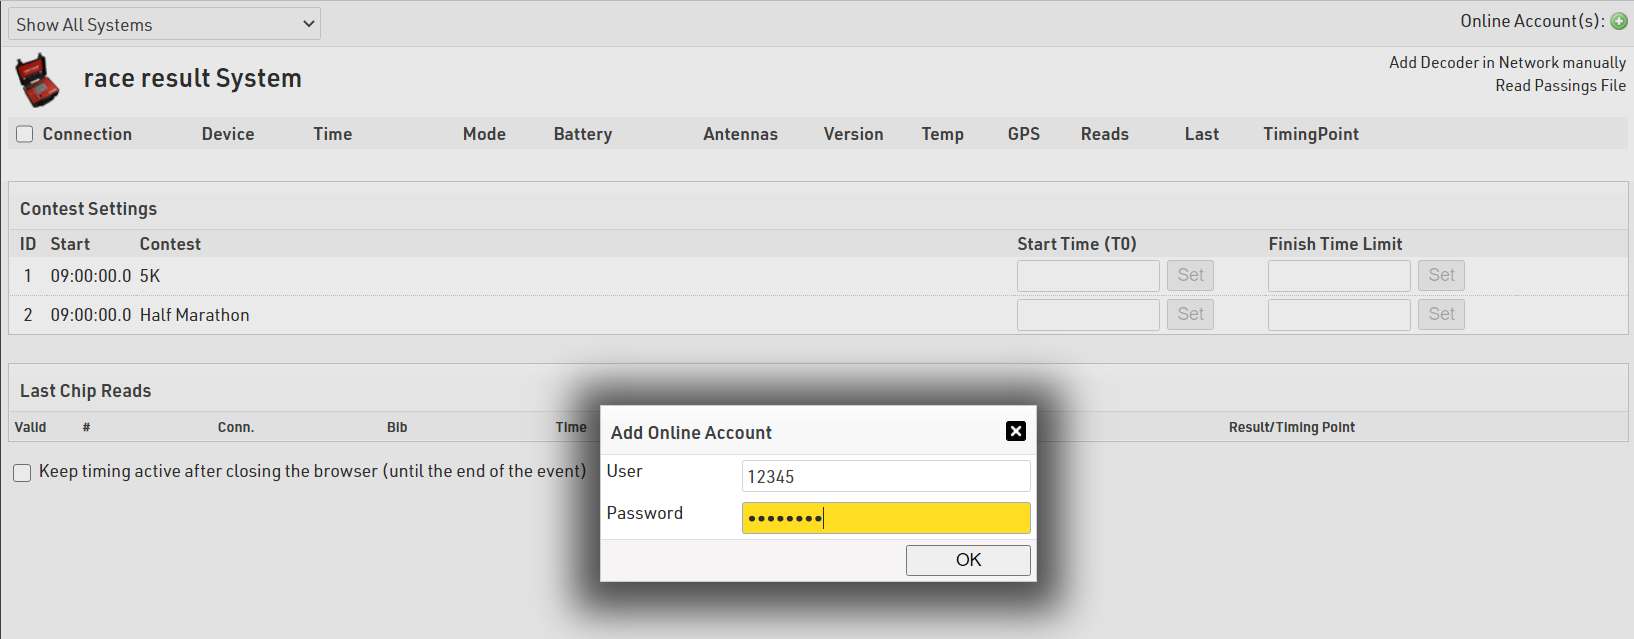
- In the Timing tab and press the green "+" button in the top right corner, next to Online Account(s)
- Enter your Customer ID and password and click OK
- Your customer ID will be listed in the Online Accounts
- Decoders which are connected online will be automatically displayed
my.raceresult.com
Tracking pixels / Google Analytics for online registration
It is not possible to include a tracking pixel or Google Analytics on my.raceresult.com.
Should an event require to track the progress of visitors within the registration form, we recommend embedding the online registration via the JavaScript code provided in the Website Integration settings. The tracking service can then be activated directly on the registration page of the website. The registration form will trigger different events upon calling the different steps.
Include merchandise, services or donation in event registration
There are a few things to consider when wanting to include items in event registration, and one of these is to consider the nature of the item you want to offer.
In this example, the focus will be on 3 different items: A Bag-Drop service at the start line, a T-Shirt and a charity donation.
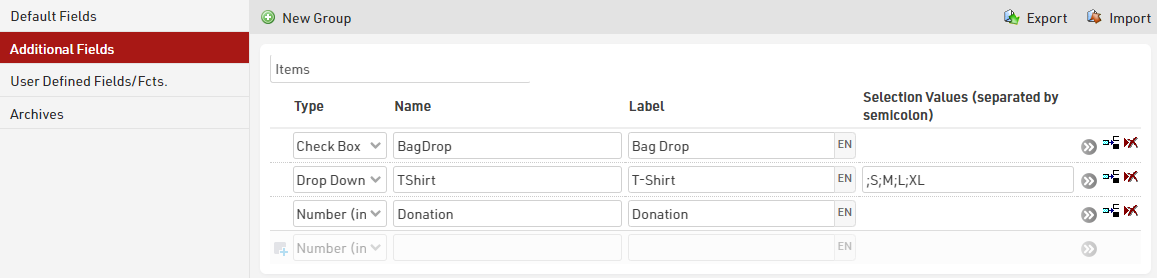
Set up different types of Additional fields
Choosing the right type of additional field will provide a better user-experience during the registration.
Since the Bag-Drop is a yes/no choice, the Check Box is the best solution to ask participants if they need it or not; For the T-Shirt, a Drop Down becomes beneficial because it lets participants decide which size they need from a pool of pre-defined values; For the donation, the Number (integer) gives the ability to fill the field with the desired numerical-only value.
Entry fees settings
Under Main Window > Entry Fees, it is possible to define the price for each item. Using the filter, the entry fee will be applied only for those participants who have selected the items in their registration.

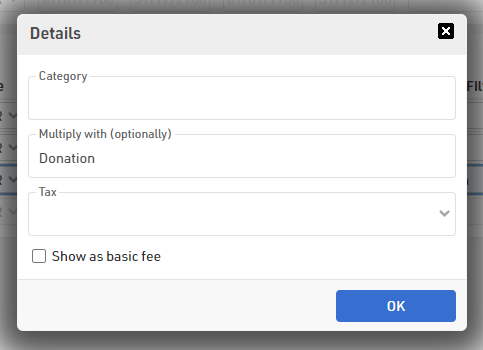
Since the Donation varies among participants, this can be calculated by setting its value to 1 EUR and then multiplying it with the value chosen by each participant during registration. To do so, the advanced setting "Multiply with" can be found by pressing the grey arrows at the end of the entry fee line.
Set up the Online Registration
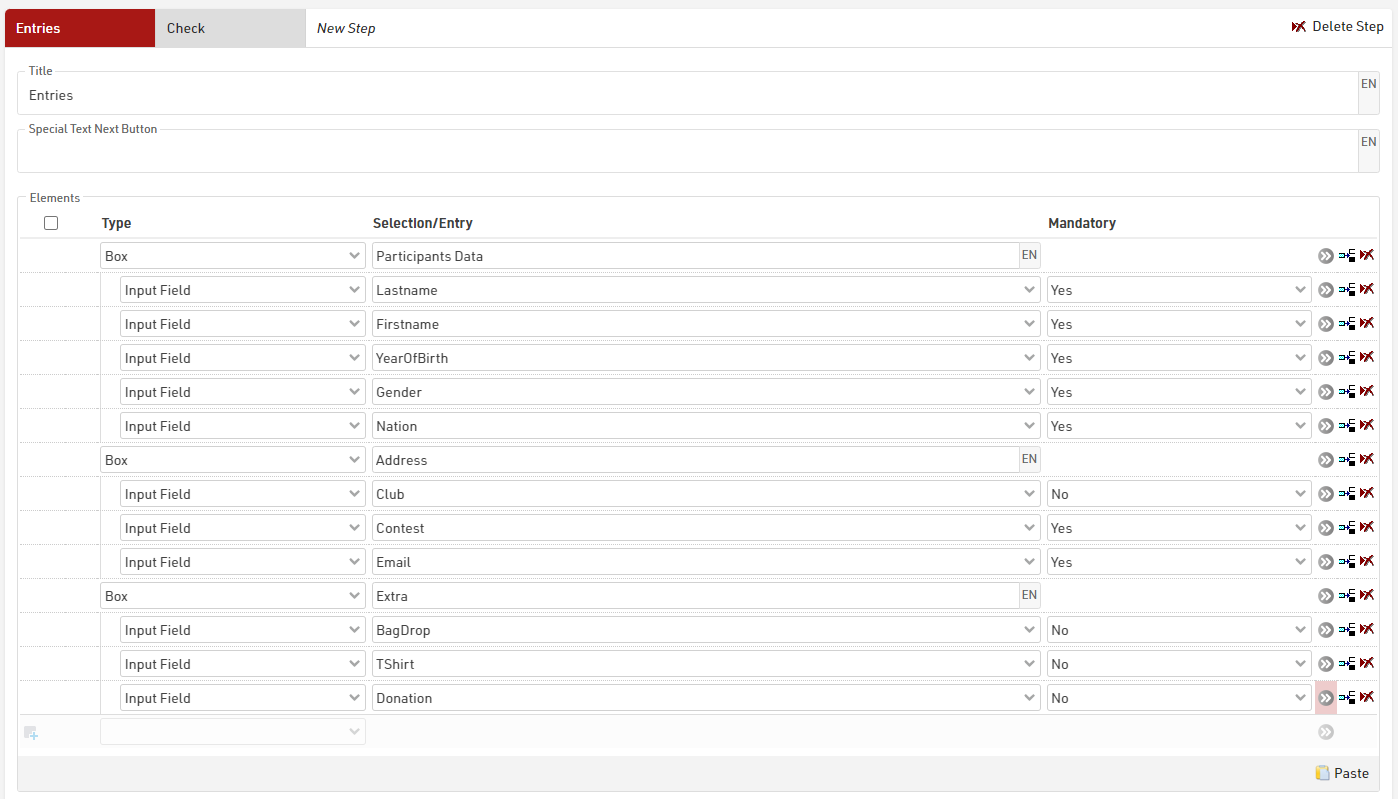
Under Main Window > Registration Form, it is possible to include the 3 additional fields inside the Single and/or Group Registration templates already included in the event file by default.
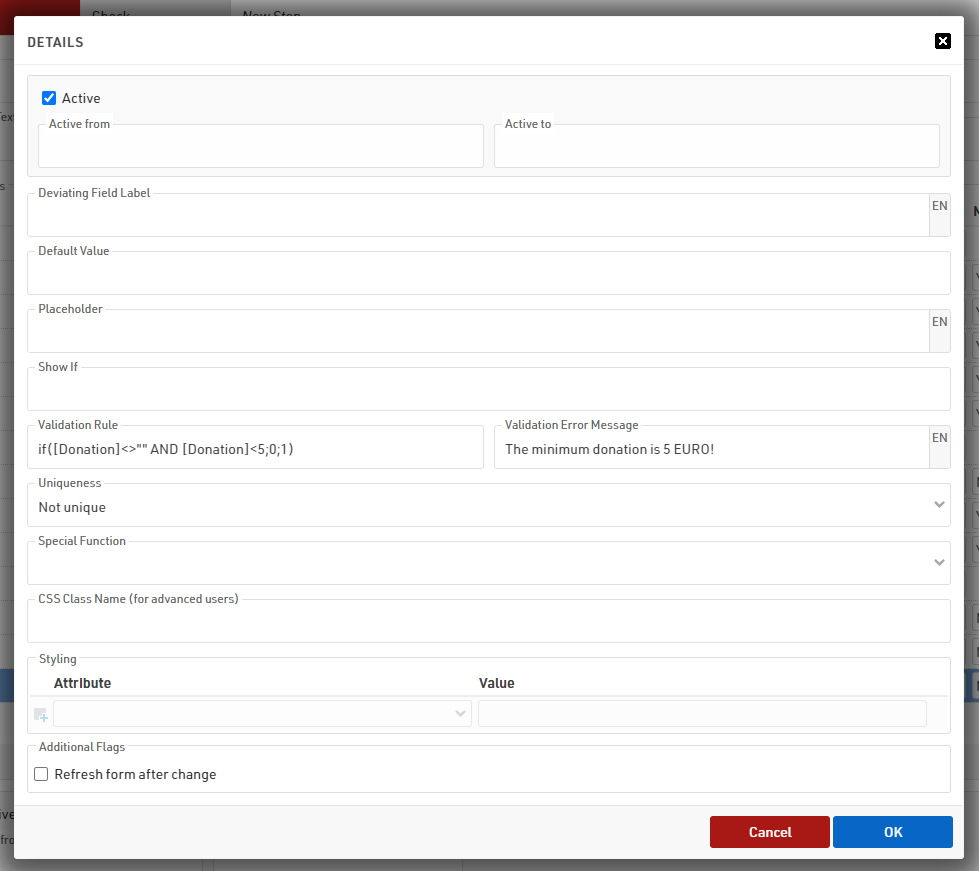
For the Donation field, it is possible to apply a validation rule which checks if the entered value is higher than 5: if the donation is smaller than 5 EUR, a validation error message will be returned.
Once again, the advanced settings for the registration fields can be found by pressing the grey arrows at the end of each line.