The following articles detail ways to customize lists and displays that can be used to streamline operations and improve visual elements of the event.
How to Create an Announcer Report
Below are two examples of how to create an announcer report in RACE RESULT Software. One is explained using Splits. The other is explained using Special Results.
Announcer Report with Splits
To create an announcer feed, you need to configure your Splits with an announcer split location. If you only have a single timing system at the finish, you can still create an announcer feed, but you would utilize the finish split rather than the announcer split. Below is a basic example of how to add an announcer split to your Splits settings.
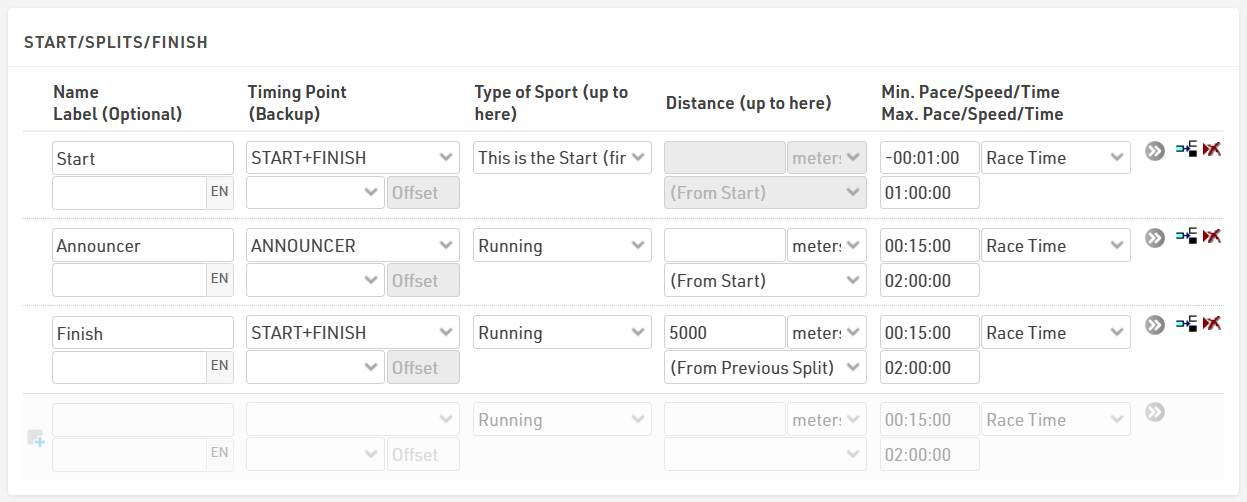
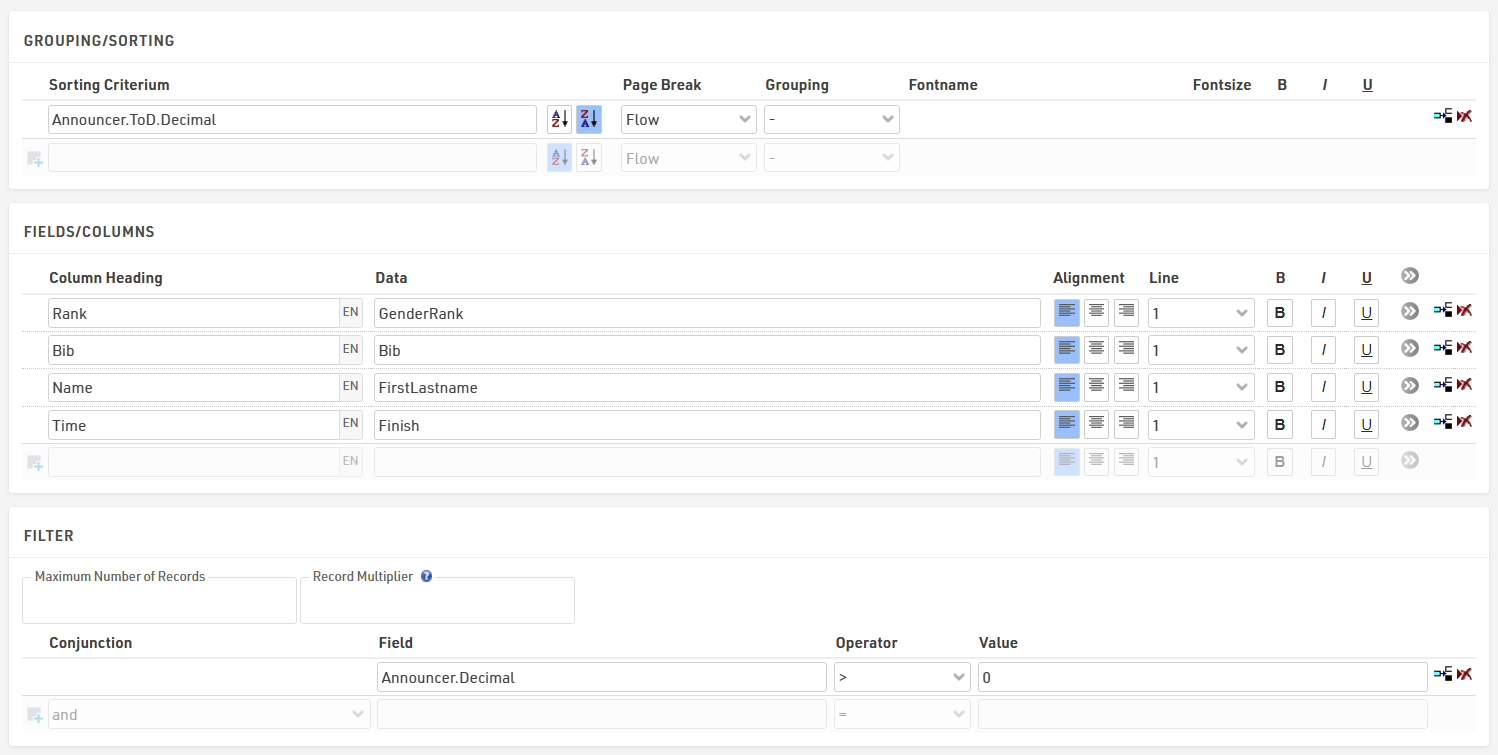
For the report, create a new List under Output and label it Announcer Feed. In the Data/Format for this list, we want to sort by the time of day a participant crosses the announcer line. We can do this by adding Announcer.ToD.Decimal. Make sure to reverse the sort order (Z>A) since we want the last time across the line at the top. The Data section can be configured as you wish to display the columns you want. For the filter section, you can set the Max Number of Records to 20, since you typically only need to show the last few names. The filter can be set to Announcer.Decimal>0 so only participants with an announcer read will show on the report.
Club registration list
In Lists you find a predefined club registration list that groups all participants from the same club, and automatically adds a subtotal of their entry fees.
If you want to create an additional receipt for each club, you can do as follows:
- "Scoring ⇒ Team Scores": Create a new Team Score with the filter [Club]<>"", a minimum number of participants of 1 (min. female 0), a maximum number of participants (and female) of 9999. Additionally, make sure to have [Club] as the only criterion for the team aggregation. Keep all other fields empty or delete the pre-set values, especially for the Result 1.
- Under "Certificates" you can import the attached file ClubReceipt.lvs. This is a receipt template that aggregates all entry fees of club members.
- Under "Certificate Sets" import the attached file CertSets_ClubReceipt.lvs. Make sure to have selected the Team Certificate (1 per team) and select the uploaded certificate design.
Now you can download/print all club receipts from the certificate sets. If you need a single club receipt, open any club member, navigate to the Certificates within the participant dataset, and open the certificate ClubReceipt.
QR code for Bib (& Transponder) Pick Up
This article describes the potential path a participant takes from event registration to collecting their race bibs (and transponders) on event day with the usage of a unique generated QR-Code and a Checkin Kiosk which is opened in the EventTools App.
The main idea here is, that the participant will receive a QR code which is sent with an e-mail template after completing the registration form.This QR code contains a personal and random value which identifies the participant uniquely.
During race pack collection the participant can show this QR code, which is then scanned in the search step of a Check-In Kiosk when working with the EventTools App.
With a dynamic bib assignment the volunteer picks up the first bib he picks from a box and assigns this bib number to the participant. If the event is timed with active technology, the volunteer can also dynamically assign active transponders to the participants.
Bib Numbers
The first step is to set up bib number ranges that are out of the real bib ranges that are going to be used on the event. The bib ranges are set up in the Participants Data in the Bib Numbers menu:
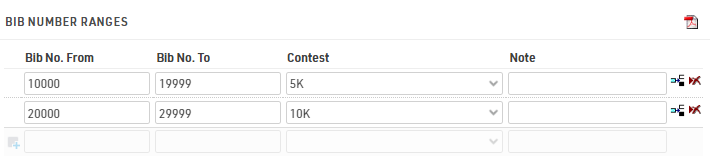
After the online-registration the participants are going to be saved in the event file with a bib number in these ranges. During the bib pick up, the bib number will be changed in the participant's data to the bib the participant receives at the bib pick up booth.
User Defined Fields and Advanced Settings in Registration
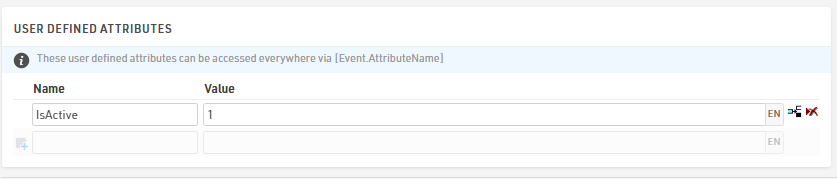
In the Event settings we add two User Defined Attributes. With the values we determine if this event is going to be an event timed with active or passive equipment. Depending on the entries here, we will later have different input possibilities in the Checkin Kiosk.
The next step is to add an additional field where we can save the string to uniquely identify the participant later.

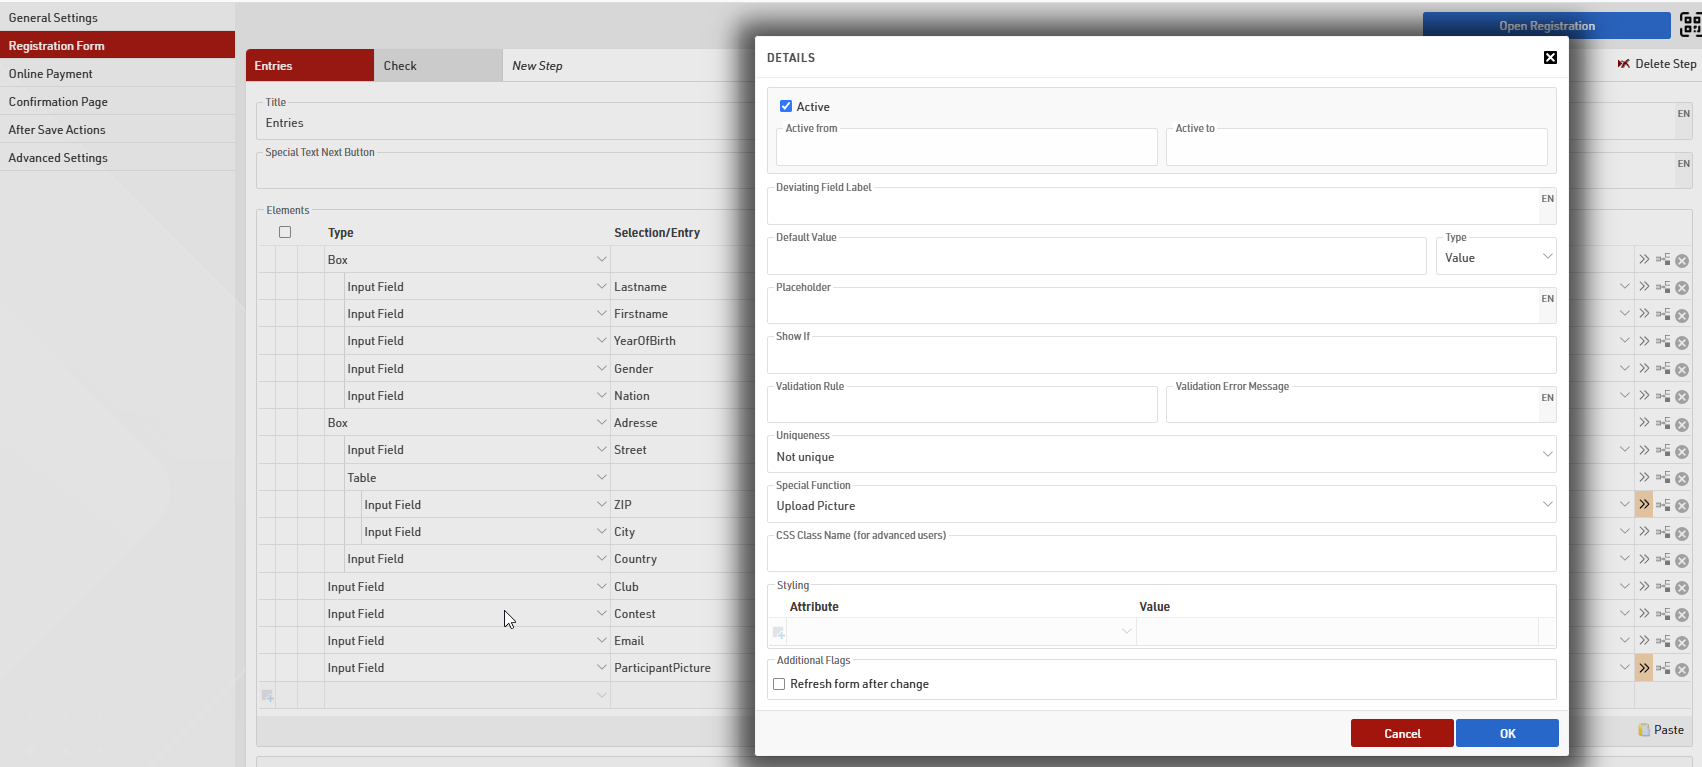
We also add a field where the participant is able to upload a picture of himself. In order to enable a picture upload in the registration form, it is possible to select the Special Function "Upload Picture" in the Details of the corresponding Input Field.
In the registration form's Advanced Settings we add the additional field [IdentificationNo] to store an additional value with a specific expression:
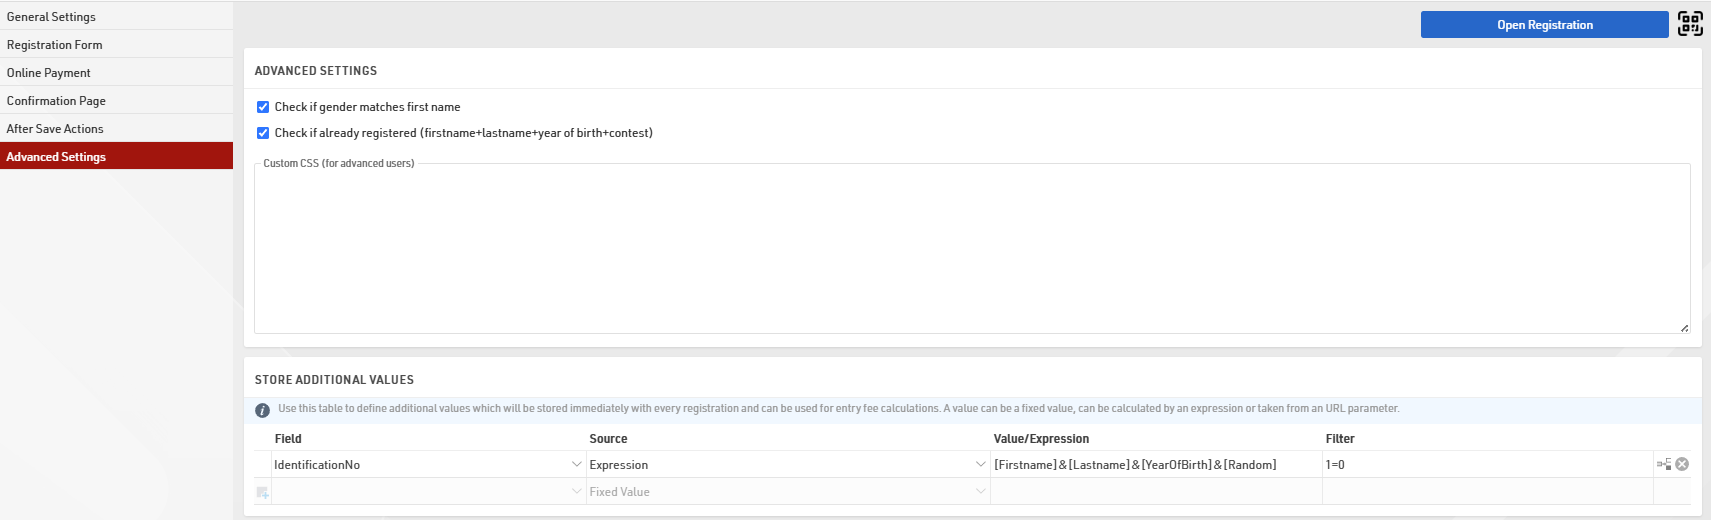
With this expression a combination of the participant's entries ([Firstname], [Lastname], [YearOfBirth]) and a random value are saved in the additional field. The field [Random] is a Derived Field which returns a random number between 0 and 1.
QR Code Generation
The QR code is generated under Output >> Certificates via the small barcode icon on the right side in the tools section:
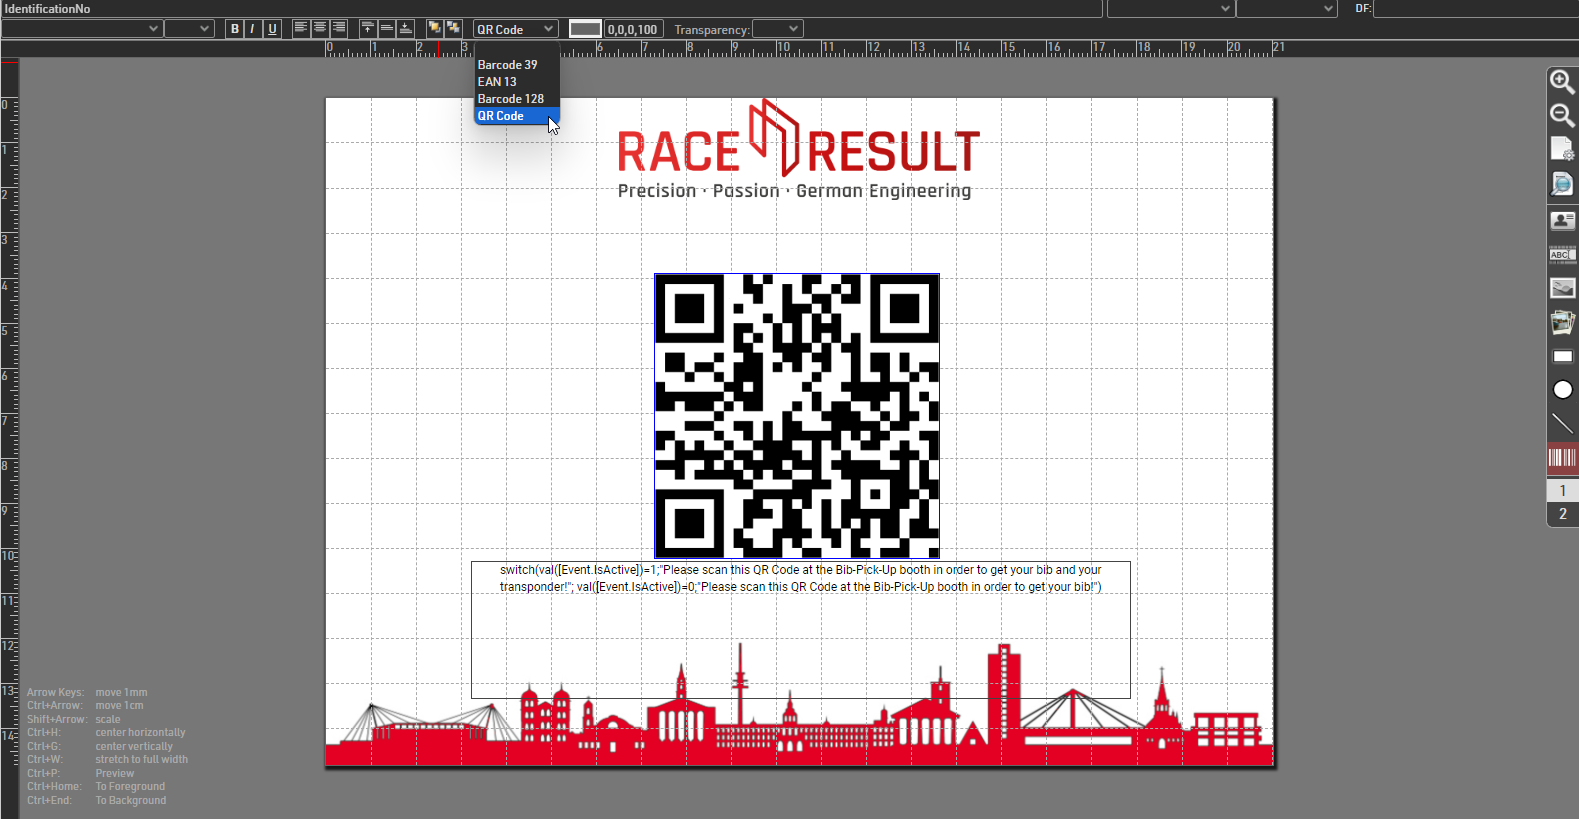
This will first create a barcode, but it can be changed to a QR code with the dropdown you find in the upper section.
After changing to the QR code we need to select the correct field which we want to save in the "QR code data". To do so, select the QR code and start typing the name of the field where you save the unique participant data during the online registration. Select the desired field from the dropdown of suggested datafields.
With a switch formula we show two different texts, depending if we set the event as an active or passive event by using the user defined attributes in the event settings.
Email Setup
The confirmation email is set up in the Email/SMS Templates. As the participant should receive his QR code with the confirmation email after the online registration, the pre-setup certificate needs to be added as an Attachment to the email:

Depending on the language the participant used on the my.raceresult.com website during the registration he will receive either a german or english certificate.
Checkin Kiosk Setup
The Checkin Kiosk is set up with three different steps. The first step is usually the Search step where we determine the search fields. The only Search field that should be used here is the field where the personal, unique identification code is saved after the finished registration.
The second step is only called Bib Pick up, as this step will only be visible if the event is going to be timed with passive transponders. The only Edit Field in this step is the [Bib] field. In the entry field's details it is possible to select a Scanner Input when using the Event Tools App. If a BLE Reader is available, the BLE Reader can be selected. With the Reader it is possible to scan the bib's transponder and use the read automatically as an entry for the input field.
If the bib number is also printed and encoded as a QR code on the bib itself, the QR Scanner option can be selected. With this option, the QR code can be scanned with the cell phone and the bib number will be entered automatically by encoding the QR code. Of course, manual entry is also possible, but this is prone to errors when typing the bib number in the entry field. The current bib value should be hidden, this is done with the corresponding Special function.

The third step on the other hand, will be only visible if the event is timed with active equipment. This step is not only used to assign a bib number, but also to assign an active transponder code to the participant.
Therefore two Edit Fields are added in this step. The first field is again the [Bib] field. As no passive transponders are going to be attached to the bibs in this case, either the QR scan option or the manual entry option (empty dropdown) can be selected. The second field is the [Transponder1] field where the active transponder code is going to be saved. It might be a smart move to attach a sticker on each active transponder with a QR code which contains the active transponder's chip-code. By doing so, it is possible to again use the QR scanner option for this input field. The volunteer later can then pick any transponder and just scan again the QR code on the active transponder to fill the [Transponder1] field.

Event Tools App usage
After logging in into the Event Tools App select your Event and open the Checkin Kiosk for the Bib-Pickup. If you plan to use a BLE Reader you can connect your smartphone with the reader now. If no Reader is going to be used, just push down the small pop up window:
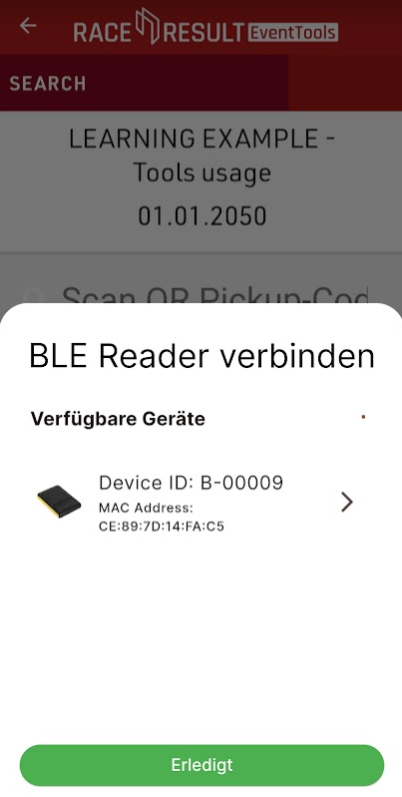
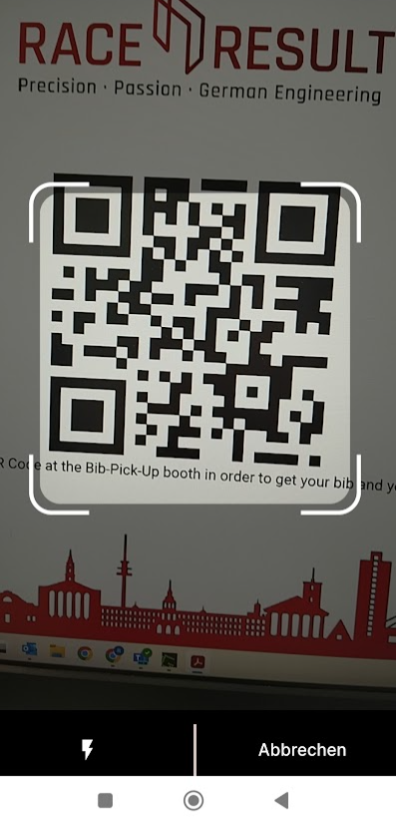
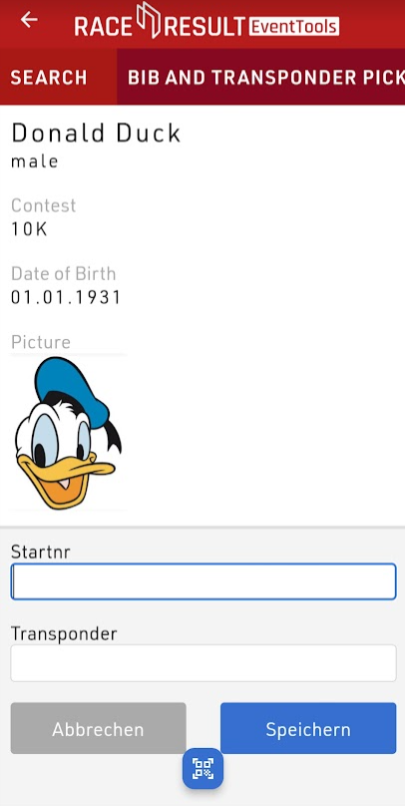
By selecting the small, blue QR code symbol on the bottom of the smartphone the app enables a camera mode which allows it to scan QR codes for the search entry field. In this mode the QR code for the bib pickup can be scanned and the participant's information and edit fields are going to be displayed in the next step:
Selecting one of the entry fields on the smartphone, shows again the small blue QR code symbol in order to scan the QR codes from the active transponder and / or the bib to automatically enter their encoded information (transponder coder / bib number) to the corresponding entry-field.
After saving, the active transponder code and the re-assigned bib number are saved in the participants data.
Add a QR Code on Bib to download personal certificate with results
To make it easy for participants to download their finisher certificates, it is possible to add a QR Code on the Bib number with an encoded link to the personal certificate of that specific participant. The basic steps that need to be done are creating a certificate with the results of the race that should be able to download later, adding a certificate-set and then publishing this certificate-set online on the my.raceresult.com page of your event. These basic steps are explained in the following article.
In the following steps it is explained how to add a QR code on your certificate that is used for the bib layout and encode a personal link which leads the participant to the downloadable certificate.
Certificate (Bib) with attached QR code to link to personal result
A QR Code can be added to a certificate by clicking on the small bar code icon on the right tool side in the certificates designer. By doing so, a barcode will be added to the certificate in the first step. The type of the code can be changed via a dropdown in the upper tool bar.
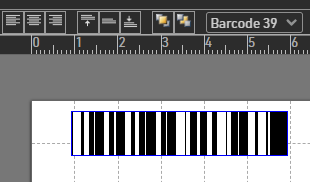
After changing the code type, the link to the certificate with the personal result needs to be added in the entry line on the top left:
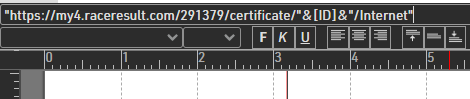
The link must be set into quotation marks and the field [ID], which links to the individual ID-Number of a participant, needs to be excluded from those:
"https://my4.raceresult.com/EventID/certificates/"&[ID]&"/Internet"
It is also possible to copy the general code from an opened certificate on the my.raceresult.com page to make sure that the correct format of the link is encoded in the QR code. Note, you need to adapt the part with the [ID] field, otherwise the link would be hard coded and would direct to a specific certificate.
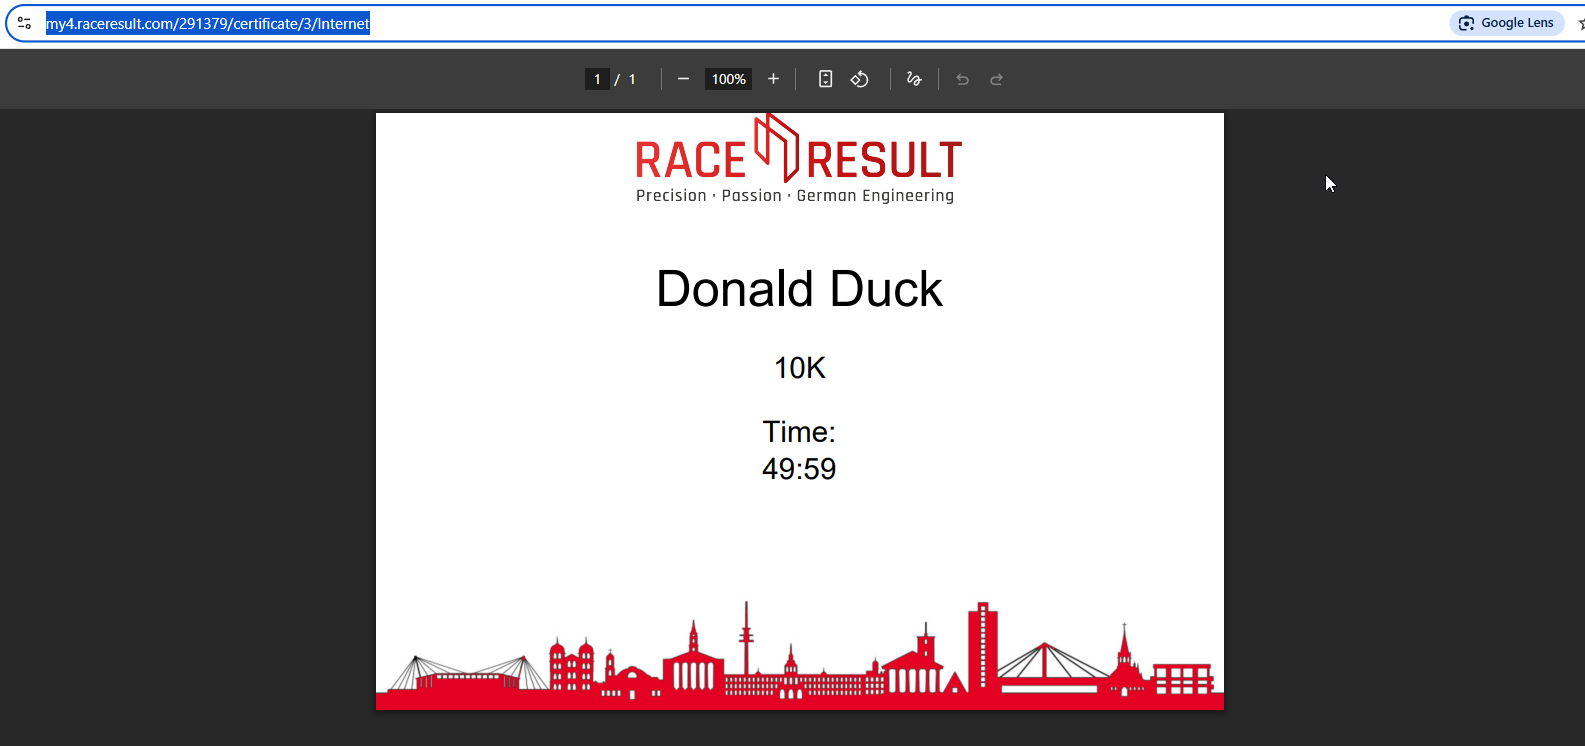
If now this participant's QR code is scanned with a smartphone, the published certificate will be automatically be downloaded:

Utilizing the BLE Reader to Display Results on a Presenter
RACE RESULT 14, in combination with the RACE RESULT Event Tools application, enables the creation of a presenter that can serve as a Selfie Screen before and after a race event.
In essence, the Event Tools application transmits transponder detections to RACE RESULT 14, which subsequently displays the data on a screen or LED wall via a presenter.
Create the Timing Structure
Create a Timing Point for the BLE Reader
Within the Main Window under the Timing Point section, create a timing point to store all detections received from the BLE Reader.

Create a Special Result for BLE Reader Detections
In the Main Window under Special Results, create a result that retains only the latest detection for each transponder. This ensures that if a transponder is scanned multiple times, only the most recent detection is updated and used for display in the Output List.
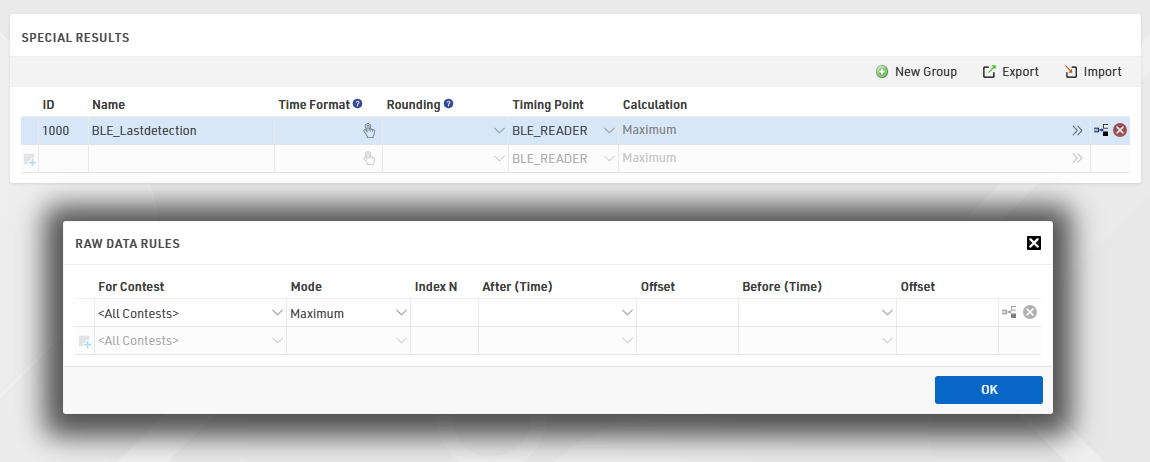
Create the Output Lists
Once the timing structure is configured, proceed with creating the desired output lists. To ensure that the most recent participant scanned by the BLE Reader is always displayed, adjust the following settings:
- Grouping/Sorting: Configure the sorting order (Z-A) based on the Special Result. This arrangement ensures that the most recent detection appears at the top of the list.

- Filter: Set the Maximum Number of Records to 1 to display only one participant at a time and apply a filter to include only those participants scanned by the BLE Reader.

- Fields/Columns: define the information to be displayed on the presenter. For example, you may include the participant’s name, club details, company website, and nationality. The if() function is used to display a placeholder (e.g., “-”) when specific information is missing, and the use of the Line feature allows data to be displayed in a multi-line template.
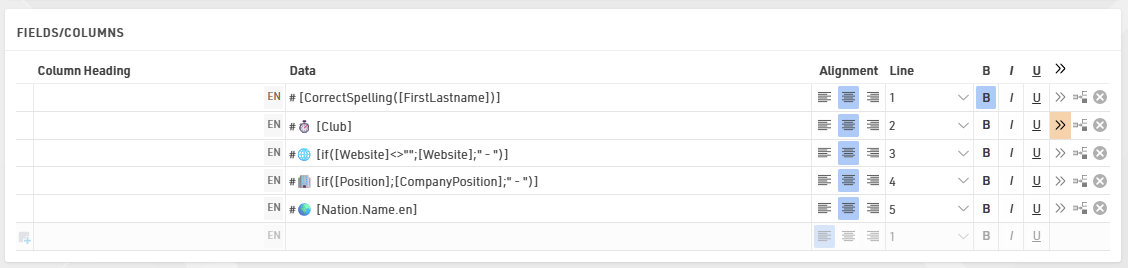
Connecting the BLE Reader in Event Tools
Within the RACE RESULT Event Tools application, connect the BLE Reader to the Timing Point created in RACE RESULT 14 by accessing the Event File, selecting the BLE Reader option, and then choosing Checkpoint. It is recommended to reduce the Reader Power to the “Kiosk” level to prevent the detection of transponders outside the intended range.
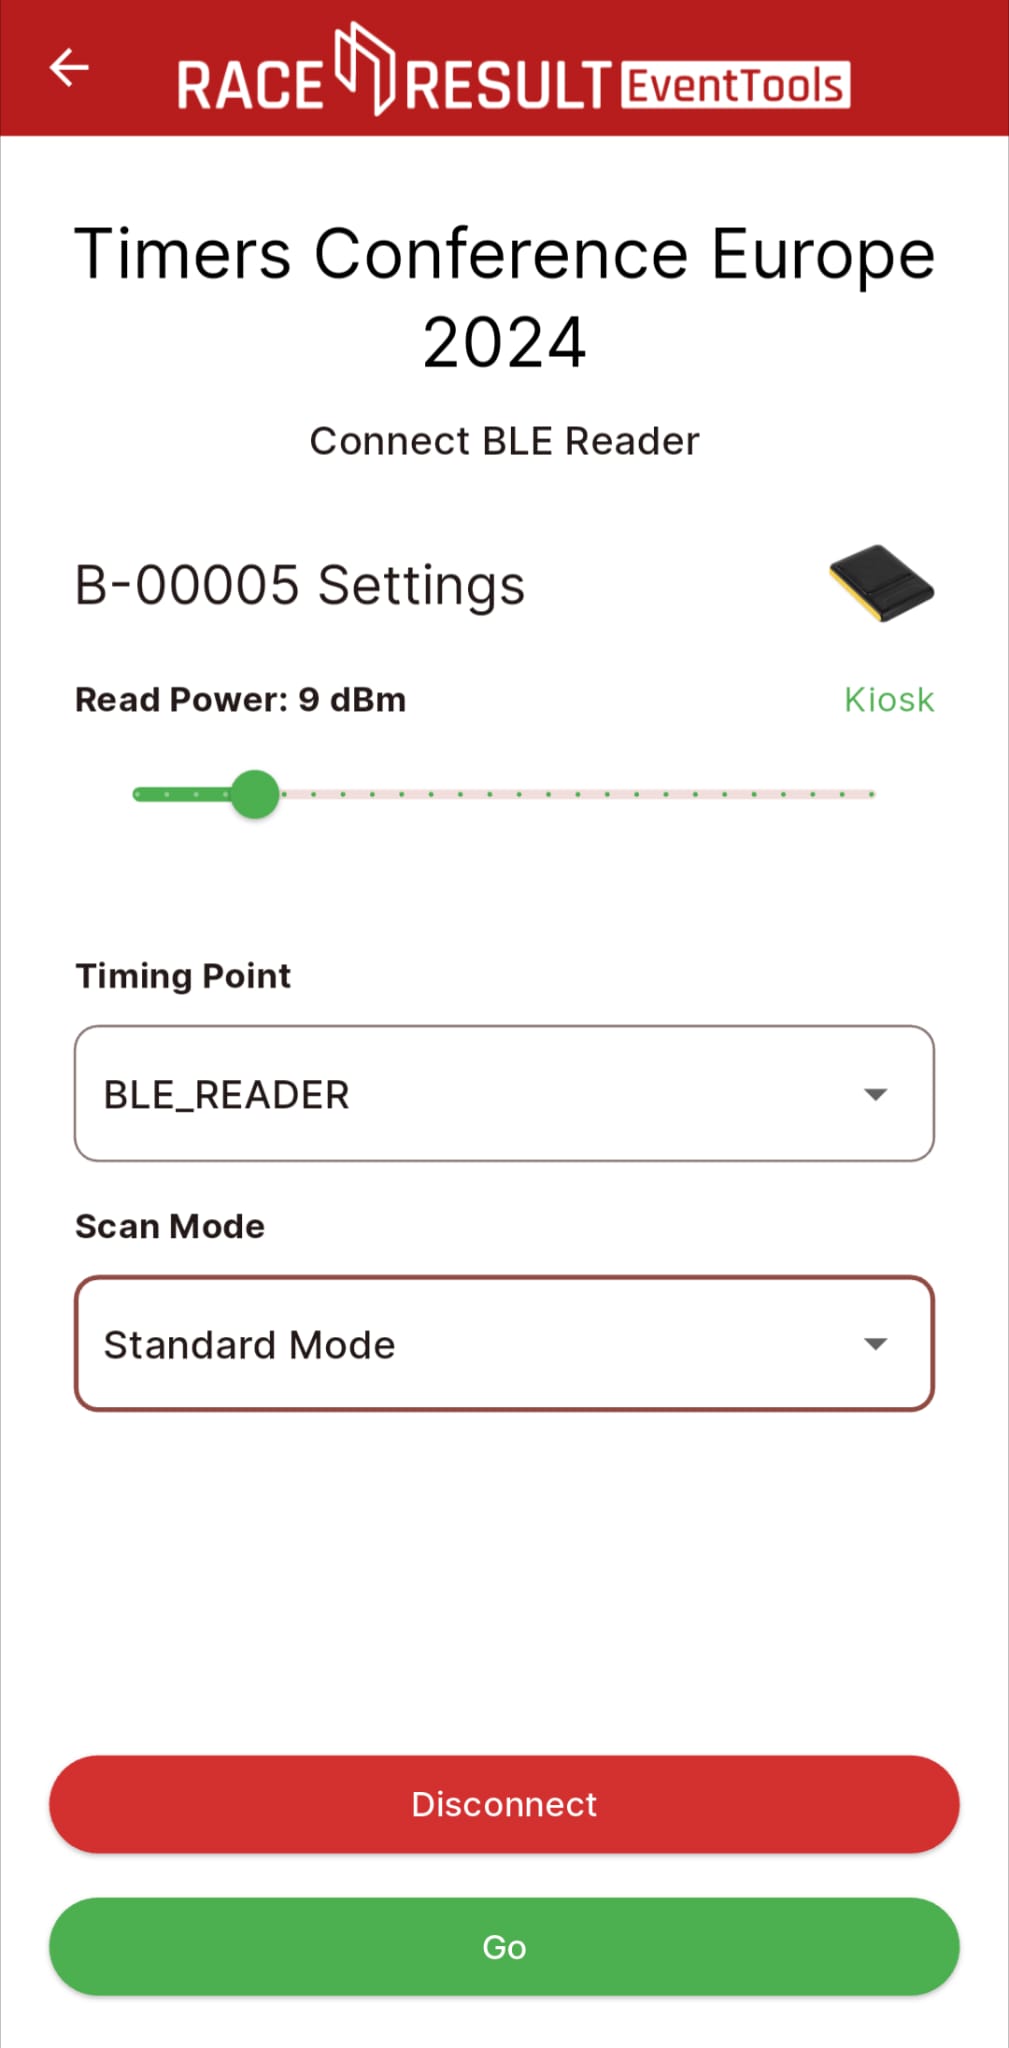
After swiping to the right, the BLE Reader begins transmitting transponder detections to the Event Tools application, which then uploads the data directly to the event file in RACE RESULT 14.
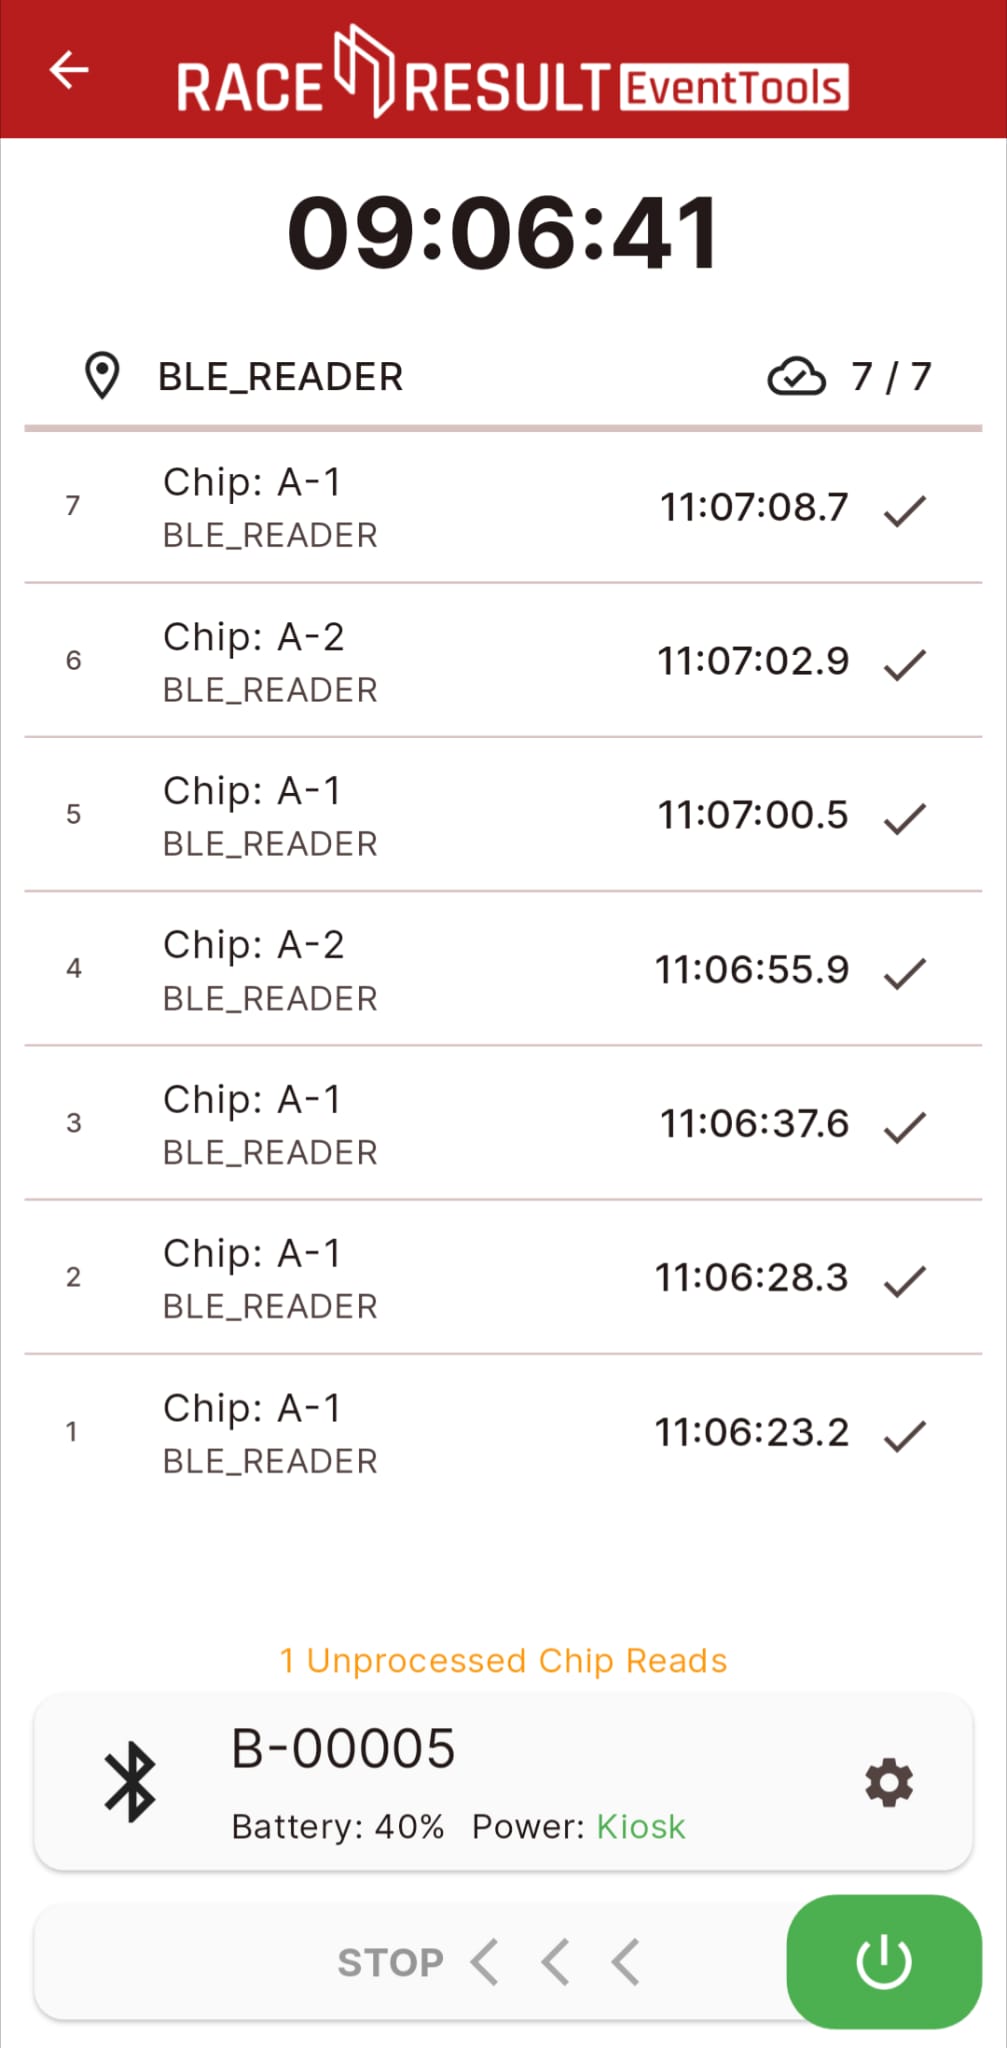
Alternative: Connecting to Manual Timing
In case a BLE reader is not available, it's possible to use the Manual Timing tool in EventTools, in order to push manually to the Event File the detection of each participant who wants to see its information on Presenter.
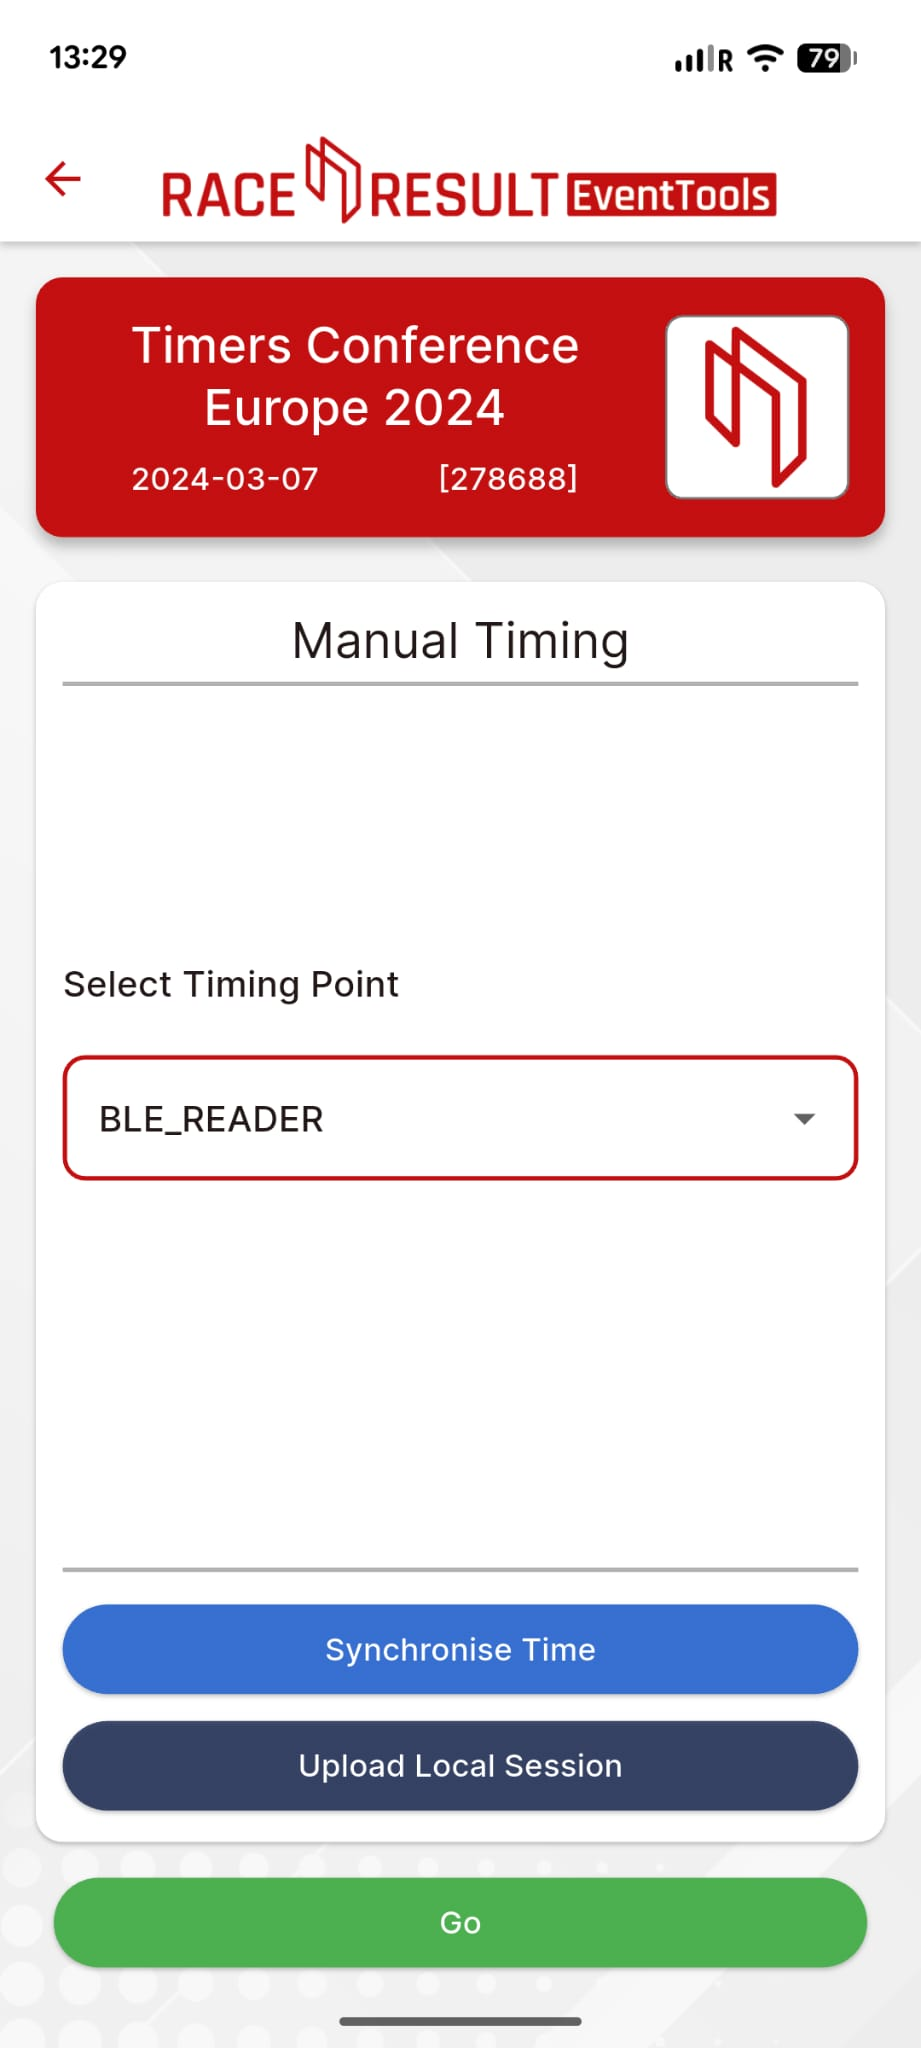
Once the Timing Point in Manual Timing is selected, it's possible to type the BIB of the participant and press GO to send the detection to the event file.
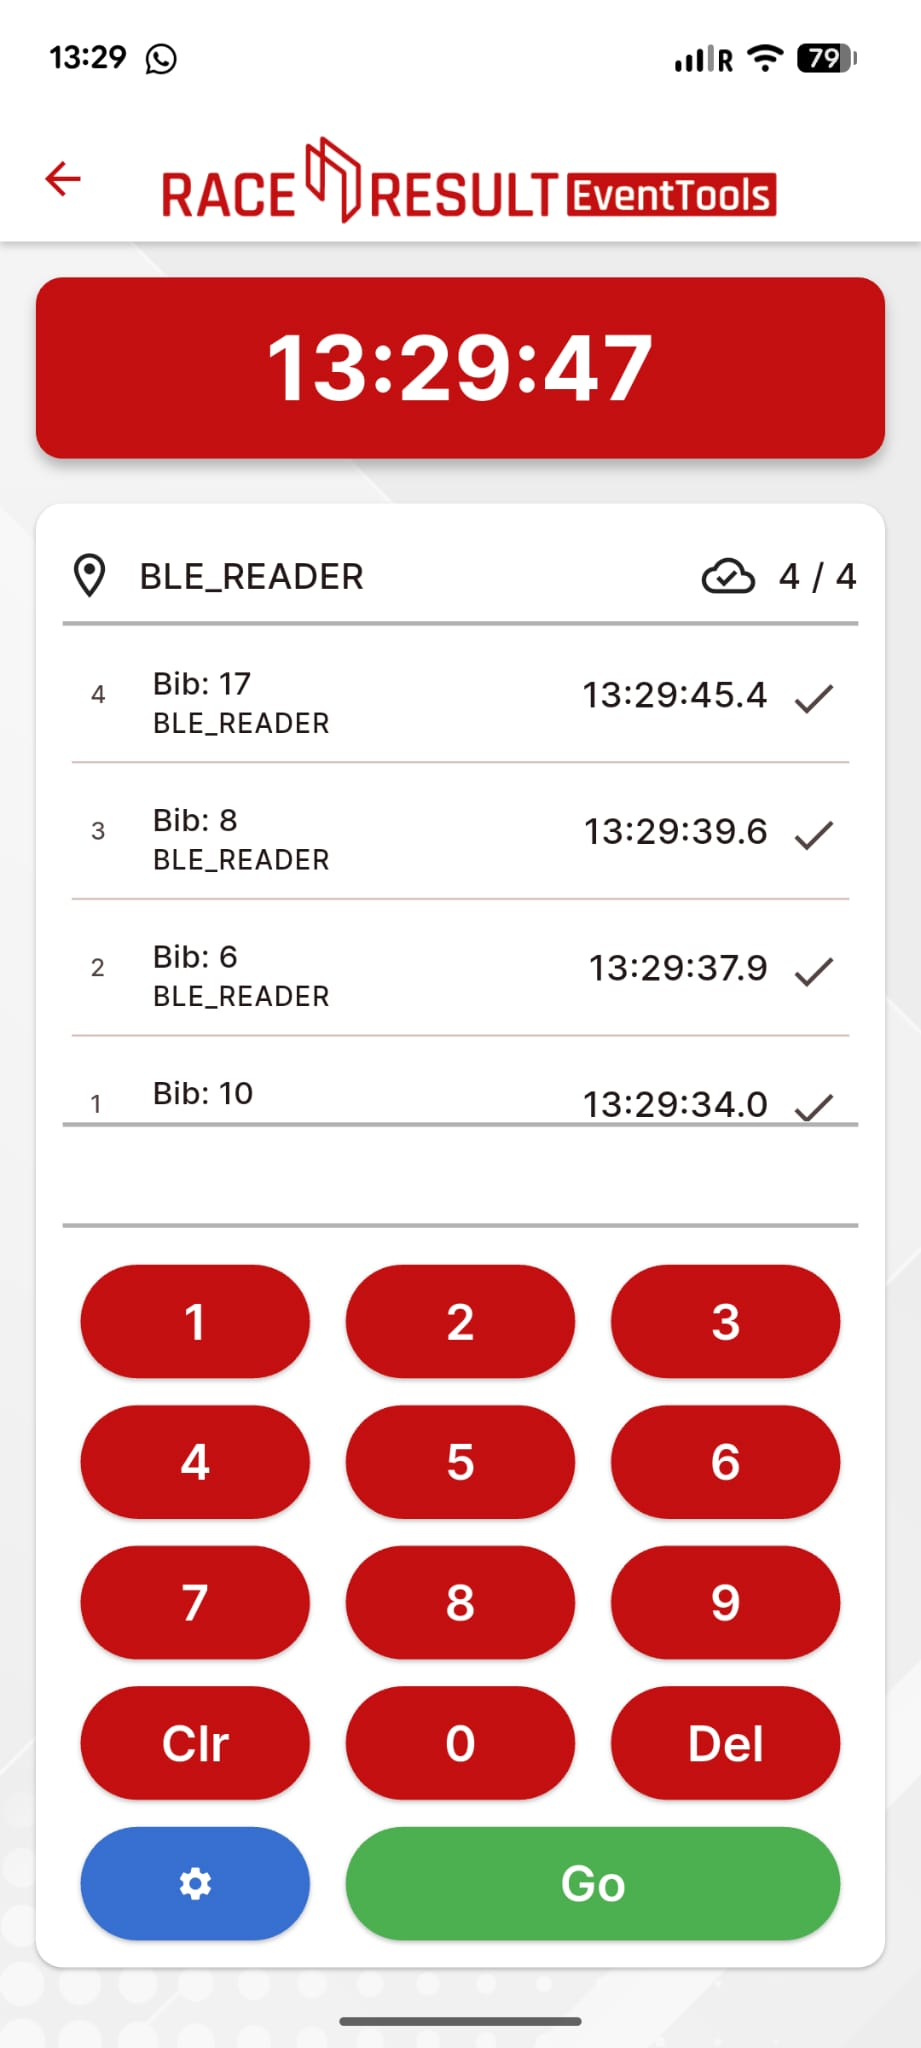
Creating the Presenter
After the output lists are configured, set up the presenter under Tools – Presenter to display the output on an LED wall or other screen.
For enhanced visual appeal, a background image may be added, with the output list positioned in the available space.
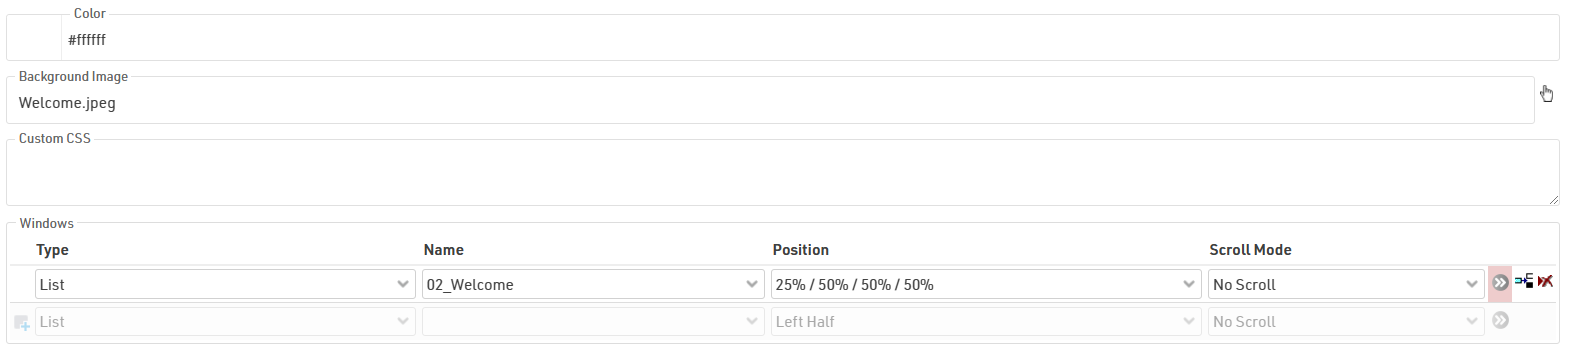
In the advanced settings of the presenter list (accessible via the grey arrows), configure the Font Size and set the page time to 1 second. This ensures that the presenter updates every second to capture new detections from the BLE Reader.

The final output should resemble the configuration illustrated above.
Equipment needed
BLE Reader:
For each presenter a customer wants to set up using the BLE Reader integration, the following components are required:
- one timing point
- one special result
- one BLE Reader
- one Smartphone/Tablet with EventTool session
Each presenter operates independently, meaning multiple presenters can run in parallel without interfering with each other.
Manual Input:
For each presenter a customer wants to set up using Manual input, the following components are required:
- one timing point
- one special result
- one Smartphone/Tablet with EventTool session
Each presenter operates independently, meaning multiple presenters can run in parallel without interfering with each other.
Publish a certificate
Certificates are a great way to reward participants with a personal memory and a shareable record of their performance. RACE RESULT Software allows you to generate and publish customized certificates for your participants directly online through my.raceresult.com.
Designing the Certificate Template
The process begins in the Certificates section of your event file. Here, you can design the layout and content of your certificate. The certificate editor allows you to place dynamic fields such as the participant’s name, finish time, position, or any other relevant data. You can fully customize the design to reflect your event’s branding.
Defining Eligibility via Certificate Sets
Once your template is ready, go to Certificate Sets. This section allows you to define which participants should receive which certificate. You can create multiple sets, each linked to a different certificate template, if needed.
For example, you might want to create separate certificates for different race distances, or only assign certificates to finishers. Certificate Sets use filters to target specific groups of participants based on result lists, timing points, or custom conditions.
Publishing Certificates Online
In the my.raceresult.com > Certificates/Details section, you can choose which Certificate Sets to publish and for which contests. You can enable or disable each set as needed, or set a time range during which the certificates will be available. By default, the system shows a preview of the certificate based on your design, but you can upload a custom image if you prefer. You can also change the name shown for the certificate by setting a custom label instead of using the default name of the Certificate Set.
Linking Certificates to the Personal Results Page
To show certificates directly on the personal results page, make sure the option “Link personal results page with certificates & details list” is enabled in each of the online pages you decided to publish.
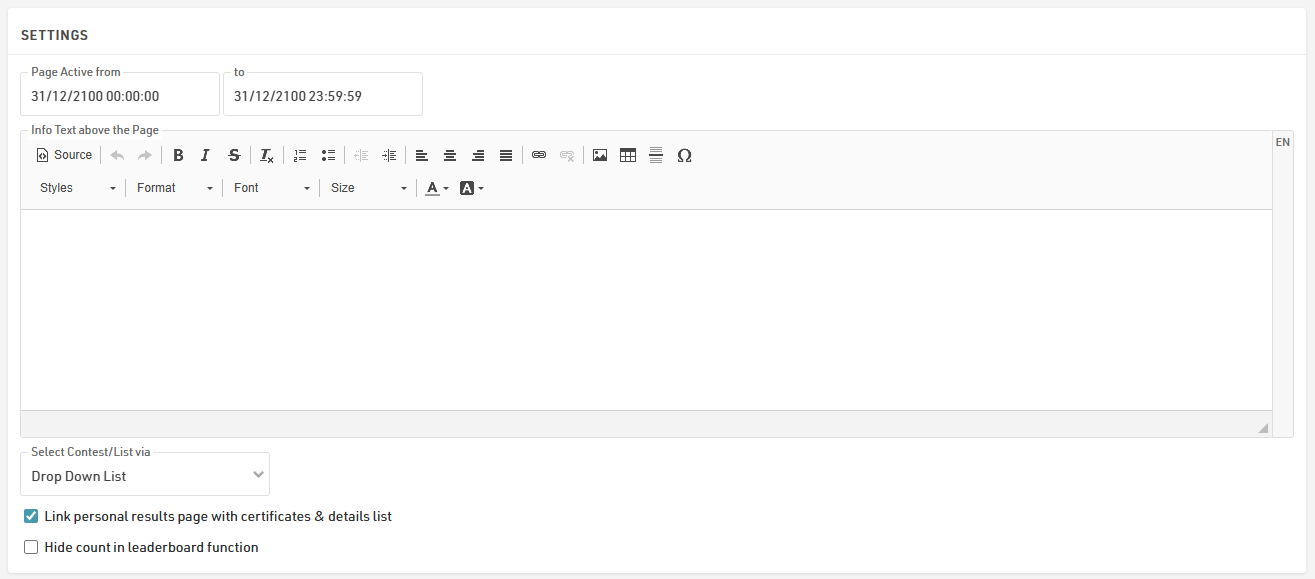
When this is active, a pop-up window appears when a participant clicks on their result. This window shows extra details about their timing and also includes links to any certificates available for that participant.