The following articles detail some administrative and technical steps for Race Result Software.
Create Backups
Regularly there is need to create a Backup of an event file, for example
- when one of several contests is finished and you would like to save the current data status.
- before operations which concern several or all participants, e.g. when deleting data or manipulating data.
Creating a Backup
There are several options to create a backup file of an event:
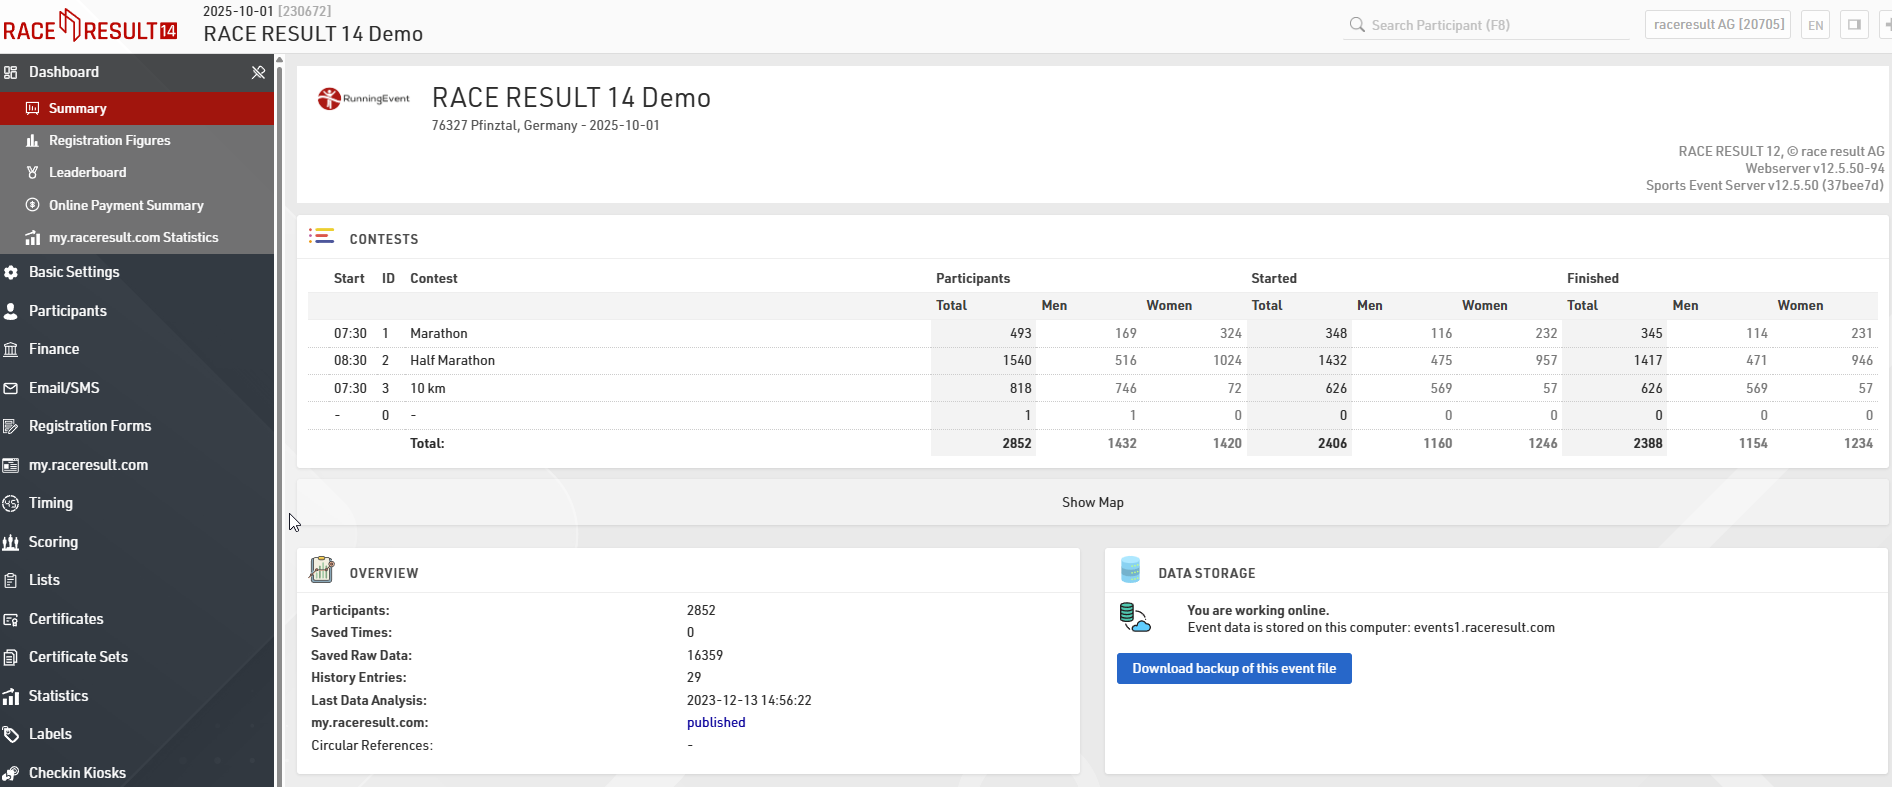
- Inside the Dashboard -> Summary you will find a link to download a backup (Note, this option is not available if you are not the owner of the file).
- When working offline, a backup can be created easily by copying the event file. Select the file in Windows Explorer and press CTRL+C and then CTRL+V.
Restoring a Backup
If something goes wrong during an operation and you want to revert to the backup, take the following steps:
If you work offline, take these steps:
- Close the RACE RESULT Web Server and all other programs that access the file.
- Rename the backup file to show that you are working with this file now, and then continue working with it as before.
- Remember to create a new backup if you want to try to execute the previously failed operation again.
If you work online and want to access a backup offline on your computer, it is best you take these two steps:
- Check out the faulty event file. Close the file after the download and delete it.
- Then open the backup file and check it in instead of the faulty file.
Automatic Backups
Every night a backup of all your events saved online is created automatically. If you need access to one of these backups, you can request the backup via email from RACE RESULT.
Backup without Backup file
If you executed an incorrect data manipulation but did not create a backup prior, there is still the possibility to use the History to undo your changes: In the Participants Window under History you can create a complete export of the history and thus create an Excel file which will rewrite the old values via the Participant Import (with the option Update existing participants).
Live Backup
The Live Backup is a function to always have an up-to-date backup on another computer or an external drive (e.g. USB thumb drive). In case of a black-out of the main computer (e.g. hard drive crash) you can continue working with the backup file on another computer.
The live backup is started in the RACE RESULT Web Server via File->Start Live Backup Locally (backup on a local drive) or Start Live Backup Externally (backup on another computer on which the race result software needs to be running).
Move an Online Event to a Different Account
Events can be shared with multiple accounts through the Access Rights.
It is not possible to directly transfer an existing event to a different account, a copy of the event file must be uploaded to the second account which will generate a new Event ID. Note that unless you delete the original event file, it will still remain active.
Download backup of the event file
Under Dashboard >Summary, download a backup copy of the event file.
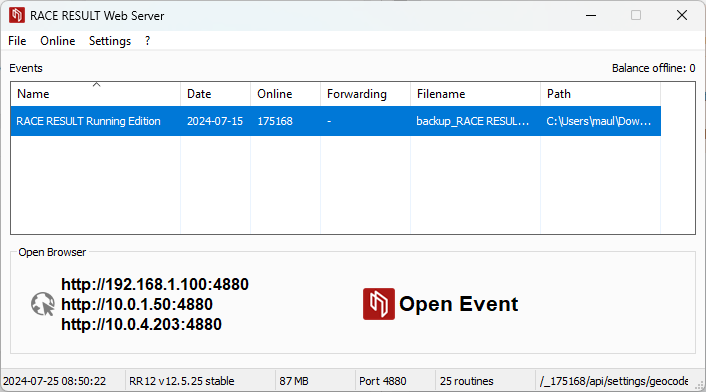
Remove the connection to the event online
Once the event has been downloaded, open it in the offline RACE RESULT Web Server. At this time, the event is still linked to the original online Event ID (in this example, 175168).
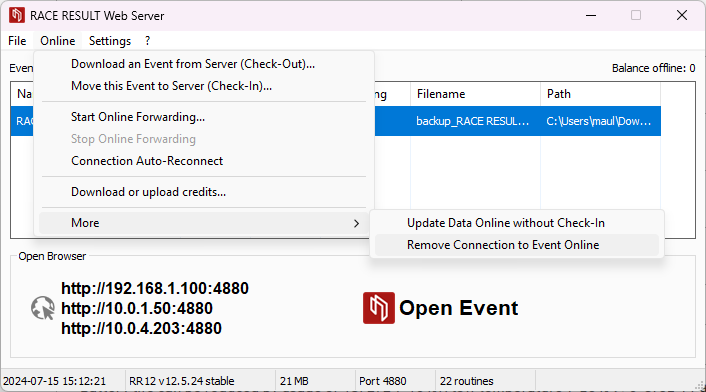
Under Online>More, select Remove Connection to Event Online
Upload the event to the other account
Now that the event is no longer set to the original Event ID, it is possible to upload it to a second account by checking-in the file via Online > Move this Event to Server (Check-In).
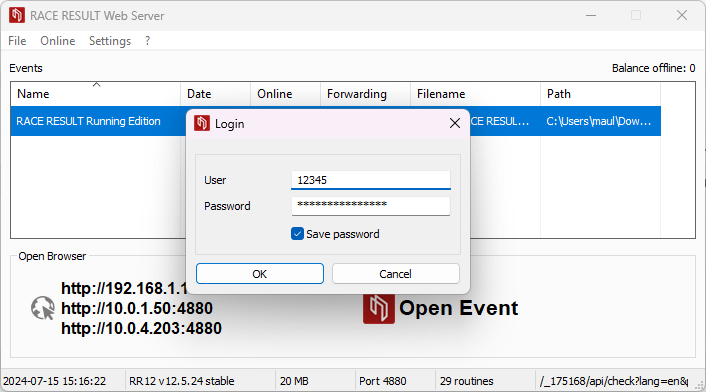
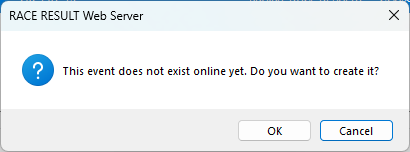
The Web Server will warn that the event does not exist and will ask if it should be created, select ok to confirm the upload.
Use Custom Fonts
Fonts can be added to the RACE RESULT Software offline by installing them to your computer as you would install any new font. Fonts are reloaded into the software every 5 minutes or when restarting the RACE RESULT Web Server. These fonts can then be used for certificates, PDFs or even Presenter screens.
Browsers will cache the list of fonts for 24 hours so new fonts will not be visible until you clear your cache or wait 24 hours.
Offline fonts will NOT transfer online. The list of fonts online are fonts available from our servers. This list can not be added to at this time.
Insert Images / Files
Lists
Images stored here can be directly inserted into lists using the "[img:.....]" tag.
Certificates
Images can be inserted using either a standard image insert, which opens an image selection window when clicked, or as a data dependent image. For data dependent images you must use the image name, exactly as saved, as text in your expression.
my.raceresult.com Text Boxes
When inserting images in text boxes, such as the Info Page, you must use the image URL to insert the image. When an event file is accessible via my.raceresult.com each image has a publicly accessible URL which can be used to access images in all parts of the software. The format is as follows:
https://my.raceresult.com/EventID/elements/picture.php?eventid=EventID&name=imagename.png
where the EventID and imagename must be replaced with the corresponding Event ID and correct file name.
In the text box of your choice click on the image icon to add an image, the link icon can also be used to link to other files stored in your event file, such as PDFs which may be used for an event guide.

In the image properties box add relevant URL for your image, you can adjust the image size by using the width and height settings.
E-mails
Images can be inserted into Creating Email Templates in the same way as my.raceresult.com text boxes using the image url.
If attaching images or files as an attachment to your template then you must ensure that the file type is included in the attachment name, otherwise, the file will be sent with no type and the recipient may be unable to open the file correctly.
When inserting images into e-mail templates you can optimize the URL by using the Event.ID data field within the URL so it is automatically updated when you copy an event file. This can be useful for e-mail templates if you always use the same name for particular images such as headers or logos.
https://my.raceresult.com/[Event.ID]/elements/picture.php?eventid=[Event.ID]&name=imagename.png
Accessing images in folders
If your image is the common or my folder you need to use URL encoding to access that folder. When accessing a folder normally you would use a slash in between the folder and the file name. Here we want to replace the slash with the URL encoded version of a slash which is %5C. In this example, we are accessing the my folder.
https://my.raceresult.com/EventID/elements/picture.php?eventid=EventID&name=my%5Cimagename.pn
How to use Swap Data
Bib Transponders
When participants have swapped their BIB Transponders, follow these steps depending on when the issue is identified:
-
Before the Race:
Simply swap the BIB numbers between the participants via the Swap Bib Numbers. This ensures that all associated data, including transponder readings, will be processed correctly. -
During the Race:
Use the "Swap Participants Data" function. This will update the participant data, swapping BIB numbers and raw timing data between the affected participants. -
After the Race:
As with during the race, use the "Swap Participants Data" function to swap BIB numbers and raw data.
Reusable Transponders
(A-Z Transponders, HuTags, Active Transponders, Bib transponders not linked to the bib number)
If participants swap Reusable Transponders, the approach depends on whether you’re using the Transponder Field or a Chip File for mapping:
Using the Transponder Field
-
Before the Race:
Manually update the transponder fields in the participants tab, to reflect the correct assignment. -
During the Race:
-
Pause timing to avoid further incorrect reads.
-
Use the "Swap Raw Data" function to correct timing data between participants.
-
Update the transponder fields in the participant records to reflect the correct assignment.
-
Resume timing.
-
-
After the Race:
Use the "Swap Raw Data" function to adjust results. Additionally, update the transponder fields if you need to replay timing reads later for verification.
Using the Chip File
-
Before the Race:
-
Edit the chip file, ensuring proper transponder-to-participant mapping.
-
-
During the Race:
-
Pause timing to prevent further incorrect reads.
-
Use the "Swap Raw Data" function to correct timing data between participants.
-
Update the chip file with the correct transponder assignments.
-
Resume timing.
-
-
After the Race:
-
Use the "Swap Raw Data" function to adjust results. Additionally, update the chip file if you plan to replay timing reads later for verification.
-