Data management is a critical part of RACE RESULT 14 and ensuring a logical data structure is an important step when managing your event.
RACE RESULT 14 already contains some basic default fields for storing participant data, if you wish to store additional participant data fields then you may need to create some additional fields for this.
Other fields
You can create as many additional fields as required for storing participant data, these fields may be used for example to record a t-shirt size, emergency contact information or relay team member information.

Additional fields must first be given a type, this controls how the data should be entered and what values are accepted. Each field must also be given a name, this is the internal name, which must be unique throughout the whole event file and must be entered without any spaces or special characters, the label is the field label which will be displayed publicly.
For additional fields of type Drop Down you should then also enter the values which will be available or accepted.
It is also possible to have these additional fields automatically generated by RACE RESULT 12 when manually importing participants.
Participant Registration
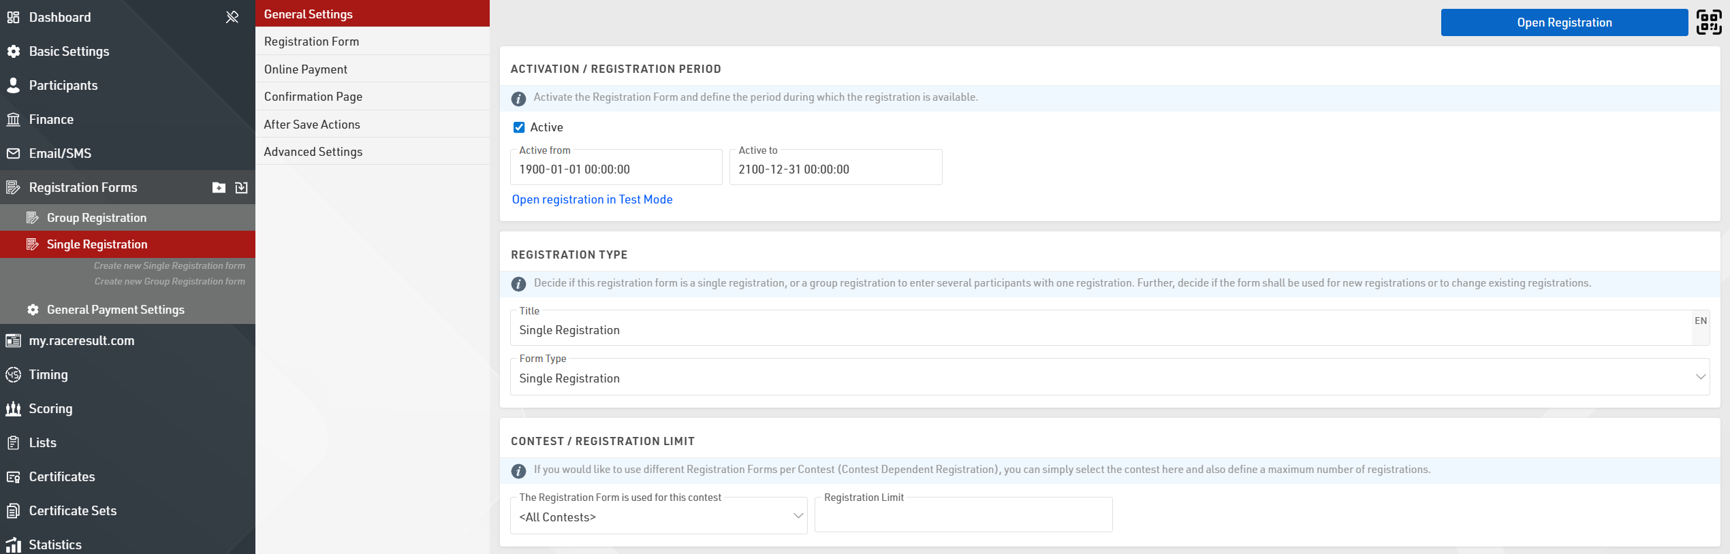
Registration through RACE RESULT 14 is handled through registration forms. Registration forms can be used to capture participant data, receive payment, and send an automated e-mail confirmation. These registration forms can be used for both online registration and on-site registration, even when working offline.
There are two main types of registration:
- Single Registration - A single participant registering at a time
- Group Registration - A group of participants all registering together
By default one of each type of registration forms is created in each template but you can create multiple forms for different purposes if required.
You will need to define when a registration form is active, and tick the box to enable it.
At a basic level these default forms have two steps, the first for recording the participant information and the second is for the participant to check their information and accept the terms and conditions of registration.
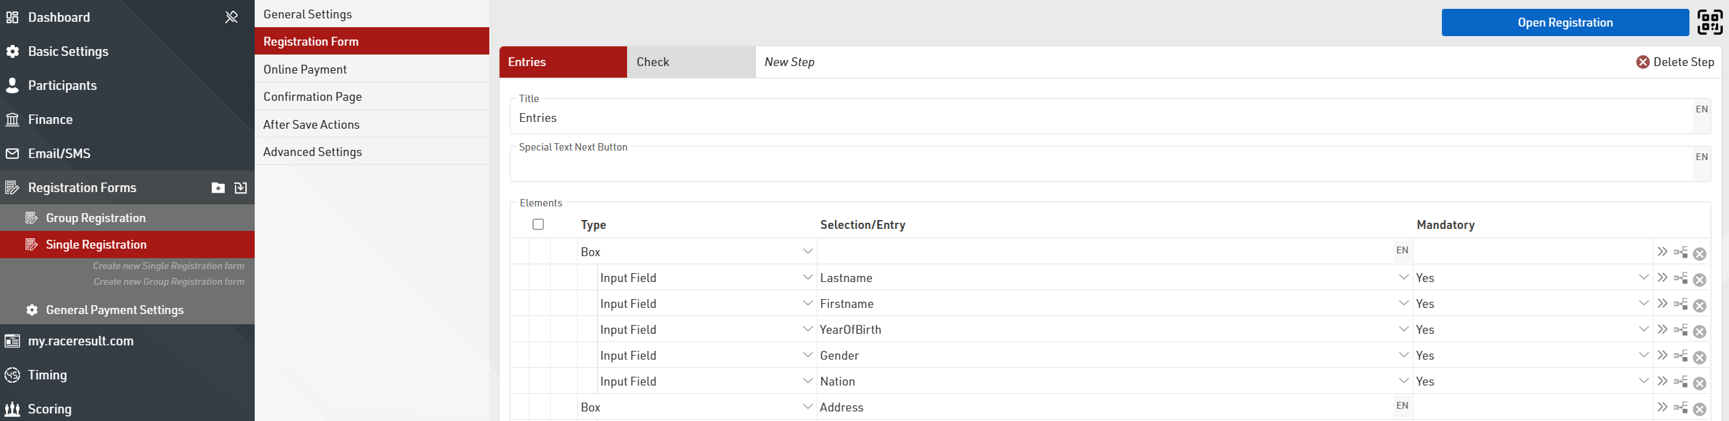
You can easily add additional Input fields to capture additional data in the form.
When capturing payment it is important to additionally setup the entry fees for your event. A default Email Template is also setup for each type of registration form which will be sent when the registration is completed as per the After Save Actions settings.
Due to the complex nature of registration forms - if you wish to create more complex registration forms please read the main Registration Forms guide.
Entry Fees
Entry Fees are automatically calculated for all participants according to the Entry Fees setup. The currency is always based on the Currency defined in the Event Basic Settings.
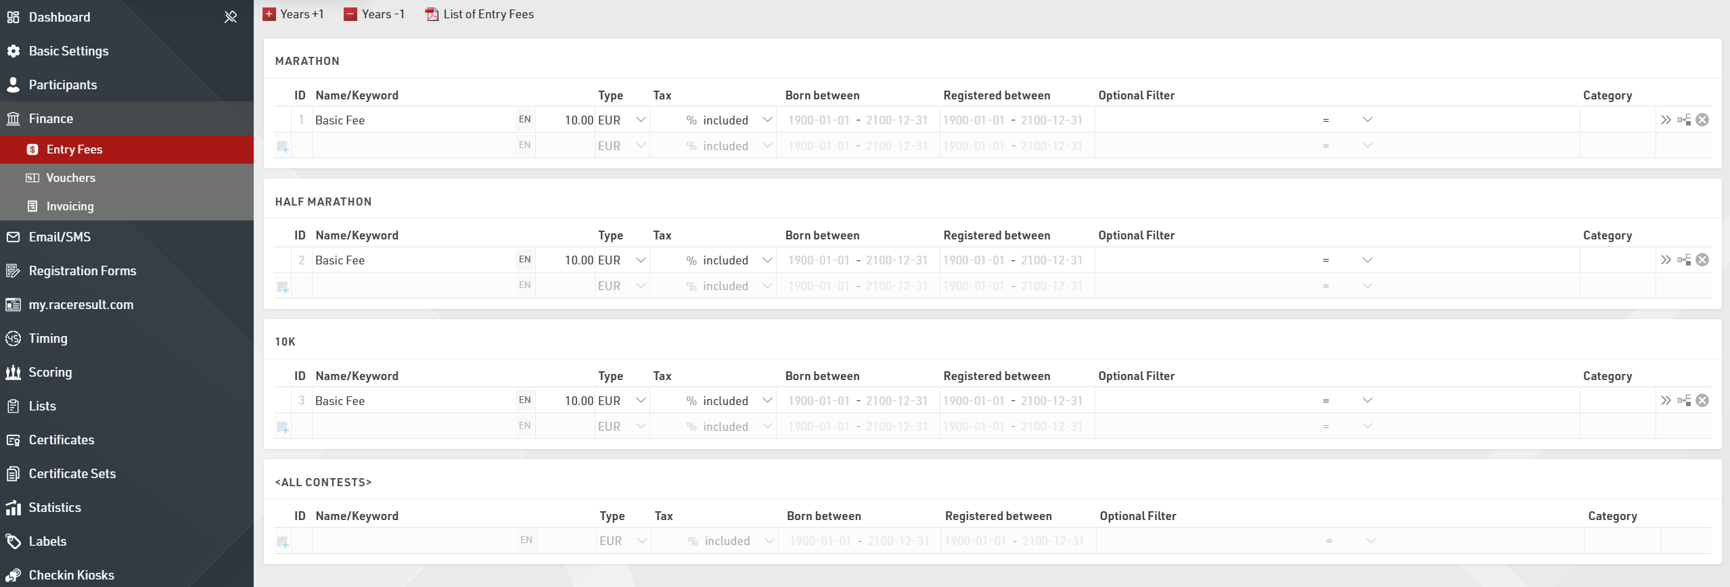
Entry Fees can be defined individually for each Contest or applied to all Contests.
To add additional Entry Fees you simply need to define the Name and Value, the Entry Fees will be automatically applied to all participants or you can define some additional filters for individual Entry Fees.
For example, if you wish to charge an additional fee for participants who select a T-Shirt during the registration you would apply a filter on the TShirt field.

If Entry Fees should be applied for different ages then the Born Between filter uses a date range which considers the participant DateOfBirth field to apply the Entry Fee.
The Registered Between filter gives the option to create tiered pricing based on the date of registration, this again uses a date range which is evaluated at the time of registration, or based on the date the participant record was created.
Importing Participants
If you are not utilizing the registration through RACE RESULT 14 it is also possible to import participants from an Excel or CSV file.

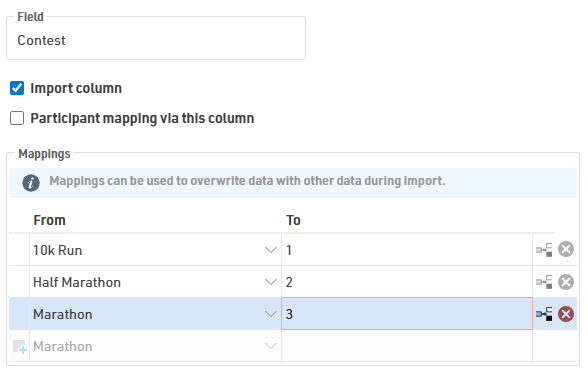
Include column headers in the first row to enable automatic field mapping. If headers are missing or do not match field names a  will show in the import preview, they can be mapped manually or skipped for import.

Contest and other data that must match the format already in the event file can be manipulated. For example, Contest names must match the event file or Contest ID can also be used.
When importing ages use one of DateOfBirth, YearOfBirth, or Age, importing more than one causes data conflicts.
Once you have mapped the data to import, choose whether you are only adding new participants, only updating existing participants, or both adding and updating participants.
If you are updating participants you can choose how participants should be matched to the data, normally this will be done using the Bib number.
Save repetitive configurations as an Import Template. Templates can be set as default or exported to other event files.