During your event, you will primarily be working in the Timing tab. This contains the tools required to connect to your timing hardware to collect the times in the software, set the start time and monitor the event as it is ongoing.
Timing System Connection
For most events you will work with the Chip Timing page during the event, here you will need to connect to your timing system(s) in order to record the times in the software. This will additionally be used to later set the Start Times.
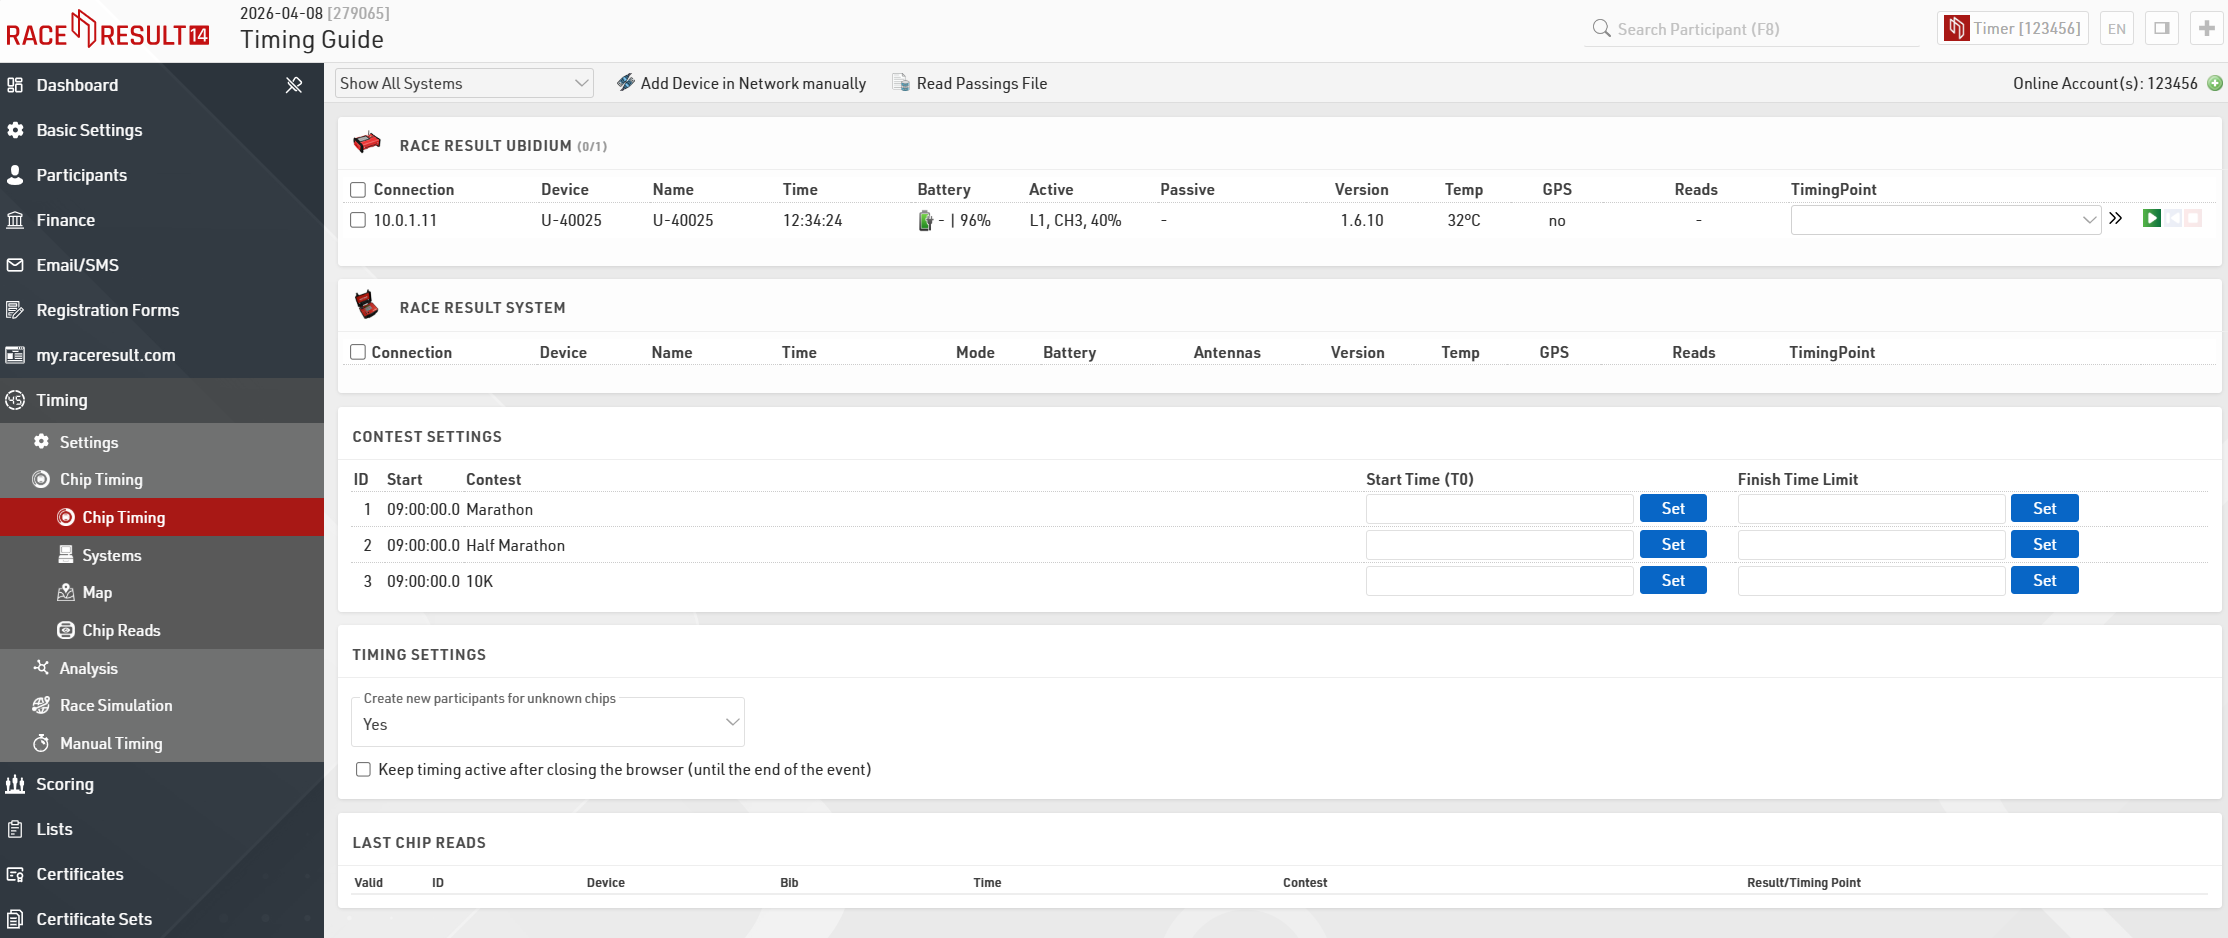
Systems that are connected online to your customer account will be listed automatically ready to connect.
If you are connecting to a system via a local connection, either LAN or Wi-Fi, then you will need to ensure that you have the RACE RESULT Web Server running on your computer and that your IP configuration is correct on both your timing system and computer.

Once you identify your system correctly you will need to assign the correct Timing Point to each system, this will assign all raw data received from that system to the corresponding Timing Point.
To now start receiving times from the system click the green play button, this opens a connection to the system and you are ready to start the race.
If you are only able to connect to the system after it has already recorded some times, or if for some reason the connection was broken, you can click the blue button to replay the current file from the system.
At the end of the event, you should click the red stop button to close the connection to the system.
Start Times
RACE RESULT 14 refers to the Start Time as T0, and this value is then used by all your Splits or Special Results settings to calculate the times.

By default in all templates, the Start Times are set individually by each Contest, however, this value can be set according to any wave definition required. If you require a more advanced wave setup then see the guide on Multiple Wave Starts, if using this then you will need to navigate to the Start Times / Finish Time Limit page within the Timing Tab to set the Start Times.

Set the Start Time for each Contest by clicking the Set button, this will use the time from your timing system to get the most accurate possible Start Time.
Alternatively, you can also manually type the time in the input box, this may be necessary if you have multiple Contests starting simultaneously and you need to ensure they all have the same Start Time. Start times should always be entered as a time of day, the times will be saved automatically when exiting the text box.
Once the Start Time has been set then a timer will be displayed on the right-hand side showing the current race time.
You do not need to take any additional steps to stop the race unless you have a time limit after which no more times should be counted. In this case, you can set the Finish Time Limit in the same way as the Start Time, this should also be entered as a time of day.
Monitoring
During the event, you should continue to monitor the timing system and your results to ensure everything is being recorded and calculated as you expect.
Timing System
It is always advisable to monitor the timing system during the event, the Chip Timing screen gives you a good overview of your system at all times.
You should ensure that the system remains connected and that times are still being sent to the software, and monitor the battery life of your system - especially during long events. Additionally, ensure that the system is not reporting any errors - for example, if a loop cable has been pulled out or a passive antenna disconnected.
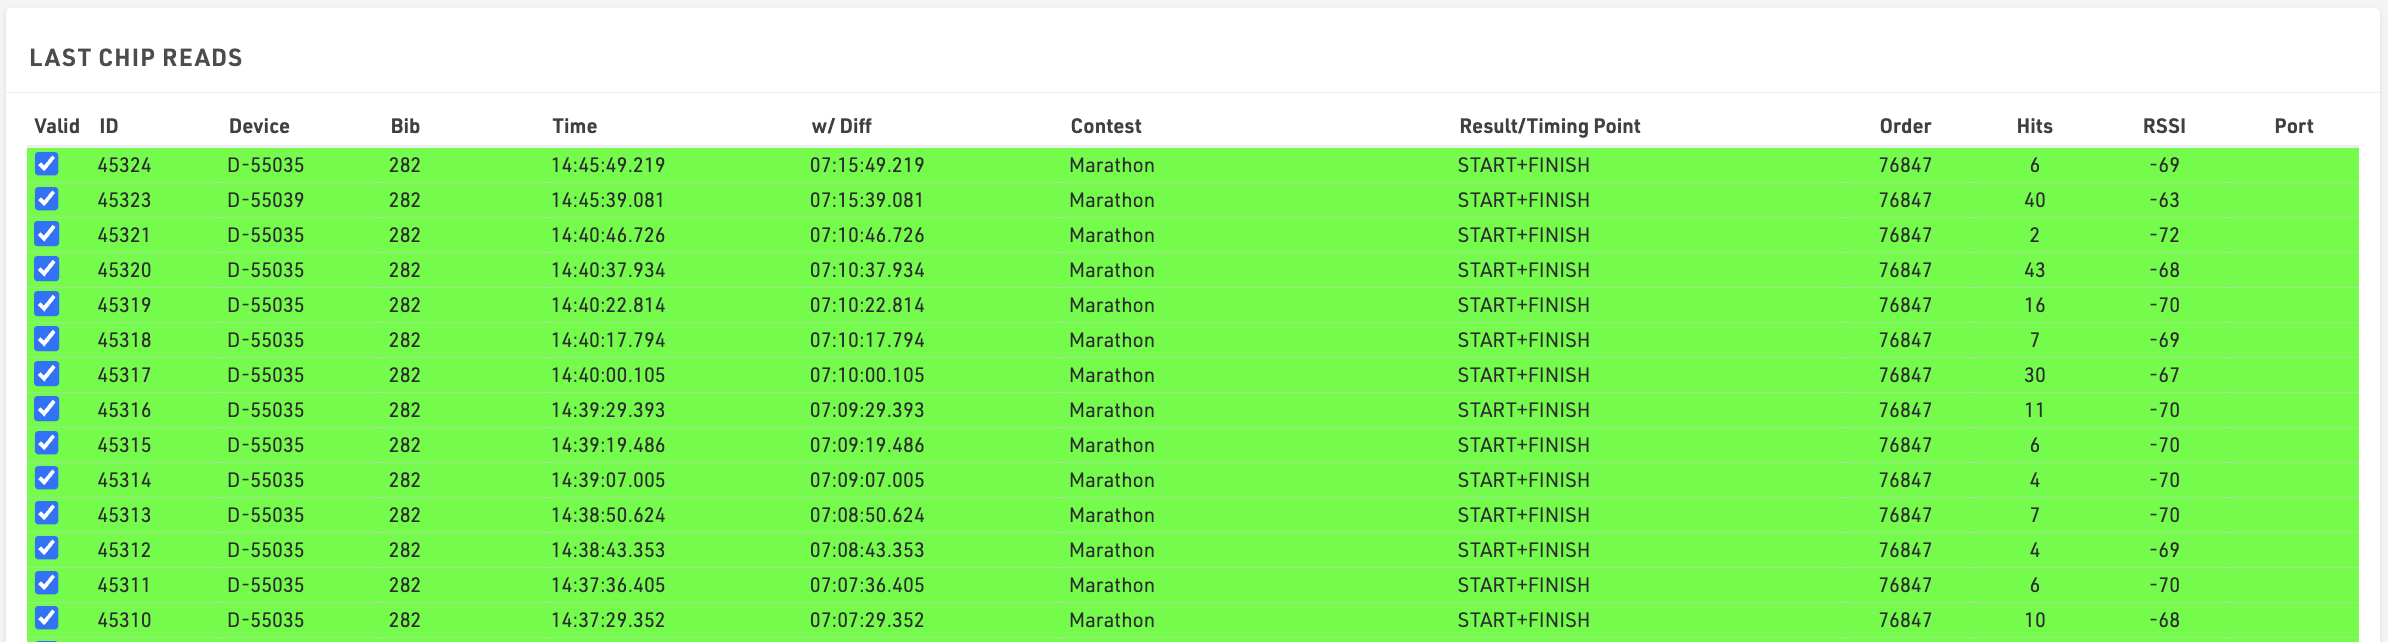
At the bottom of the Chip Timing screen, you can also see an overview of the Last Chip Reads, here you can see the latest data that has been received from your timing system.
Time Visualisation
Time Visualisation is a useful tool for quickly checking that your times are all handled correctly and identifying any missing passings.
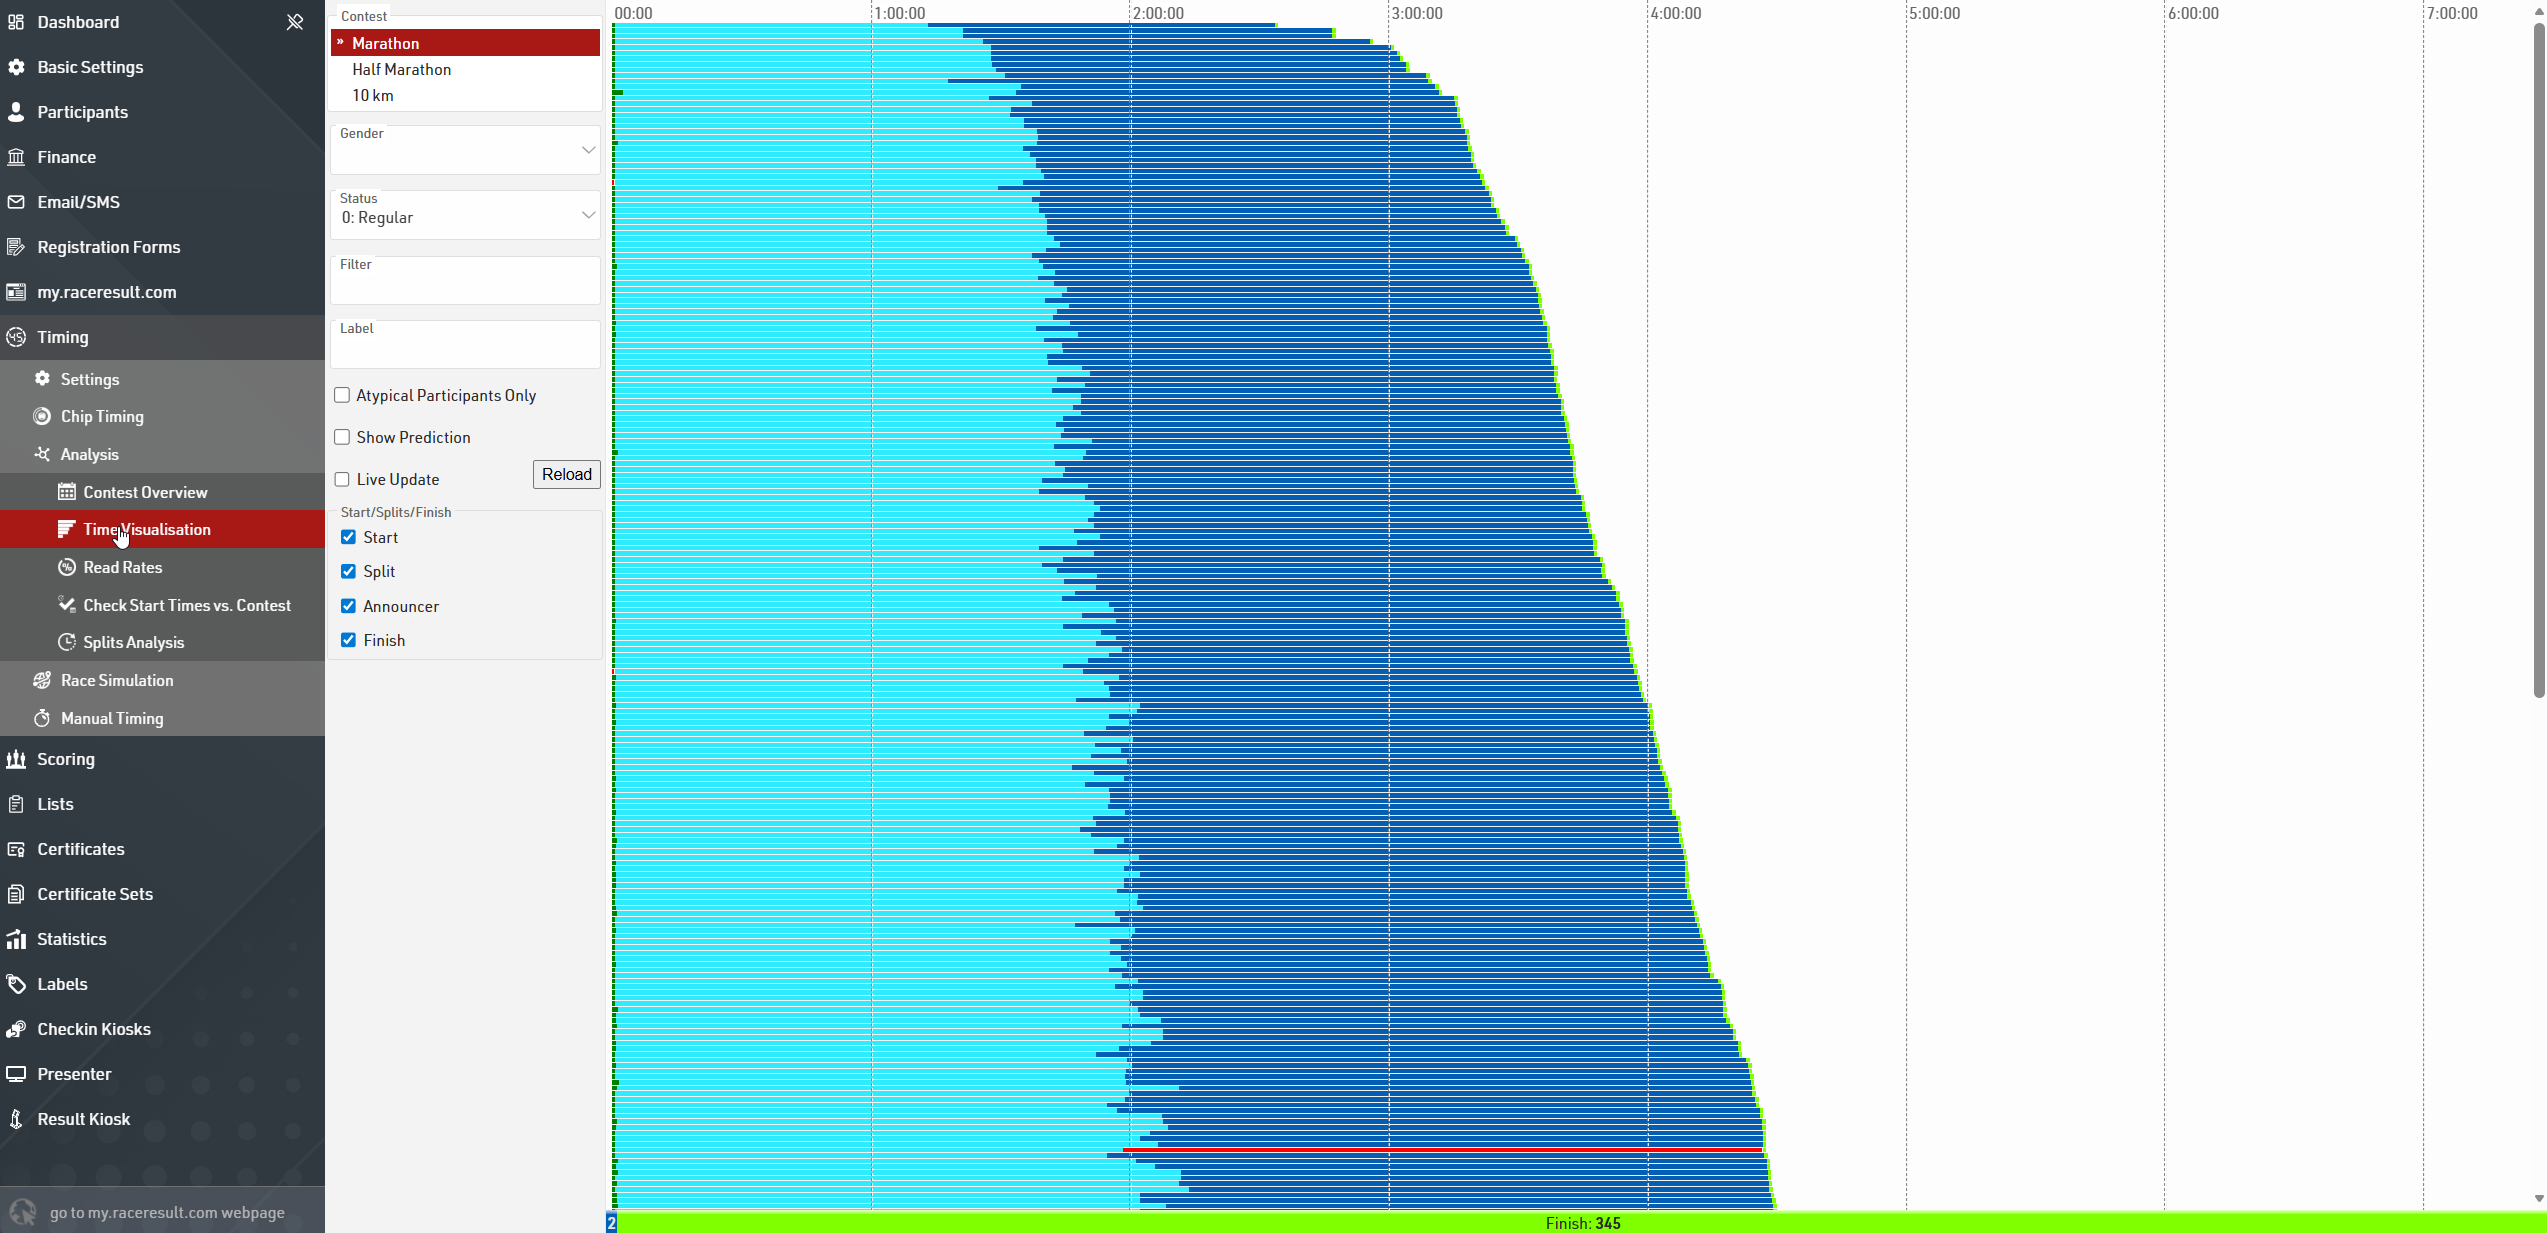
The graph shows a bar for each participant with at least one time in the selected Splits or Special Results. A red bar indicates that a time is missing and should be checked.

Clicking the bar will open a popup with the information for that participant including their times at each of the Splits or Results and the possibility to change their Status.
You can quickly view all participants with missing times by ticking the box for Atypical Participants Only.
Results
The simplest way to additionally check everything is correct is to check your results Output Lists. The best time to do this is immediately after the first participant has finished.
If they do not have a finish time then you may need to check why!
- Do they have a time recorded at the finish? Check the Timing Raw Data tab in the participant record.
- Does their time fit the minimum and maximum rules for your finish Split?
- Is the Start Time set correctly?
- Is their Status equal to 0 (Regular)?
Adding Missing Times
When viewing a participant with a missing time on the Time Visualisation, the missing time will be highlighted in red. You can quickly add predicted times by clicking the plus button and hitting enter after confirming the missing time.
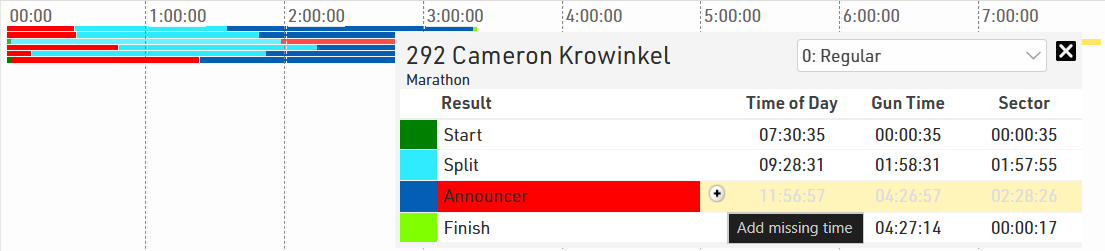
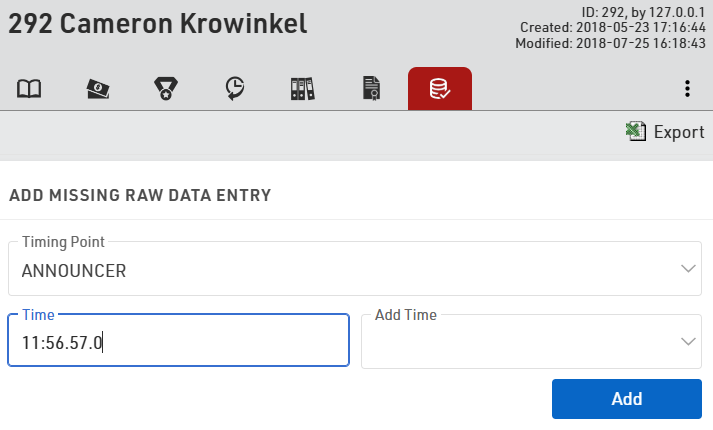
Additionally, times can be added manually in the Timing Raw Data tab of the Participant view. To do this, select the correct timing point and then enter the correct time to add to the participants raw data with "(Manual)" listed as the device.