The my.raceresult.com event page has been redesigned from a fixed set of sub-pages to a more flexible tab-based system. Tabs can be set up with different names, types, and timing so you can better control the design of the event page on my.raceresult.com. Existing event files are automatically converted to this new structure. New events will populate with a standard set of default tabs, including Info, Registration, Participants, Live, Results, Reviews, and Contact. Each of these can now be moved, renamed, or scheduled independently.

Title / URL Settings
This box defines how the tab appears in the navigation menu, what template is used, and the web address.
URL Preset: Select a standard template and path. This automatically sets the tab's behavior.
Title: If you want a custom name in the menu (e.g. "See Your Times" instead of "Results"), enter it here. Translation is possible by selecting the chosen languages and adding the text. If left empty, the URL Preset name is used.
Custom URL: When using a Custom URL preset, you can define a custom url here.
General Settings
These controls manage page status and visibility. The Publish button enables the tab's public URL. Menu Visibility determines how users navigate to the tab:
- Never: Always hidden from the menu; accessible via direct link or embed.
- When Active: Visible only during Page Active From/To dates.
- Always: Always visible; appears greyed out outside of Page Active From/To dates.
Use the Page Active From / to fields to automate access to the tab based on a schedule, for example turning Registration off and Live Results on at the event start.
Adding a New Tab
When adding a new tab you first select the type of content for the tab. The new tab's template will depend on your selection. Text will use the info template and external content will embed content or video from outside sources.
Info / Text
Events on my.raceresult.com can have an "Info" tab that can display text, HTML or embed a website, this is the default landing page for the event if configured.
Inside the Info text it is possible to use a limited set of specific fields for dynamically displaying data, the supported fields are as follows:
- [Event.Name]
- [Event.Location]
- [Event.Zip]
- [Event.State]
- [Event.Street]
- [Event.Date]
- [Event.AttributeName] - The user-defined attributes for the Event.
- [CounterX] - Where X should be replaced by a Contest ID to display the number of participants currently registered for that Contest.
These fields can also be used in the Info text on the Registration page.
Note that some websites may not permit embedding and so will not load, you will need to check the hosting settings for your website in this case.
Registration
Your Registration Forms can be included in the my.raceresult event to accept registrations and payment online.
Basic Settings
The registration page must be activated by checking Activate Online Registration, and a date range can be entered to define when the registration page should be available, according to the time zone set in your event file basic settings. Note that this is separate from the individual Registration Form active date range.
Info Text
The Info Text is displayed at the top of the registration page to provide additional information to participants looking to register, this can be entered as HTML allowing for complete customisation.
Registration Forms
Multiple Registration forms can be added to the registration page, each of which already defines the available dates and contests for the form.
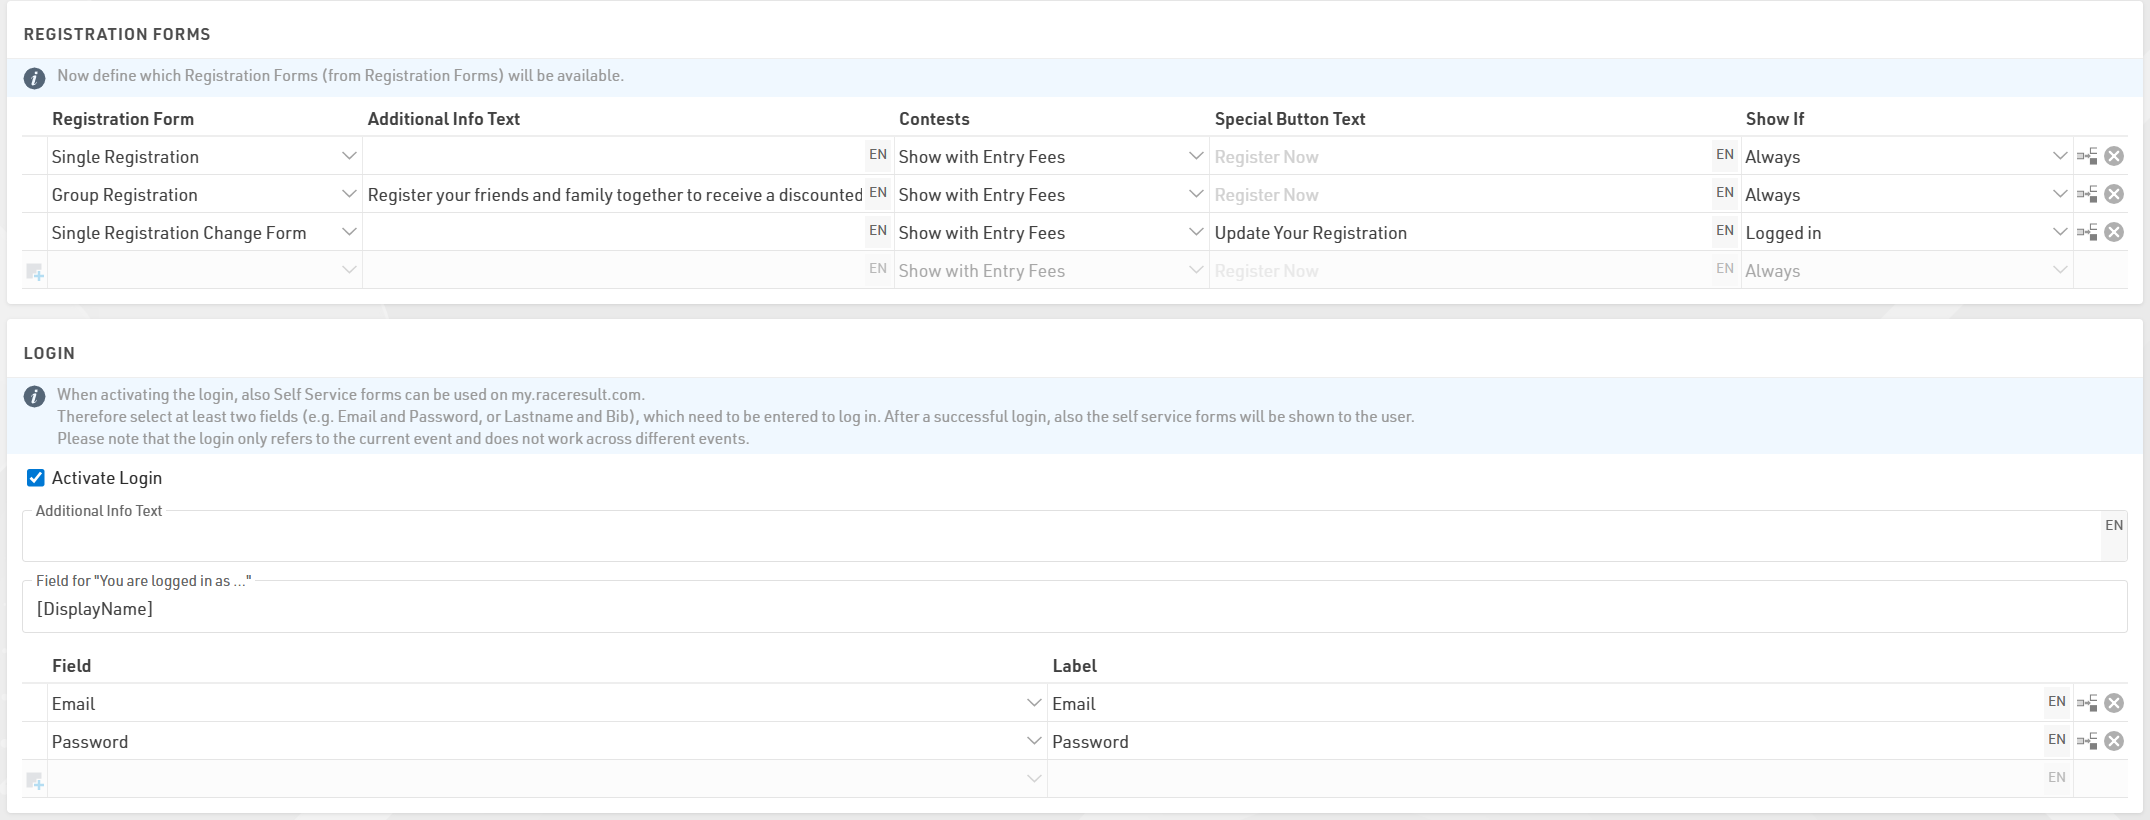
For each form you can define some additional info text to be displayed below the form title.
Selecting Show with Entry Fees will show a summary of the applicable entry fees for each available contest in that form.
You can also optionally relabel the button to start registration for each form.
If Login is activated then an additional dropdown will control which forms should be shown always, only when logged in, or only when not logged in.
Test Mode
Test mode allows you, or a third-party to test a registration form before the registration period, when in test mode the payment will not be captured.
It is advised to enter a date up to which the test mode is active to prevent this link from being used for an actual registration.
A link is available to open the registration page in test mode so this page can be accessed even before it is available according to the date range, note that it still must first be activated .
When in test mode it is possible to simulate specific dates by adding the query parameter &testDate= to the URL, this is useful for validating entry fees or active date ranges for specific fields.
e.g. &testDate=2026-12-25 would simulate registration on 25th December 2026.
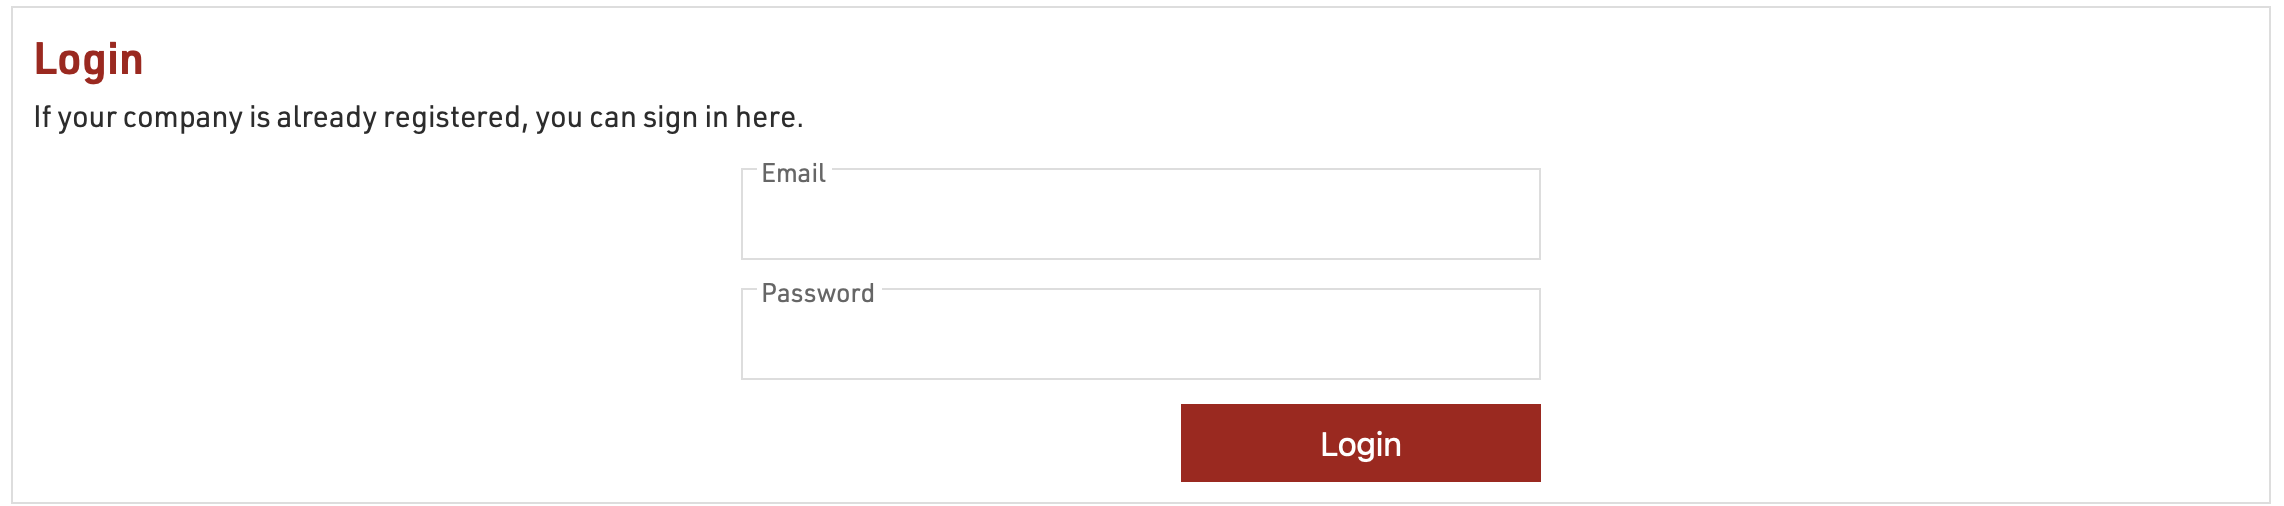
Login
Login can be used to allow users to login to access specific registration forms or self service forms: this is commonly used for Company-Races where only one member of a team is in charge of the registration of all members of a team.
Please note the Login is not mandatory for using the Online Self Service. You can set up a self service form and use ChangeLink() to send a Changelink to participants via mail, by integrating the ChangeLink() in the email body.
This is primarily used for corporate registrations where a team manager may then register additional team members and ensure they are registered to the correct team / club, or with series registration where members may login to retrieve their details easily.
Note that the login is only accessible within the event it is set up and cannot be used across multiple event files.
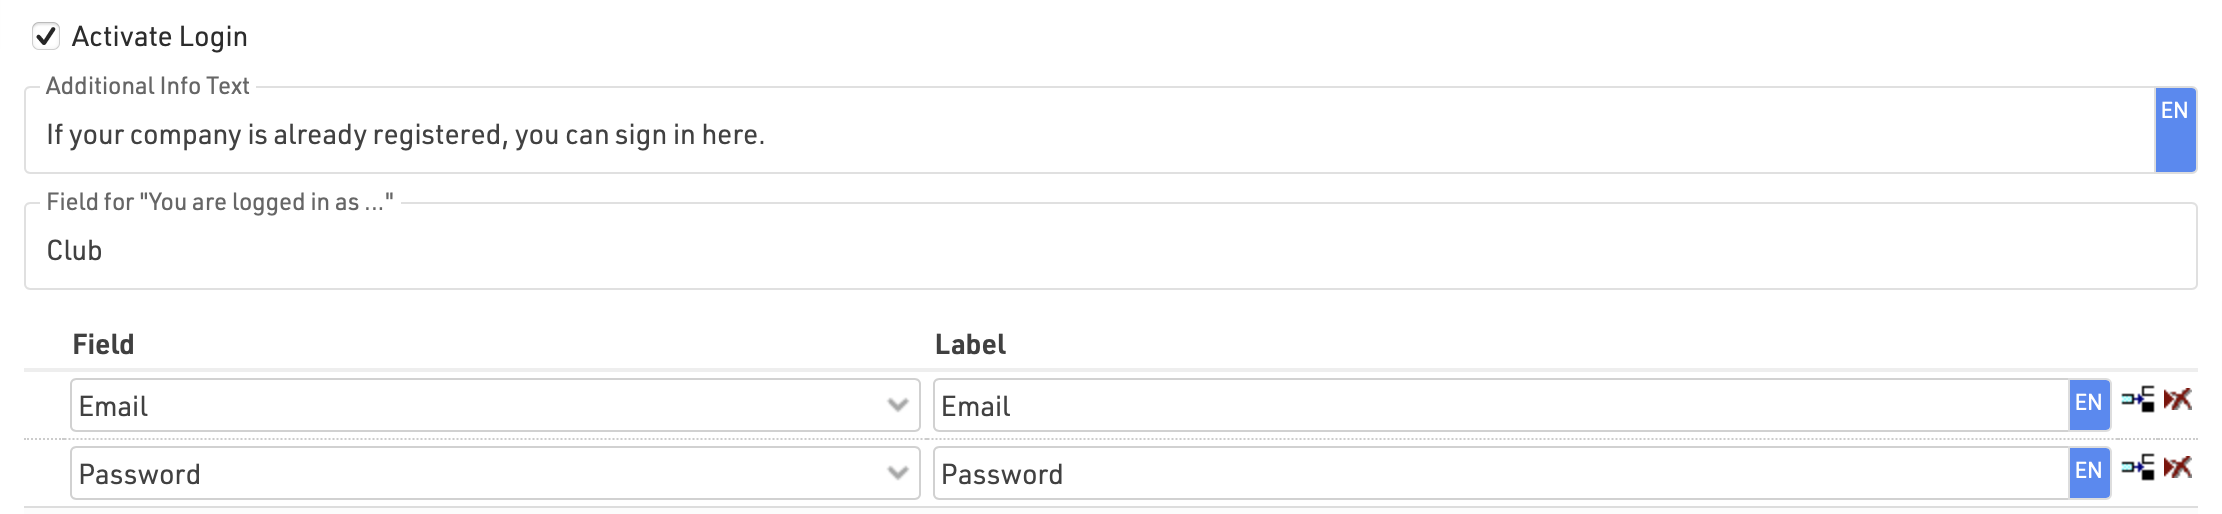
To allow users to login add at least two fields to be used to login, these should be captured in the initial registration and must be unique. Most commonly this would be an e-mail and the password field (which is stored as a hashed value).
When logged in you can show additional specific registration forms or self-service forms for the user to access.
Additionally, fields from the logged in user can be called in Store Additional Values in the advanced settings of registration forms.
Lists
The Lists templates allow you to publish lists on my.raceresult.com, each tab is intended to make it easier for viewers to find what they need.
The general use case for each template is as follows:
- Participants - Intended for start lists / information before the race.
- Live - Intended for Live Results DURING a race, to show leaderboards etc.
- Results - Intended for full results lists after a race.
Settings
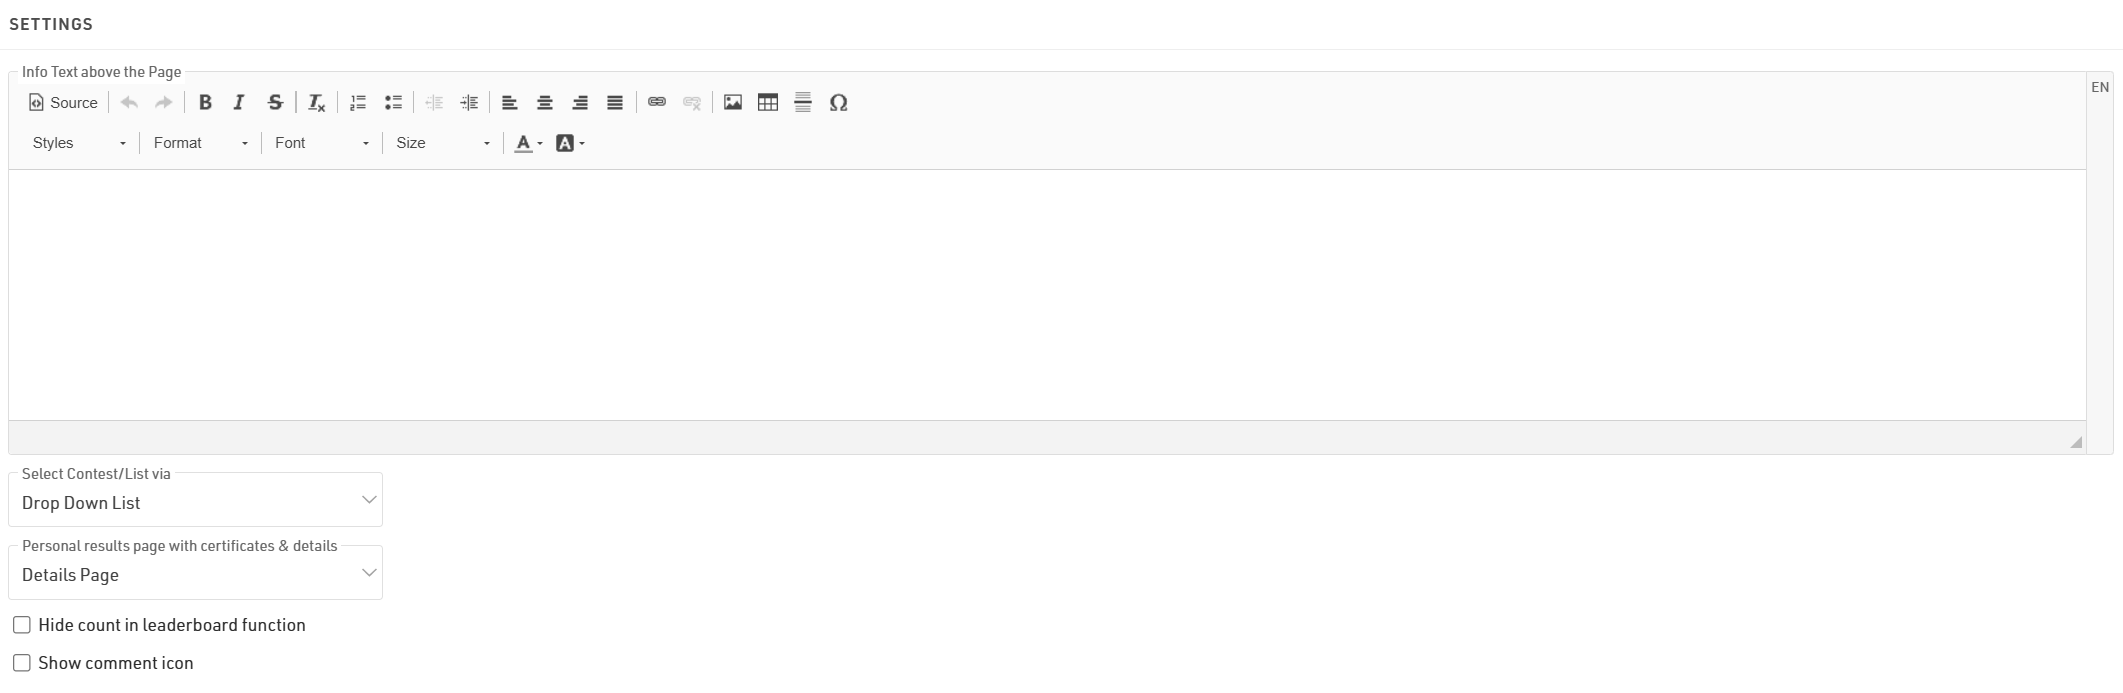
The info text will be shown above your lists and can contain additional HTML content.
If you have multiple lists they can be displayed / selected using either a drop-down list or selector boxes, the 2 options are explained in the below article.
If you select a Personal results page with certificates & details it will enable a popup window when clicking a participant within a list, this popup contains the details list and additional details as configured in the Participant Views settings.
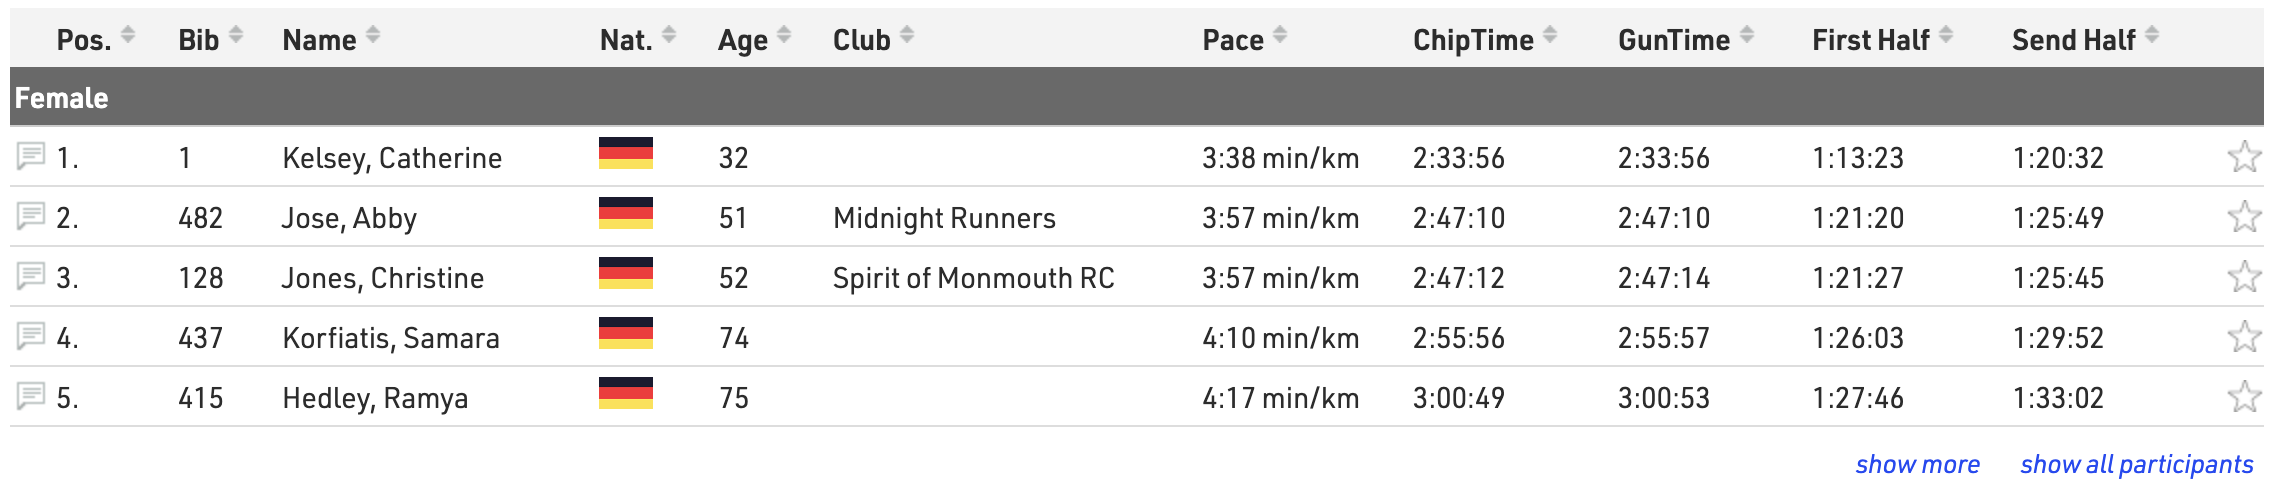
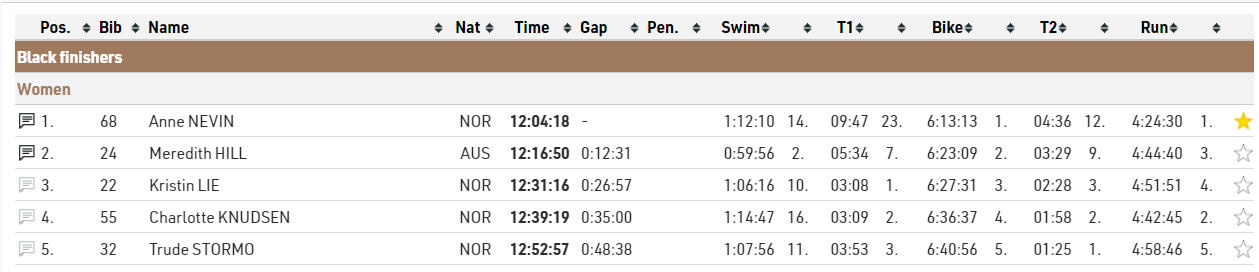
When using the Leaderboard function for a list it will have an option to "Show X participants" where x is the total number of participants within the group, hiding this will replace X with "all."
Selecting the Show comment icon will show a  next to each participant in the list. Allowing viewers to see and add comments for specific participants.
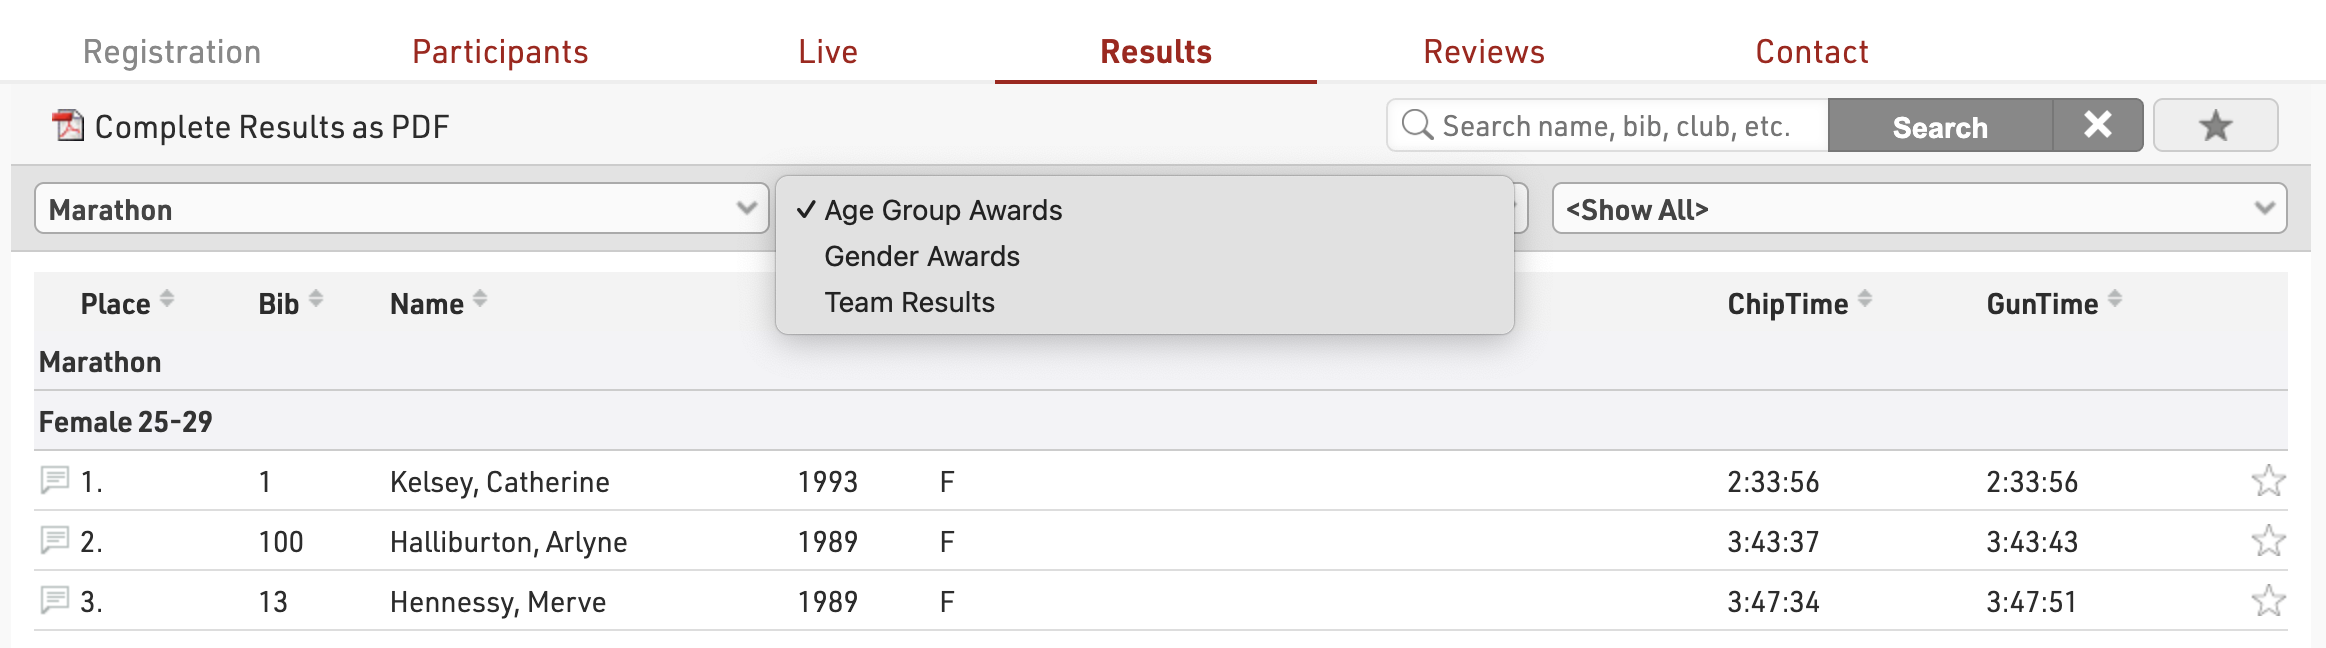
Publish Lists
You can publish multiple lists through my.raceresult.com, however in most cases it is recommended to publish a single list containing all the necessary information, this keeps the user-experience simple.
When publishing multiple lists on a tab the user will be able to select the list using either the drop-down menus or box selector according to the Select Contest/List via settings, the name of the list can be adapted using the optional label.

Lists can be activated / de-activated individually so they can be hidden until required. Clicking the link to open a list will open the page directly with that list opened, this will still work even if the list or tab is not active according to the published dates allowing you to preview a list before publishing.
You can apply Contest filters to lists, if you have multiple options selected for the Contests then filters / box selector will additionally include the Contest options before the list.
The leaderboard function for lists will reduce each group within the list to the corresponding number of records, buttons to show more or show all will be shown below each group.
With live update enabled lists will be automatically updated in real-time, most useful for live leaderboards. Note that this will only be active within the date range of the event according to the Basic Settings.
Advanced settings can be set for each list:

If you want to only show the Details Page on specific lists you can set use Overwrite Personal result page to enable or disable personal results pages for that specific list
If Preview for a list is disabled then selecting this list will instead automatically open a PDF of the list. Similarly if PDF is enabled then a link above will be shown allowing users to open the list in PDF format.
When List Sortable is enabled then users can sort each column in ascending / descending order by clicking the column headers.
Drop-Down / Box Selector
When publishing multiple lists then these can be selected via either a drop-down menu or box selector.
Drop Down
A dropdown is added above the lists, before any other drop-down filters within the list, to choose which list should be opened. If also filtering by Contest in the publish list settings then a dropdown for the Contests will be shown first.
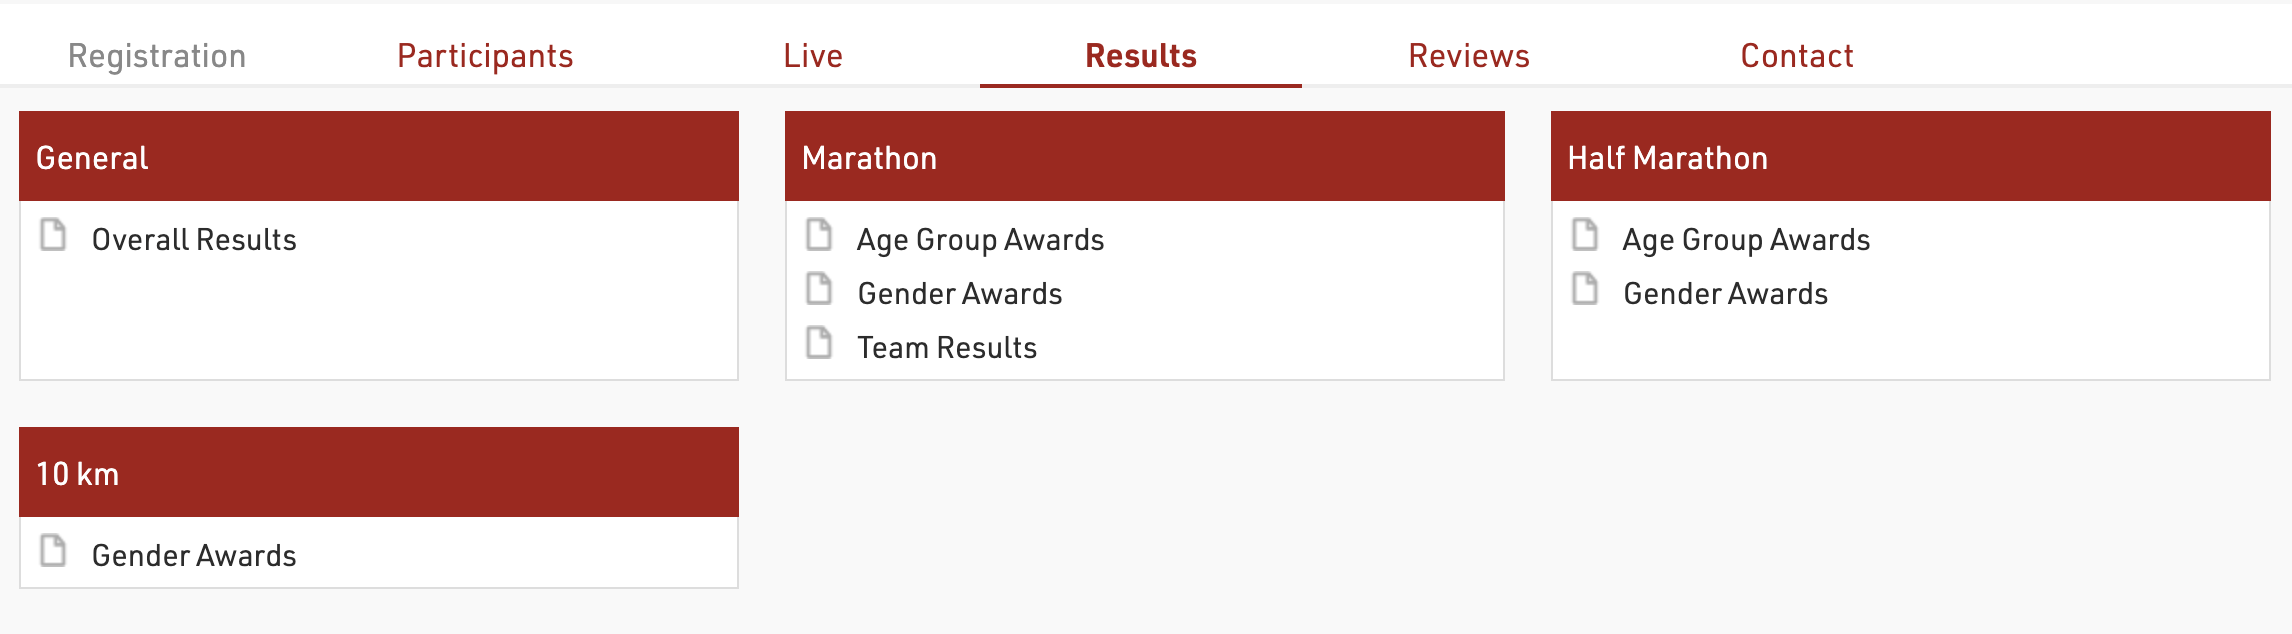
Box Selector
When opening the page a series of Boxes is shown for each Contest (if filtering by Contest) and a box for All Contests, with the available lists shown below, clicking a list will open the corresponding list.
Display Logic on Mobile Devices
Nowadays, most users visit the results pages on mobile. That's why it is important to understand the display logic of my.raceresult.com on mobile devices, to set up your results for optimal display on these.
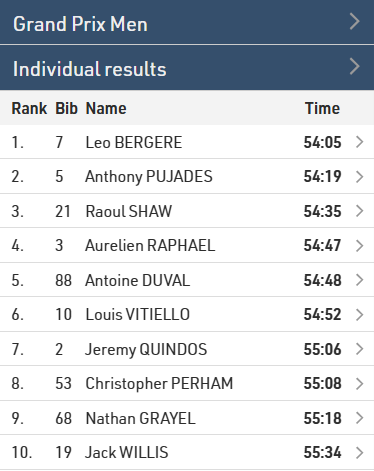
When the screen gets too small to display all the data, fields disappear one-by-one from the second field on the right. We based this display logic on the assumption that the last column typically contains the time, which is why it is always displayed.
Here is an example of how the display of the results evolves when the screen gets narrower.
When the screen is wide enough, all fields are displayed:
When the screen gets narrower, fields disappear one by one. The drop-down menus also switch to a more mobile-friendly layout. The hidden fields are accessible by clicking on a participant. A further click on the participant then takes the user to the details window.

Sometimes you may want to display a field on the far right that is not the final time, for example a gap, but you still want the final time to always be displayed. Or, you may want to have more control over the order in which fields are hidden.
In the advanced options for each field in the output, you can now select between three settings: Hide column last, Automatic, or Hide Column First.
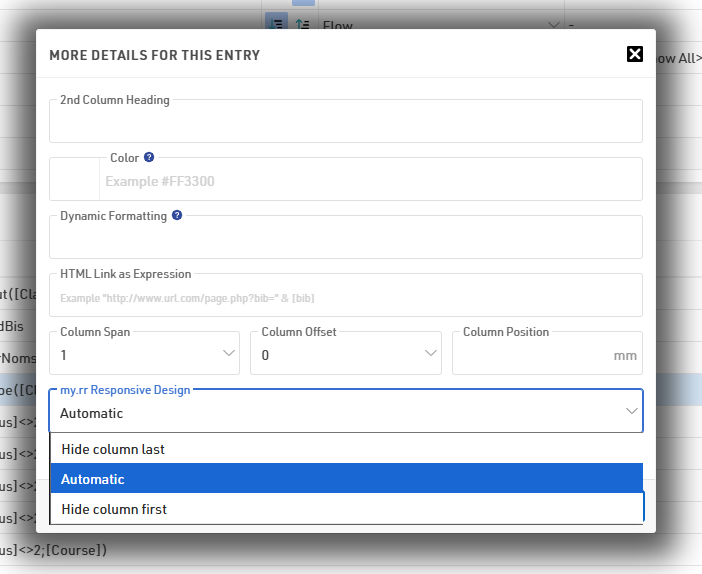
By default, all fields are set to Automatic. If you select a different setting for different fields, the same order logic will be applied, but within groups: as the screen gets narrower, the fields set to Hide column first will start disappearing from right to left, the one on the far right disappearing last in the group, then the fields set to Automatic will disappear following the same logic, and finally the fields set to Hide column last.
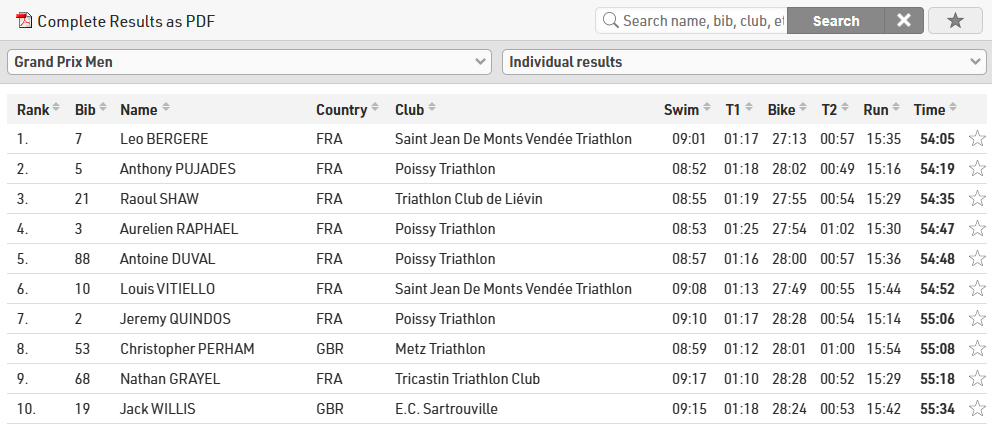
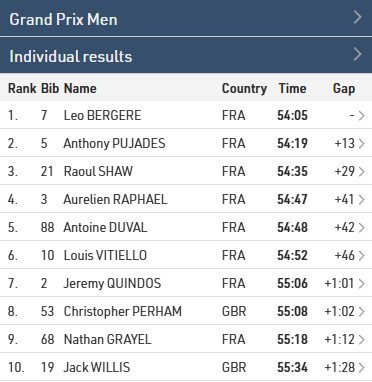
Here the same list as above, this time with a gap time to illustrate the settings:

The split times, the club and the country are set to Hide column first, the gap to Automatic, and the rank, bib, name and final time to Hide column last.
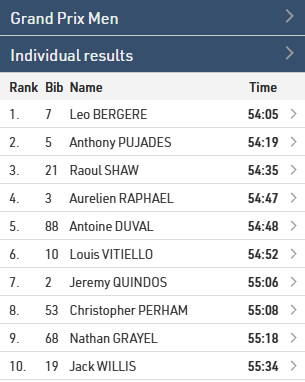
This way the splits, nation and flag disappear first, while the gap stays visible until there is no space left to display it with all the fields we want to always be displayed:
Reviews
Visitors can leave comments in two places on my.raceresult.com:
- On the Reviews tab they can leave longer texts and rate the event with a 5-star-system.
- Comments can be left for specific participants in the participant details window. If there are comments for a participant and the comment logo is enabled then the comment icon on the left side of the Output list will be solid.

Comments and Reviews can be disabled if you choose, and you can also moderate comments through the Reviews settings page too.
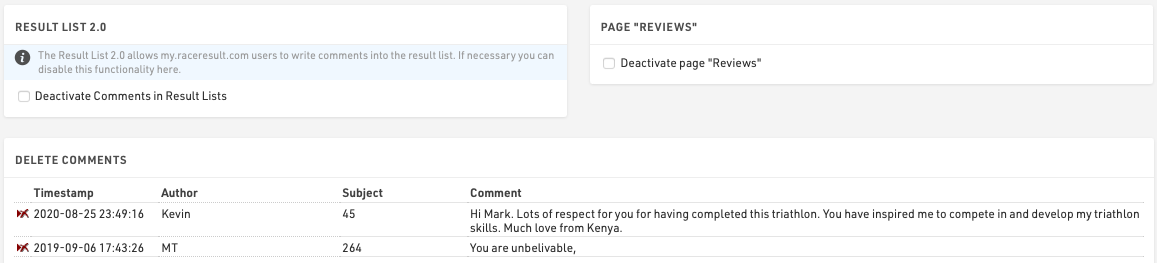
Note that new comments are checked on a daily basis by RACE RESULT and comments deemed improper will be removed.
Contact
Specific Contact Details for the race organizer, timer or payment processor can be listed in the Contact page, it is strongly advised to update these in Activate my.raceresult.com settings to ensure participants know who to contact for any queries - otherwise some may contact RACE RESULT who are unable to answer event specific queries.
The page also shows a Contact form through which participants can submit Inquiries or report missing/incorrect data, this can optionally be disabled if not wanted.
External Content
When adding a new External Content tab it is possible to embed content from a website or YouTube.

iFrame
To load a website directly in a tab, enter an embeddable URL in the iFrame field. Please avoid using standard website homepages or top-level URLs for this purpose, as most sites block this for security reasons, which may cause the tab to appear blank or function incorrectly.
YouTube Video
To display a YouTube video, enter the unique Video ID found at the end of the video's URL. Please note that if a user has not accepted third-party cookies in their browser, the video will not load automatically. Instead, a cover image will be displayed that allows the user to accept YouTube’s terms of use to view the video.
Favorites
The Favorites Tab enables spectators to search for participants and maintain a personalized tracking list. End users can add participants to their favorites directly when viewing lists or via the integrated search.
Search Settings

The favorites search is a global search across the entire event file, so you must define the search parameters to ensure relevant results.
- Search Fields: Add the specific participant fields that the system will query when a user types a search term.
- Filter: Apply a filter expression to restrict the searchable pool, for example, to exclude participants who canceled their registration
Visualisations Configuration
Use the Search Result Visualisation to adjust how users see the results of their search and look for athletes to add to their favorite list.
- Order by Field: Sort the search list in a logical order by adjusting the order by field.
- Elements: Construct the row layout by setting up the elements in the same way as in the Participant View to display relevant data for each participant

The Favorite List Visualisation configures the actual saved favorites list. Here you define how the list looks once a spectator has chosen their favorites and what happens when they click on a participant.
- Order by Field: Set the sorting logic for the active favorites list.
- Linked Participant View: Specify which detailed Participant View layout opens when a user clicks on a participant in the list.
- Elements: Build the list display layout, for example show latest split data so that spectators have relevant data for all favorites without having to click into indivual participant views.

Note: Favorites are stored locally in the user's browser cache. They do not sync across different devices or browsers (e.g., from a phone to a computer).