The Operator Login is protected by a user name and password. The default setting for these settings is admin / admin. Both the user name and the password can be changed in the user settings menu after logging in.
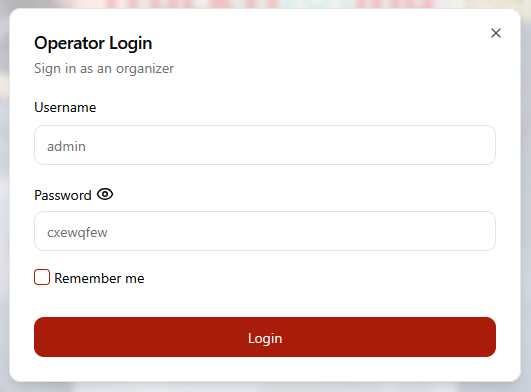
The Operator Login is used to setup and manage the event timing, primarily this is the configuration of the events, races, age groups, and results as well as participant management including transponder assignment.
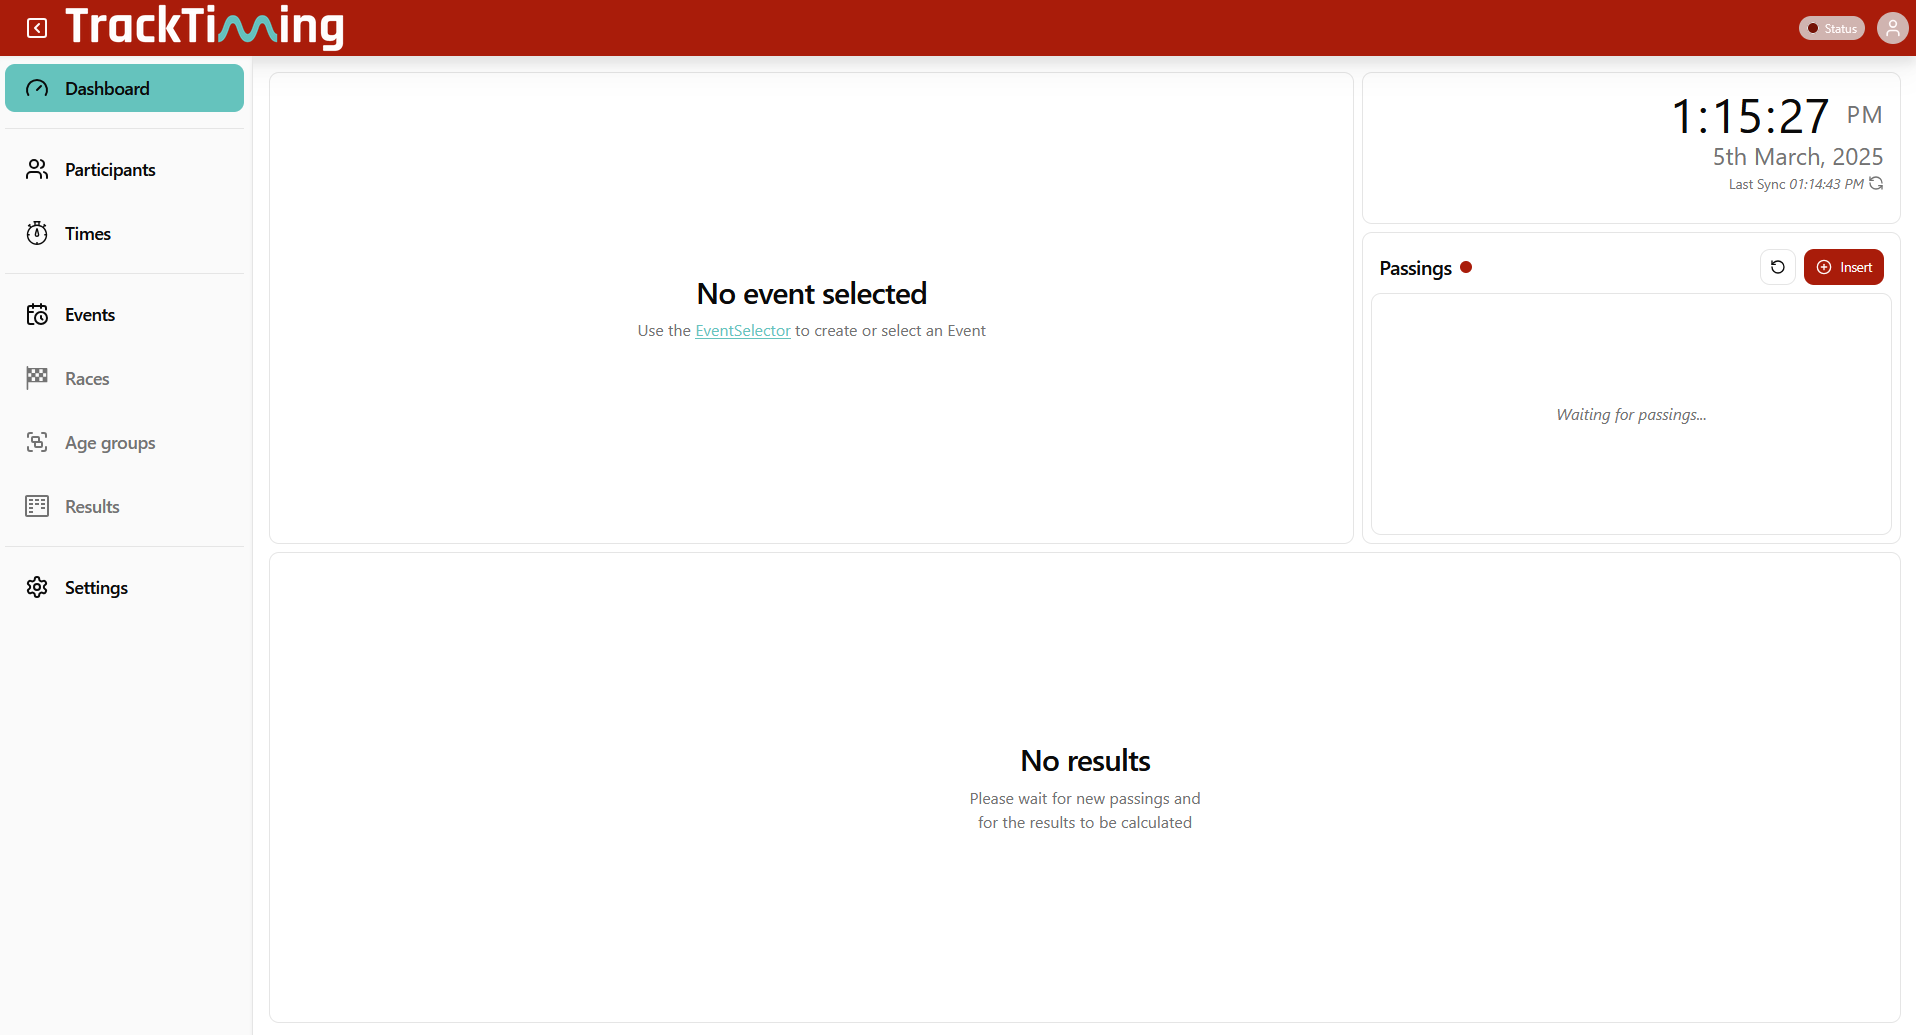
The left-hand menu can be expanded to view the different setup/monitoring screens available to the operator.
Dashboard
The Dashboard provides an overview of the currently selected event as well as available races for the event. Additionally, the most recently created passings and calculated lap times can be monitored.

Races
Each race has a scheduled start and finish time, however it is also possible to manually start races from the dashboard by clicking the play button on any inactive race.

For active races you can access the presenter and results displays by clicking the respective icons.

Passings
To easily monitor the incoming data a window with the most recent passings is available from the dashboard, additionally you can manually insert passings if needed for any reason.

When choosing to insert passings you can choose to generate these automatically, which uses the main timing point for the currently active race, or manually to choose the timing point to which the passing should be assigned.
 |
 |
You can only insert a passing for a previously registered transponder.
Calculated Times
The results overview below shows the last completed laps with the transponder code, participant name, lap time, result type, and the time of the first passing of the result (start of the lap). When viewing the last laps a button to quickly view all times is also shown.

Participants
The Participants screen allows you to manage all participants registered on your TrackTiming system, in particular the transponder assignment for each participant can be managed through this screen.
Participants
Participants can be searched by name, or filtered by assigned transponders or clubs.

To add participants through the operator login you can either click the Add Participant button to manually enter the data, or upload a CSV file with the participant data for a bulk upload. An example file is available for download which provides a template for how data should be recorded.

Transponder Assignments
The assignment of the transponders is important to ensure that passings and lap times are assigned to the correct participant.
Each participant should be assigned a unique transponder, transponders are assigned for a fixed period of time, which is set at the time of assignment. After this period, the assignment is cancelled and times will no longer be assigned to that participant. A transponder assignment can also be removed manually at any time if required.
To assign a transponder to a participant, first lookup the participant in the table and click the Assign button in the transponder column.

Enter the full transponder code to the input field, if you have previously registered transponders then these will be suggested whilst typing allowing you to click to choose the transponder if required. Choose the duration of the assignment either as a fixed suggested value or a custom end date/time.
Additionally if a transponder has previously been used then the last assignment will be shown, or if it is still currently assigned to a participant then the current assignment will be shown, clicking the delete icon will remove the current assignment allowing it to be re-assigned
 |
 |
If you have a batch of transponders which start with the same characters you can choose to enable the transponder prefix, this will then pre-fill the prefix in all future transponder assignments.

Clicking on an already assigned transponder for a participant will show information on the start and end time of the transponder assignment and allow you to manually end the assignment if required.

Times
The Times section provides an overview of all calculated results for all participants.

You can modify which columns are displayed using the view settings or filter the results according to the available dropdowns.
Results can additionally be selected using the checkbox at the left of the row, this allows batch deleting of calculated results.
Events
An event defines a group of races which will all take place on the same physical course. The settings of the currently selected event will be shown when loading the events screen.

The Event Selector can be used to create new events or activate a previously created event.

When creating an event you can either choose to start from scratch or use the express setup which will guide you through the additional steps required to setup the races and age groups to be used in the event.

Event Settings
The basic settings for the event include the name, location and event type.

The event type can be one of two options.
Lap Race
Participants complete laps on a closed circuit which has a single timing point for the start and finish of each lap (additional splits may still be configured for intermediate times).
A-B Race (Experimental)
Participants complete runs on a track with separate start and finish timing points. This requires an additional Loop Box to act as the second timing point.
Timing Point Settings
The required timing points depend on the event type defined in the basic event settings.
For lap races only a single timing point for the start and finish is required, whereas A-B events require two timing points for the start and finish separately. Additional split points can be added for both event types to create sector times within the circuit or track.

Each timing point should be named and have a Loop ID set to determine from which device the times will be received, each timing point should use a unique Loop ID. The Device ID is always the ID of the Ubidium on which TrackTiming is running even if there are several timing points defined as it is the Ubidium which receives all passings.
For each sector between two timing points you must then define the minimum and maximum split times and the distance of the sector.

Creating Events
Races
You can define multiple races for each event, each race is scored independently, and so generates a unique results list, all participants are automatically eligible to participate in all races.

Races must not overlap, only one race may be scheduled at any given time from any event, each race has a defined start and end date/time and the races will be automatically started and stopped according to this schedule. A race may take place over a specific time window on a given day or could take place over several days or any given period of time.
When scheduling races the calendar will show all currently scheduled races for the current calendar month, races from other events are shown but will be greyed out.
To create a new race you need to give the race a name and define the start and end date / time, you can only create races for the currently active event.

Age Groups
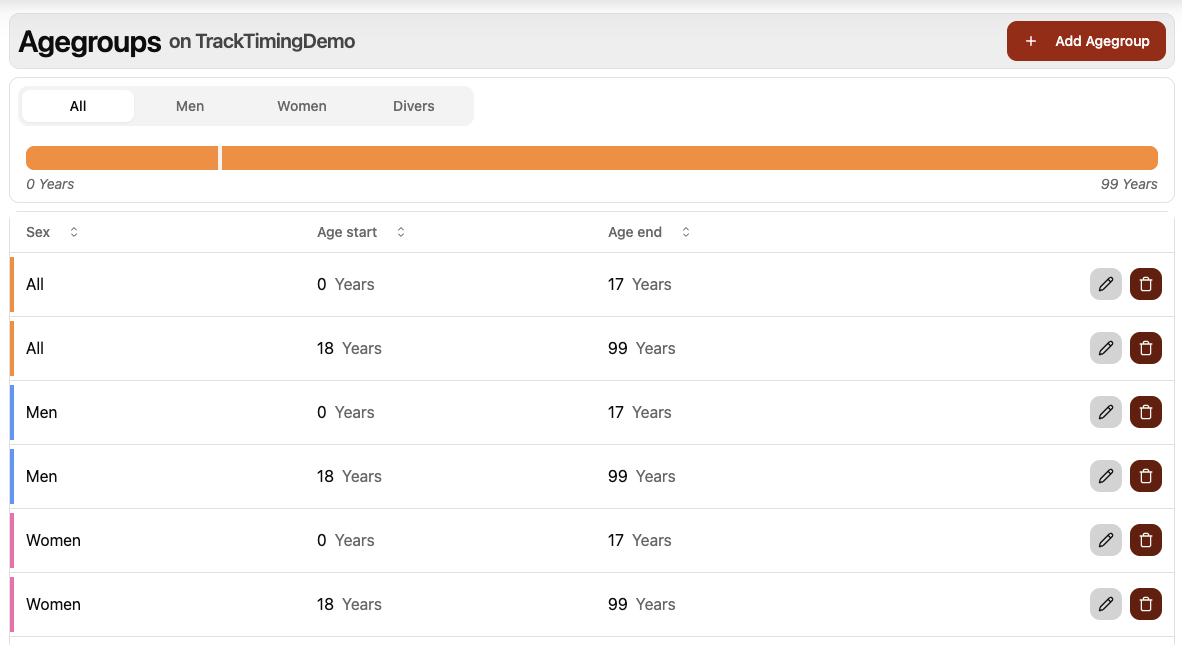
Age groups determine which participants are to be ranked against each other within each race, they are defined according to gender (All, Female, Male, Diverse) and age (start and end).
It is not necessary to define age groups if not required.

Results
The results screen of the operator area provides a preview of the results for the currently selected race.
Participants are ranked according to their best time in the race, and view settings allow filtering by age group, club, or a specific date range.
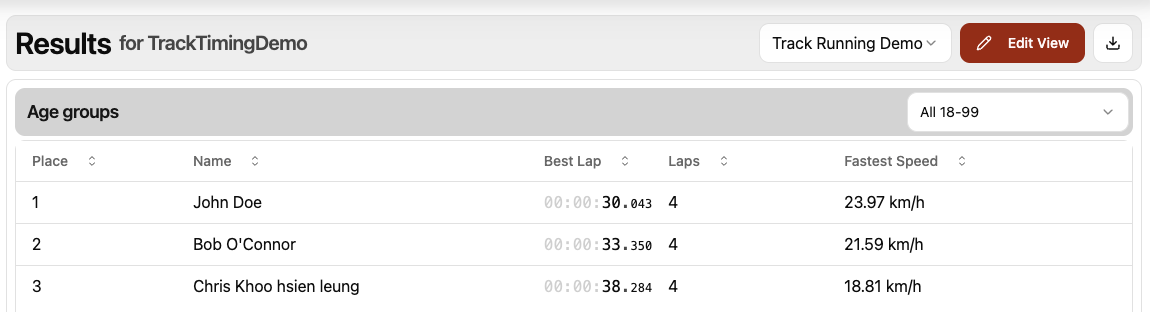
Clicking on a participant will additionally show a detailed results window for that participant with every lap listed.
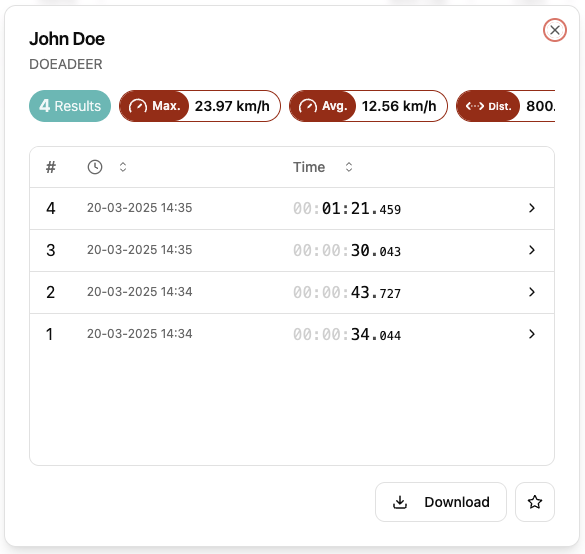
Both the overall and individual results can be downloaded as either a CSV or JSON file.
When editing the view of the results screen, this layout is also stored and used for the Results View.
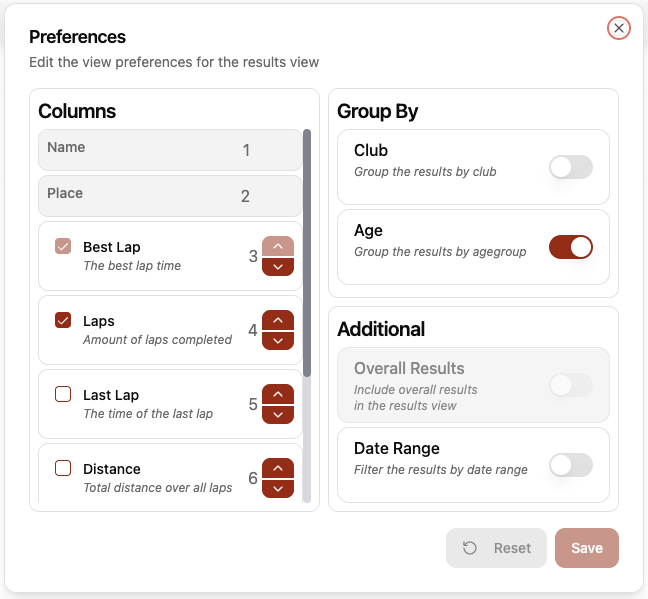
You can choose which columns should be shown, and the order in which columns should be shown, the grouping filters which should be applied and enable/disable additional options for overall results and filtering by date range.
Settings
The settings are applied globally to all events and the general TrackTiming system.
Status
The Status indicator in the top right can be used to monitor the current condition of the system. You can view both the setup status and Ubidium status here.
The setup status checks that everything within your current event is setup as expected, ensuring all steps have been completed in order to run a race.
 |
 |
Options
The options menu provides quick access to general system settings including language and appearance mode, as well as access to both the Wi-Fi and UI QR codes so these could be saved, printed and distributed for your participants to access the results pages.
