This article describes the potential path a participant takes from event registration to collecting their race bibs (and transponders) on event day with the usage of a unique generated QR-Code and a Checkin Kiosk which is opened in the EventTools App.
The main idea here is, that the participant will receive a QR code which is sent with an e-mail template after completing the registration form.This QR code contains a personal and random value which identifies the participant uniquely.
During race pack collection the participant can show this QR code, which is then scanned in the search step of a Check-In Kiosk when working with the EventTools App.
With a dynamic bib assignment the volunteer picks up the first bib he picks from a box and assigns this bib number to the participant. If the event is timed with active technology, the volunteer can also dynamically assign active transponders to the participants.
Bib Numbers
The first step is to set up bib number ranges that are out of the real bib ranges that are going to be used on the event. The bib ranges are set up in the Participants Data in the Bib Numbers menu:
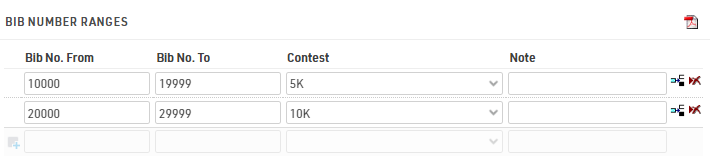
After the online-registration the participants are going to be saved in the event file with a bib number in these ranges. During the bib pick up, the bib number will be changed in the participant's data to the bib the participant receives at the bib pick up booth.
User Defined Fields and Advanced Settings in Registration
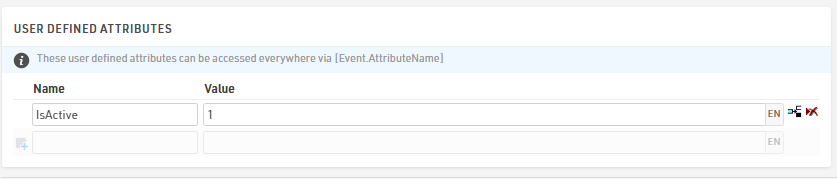
In the Event settings we add two User Defined Attributes. With the values we determine if this event is going to be an event timed with active or passive equipment. Depending on the entries here, we will later have different input possibilities in the Checkin Kiosk.
The next step is to add an additional field where we can save the string to uniquely identify the participant later.

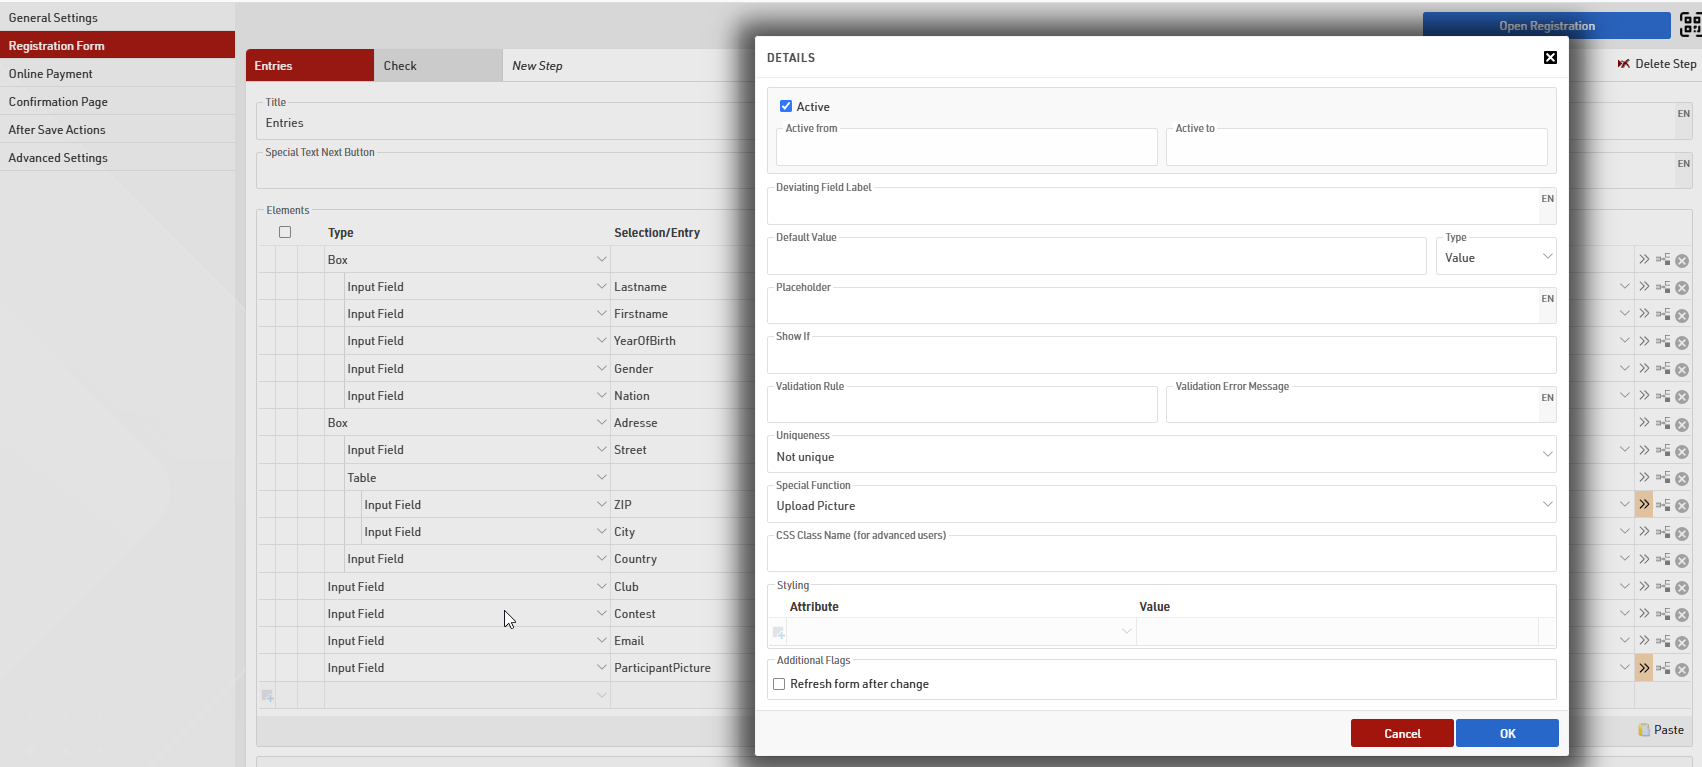
We also add a field where the participant is able to upload a picture of himself. In order to enable a picture upload in the registration form, it is possible to select the Special Function "Upload Picture" in the Details of the corresponding Input Field.
In the registration form's Advanced Settings we add the additional field [IdentificationNo] to store an additional value with a specific expression:
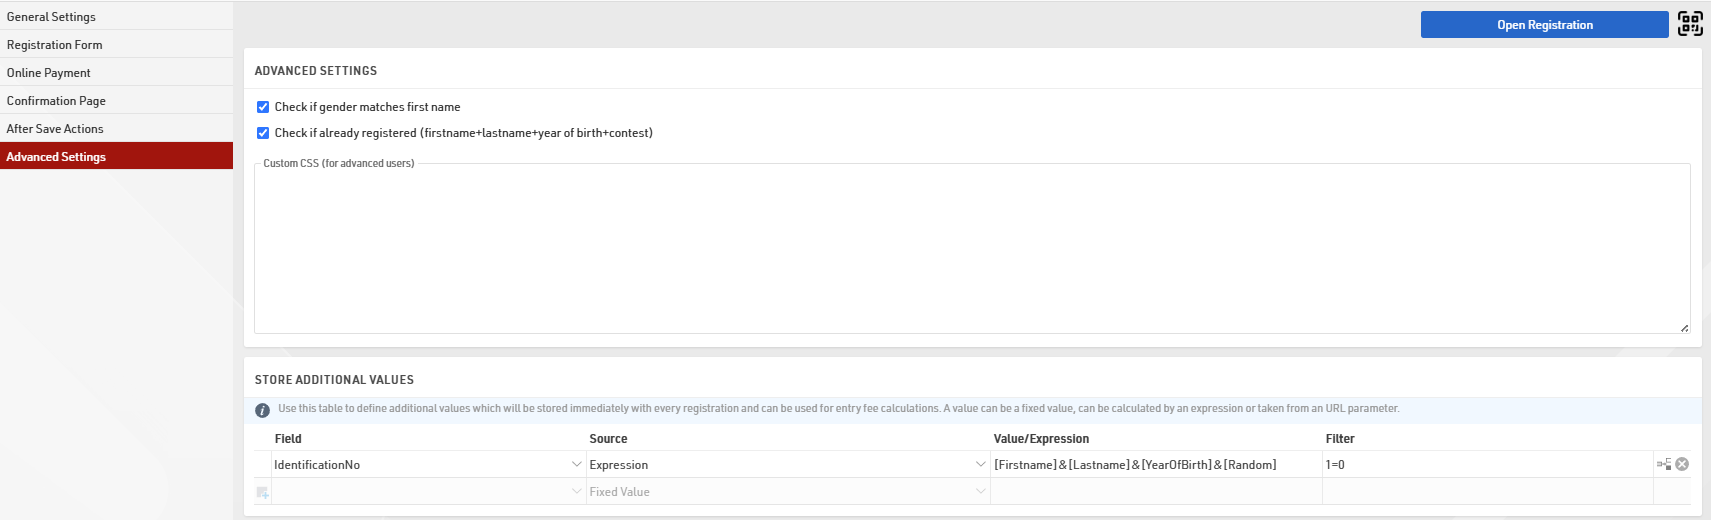
With this expression a combination of the participant's entries ([Firstname], [Lastname], [YearOfBirth]) and a random value are saved in the additional field. The field [Random] is a Derived Field which returns a random number between 0 and 1.
QR Code Generation
The QR code is generated under Output >> Certificates via the small barcode icon on the right side in the tools section:
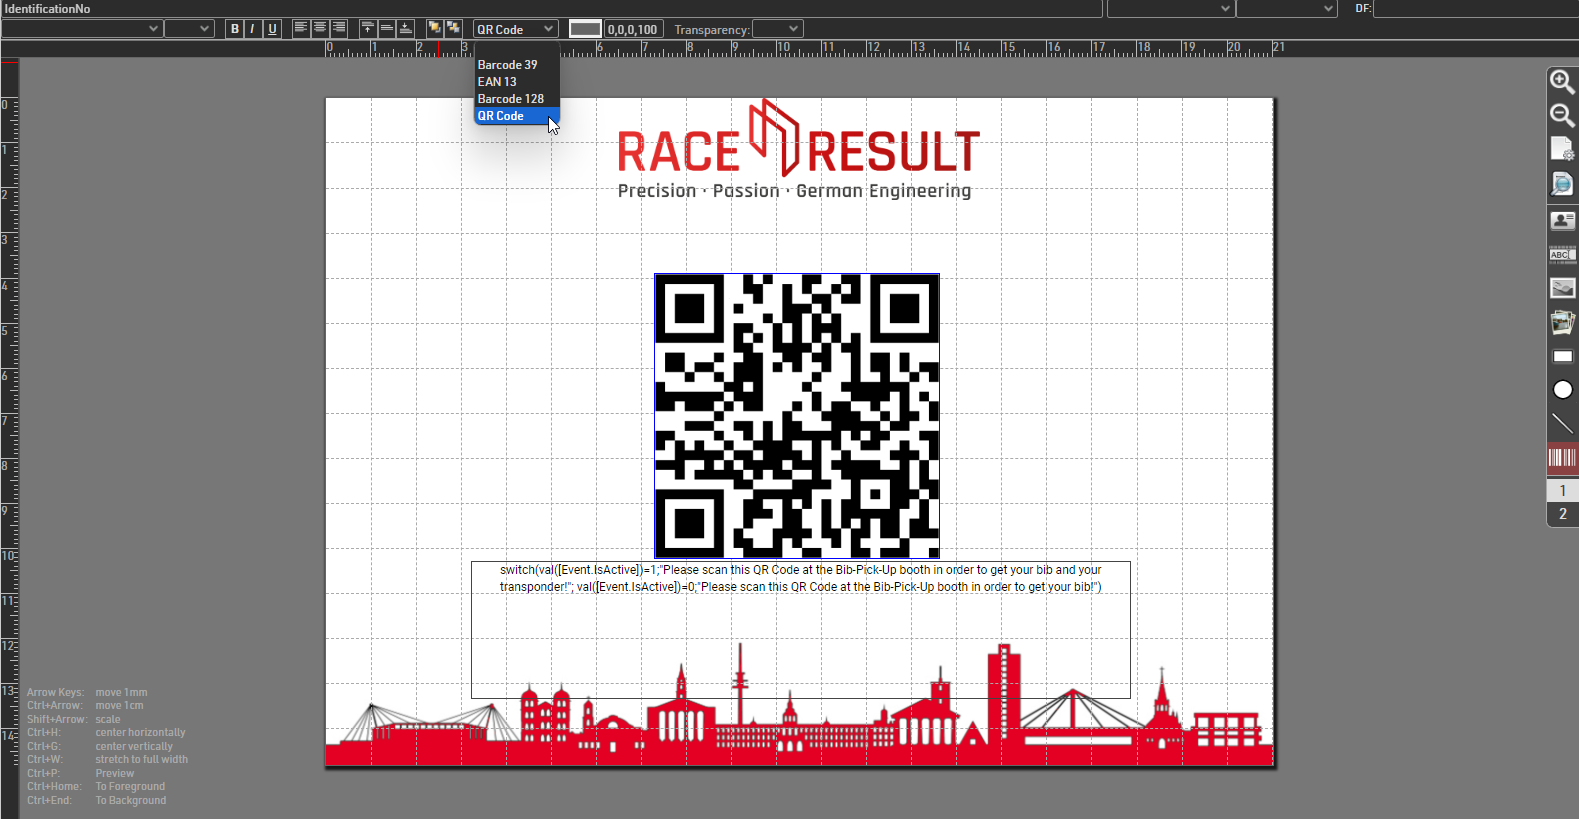
This will first create a barcode, but it can be changed to a QR code with the dropdown you find in the upper section.
After changing to the QR code we need to select the correct field which we want to save in the "QR code data". To do so, select the QR code and start typing the name of the field where you save the unique participant data during the online registration. Select the desired field from the dropdown of suggested datafields.
With a switch formula we show two different texts, depending if we set the event as an active or passive event by using the user defined attributes in the event settings.
Email Setup
The confirmation email is set up in the Email/SMS Templates. As the participant should receive his QR code with the confirmation email after the online registration, the pre-setup certificate needs to be added as an Attachment to the email:

Depending on the language the participant used on the my.raceresult.com website during the registration he will receive either a german or english certificate.
Checkin Kiosk Setup
The Checkin Kiosk is set up with three different steps. The first step is usually the Search step where we determine the search fields. The only Search field that should be used here is the field where the personal, unique identification code is saved after the finished registration.
The second step is only called Bib Pick up, as this step will only be visible if the event is going to be timed with passive transponders. The only Edit Field in this step is the [Bib] field. In the entry field's details it is possible to select a Scanner Input when using the Event Tools App. If a BLE Reader is available, the BLE Reader can be selected. With the Reader it is possible to scan the bib's transponder and use the read automatically as an entry for the input field.
If the bib number is also printed and encoded as a QR code on the bib itself, the QR Scanner option can be selected. With this option, the QR code can be scanned with the cell phone and the bib number will be entered automatically by encoding the QR code. Of course, manual entry is also possible, but this is prone to errors when typing the bib number in the entry field. The current bib value should be hidden, this is done with the corresponding Special function.

The third step on the other hand, will be only visible if the event is timed with active equipment. This step is not only used to assign a bib number, but also to assign an active transponder code to the participant.
Therefore two Edit Fields are added in this step. The first field is again the [Bib] field. As no passive transponders are going to be attached to the bibs in this case, either the QR scan option or the manual entry option (empty dropdown) can be selected. The second field is the [Transponder1] field where the active transponder code is going to be saved. It might be a smart move to attach a sticker on each active transponder with a QR code which contains the active transponder's chip-code. By doing so, it is possible to again use the QR scanner option for this input field. The volunteer later can then pick any transponder and just scan again the QR code on the active transponder to fill the [Transponder1] field.

Event Tools App usage
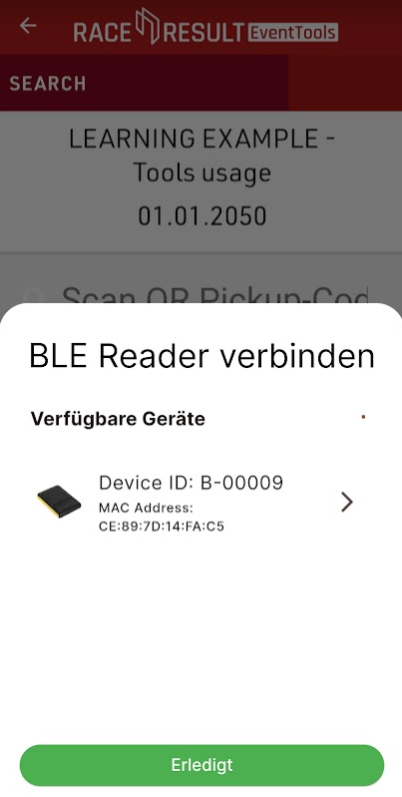
After logging in into the Event Tools App select your Event and open the Checkin Kiosk for the Bib-Pickup. If you plan to use a BLE Reader you can connect your smartphone with the reader now. If no Reader is going to be used, just push down the small pop up window:
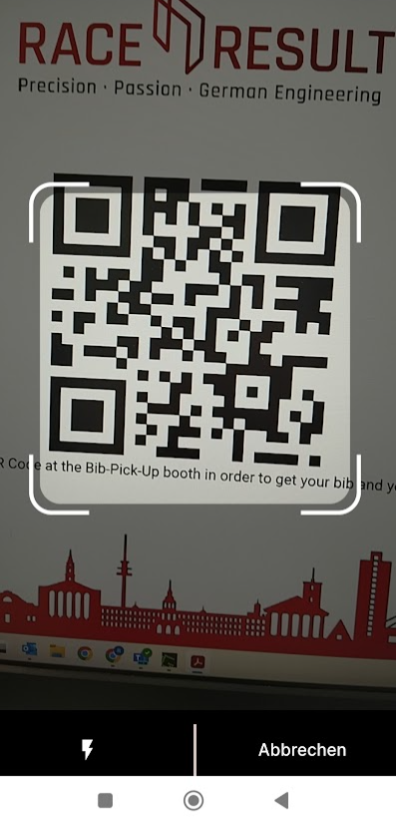
By selecting the small, blue QR code symbol on the bottom of the smartphone the app enables a camera mode which allows it to scan QR codes for the search entry field. In this mode the QR code for the bib pickup can be scanned and the participant's information and edit fields are going to be displayed in the next step:
Selecting one of the entry fields on the smartphone, shows again the small blue QR code symbol in order to scan the QR codes from the active transponder and / or the bib to automatically enter their encoded information (transponder coder / bib number) to the corresponding entry-field.
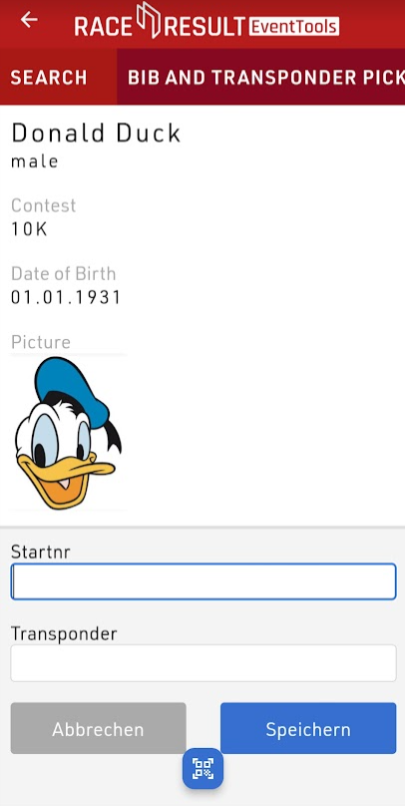
After saving, the active transponder code and the re-assigned bib number are saved in the participants data.