Especially for events including corporate registrations, you may be asked to issue invoices, regardless of the used payment method.
Example Scenario
In the registration form, we ask whether an invoice is required and if so, in the next step ask for the invoice details. After completing the registration, the invoice will be filled with payment terms from the online payment and is automatically sent to a dedicated invoice receiver address.
Create Additional Fields to Store Invoice Receiver Data
To fill the invoice with the correct receiver information, additional fields must be added to the participant dataset.
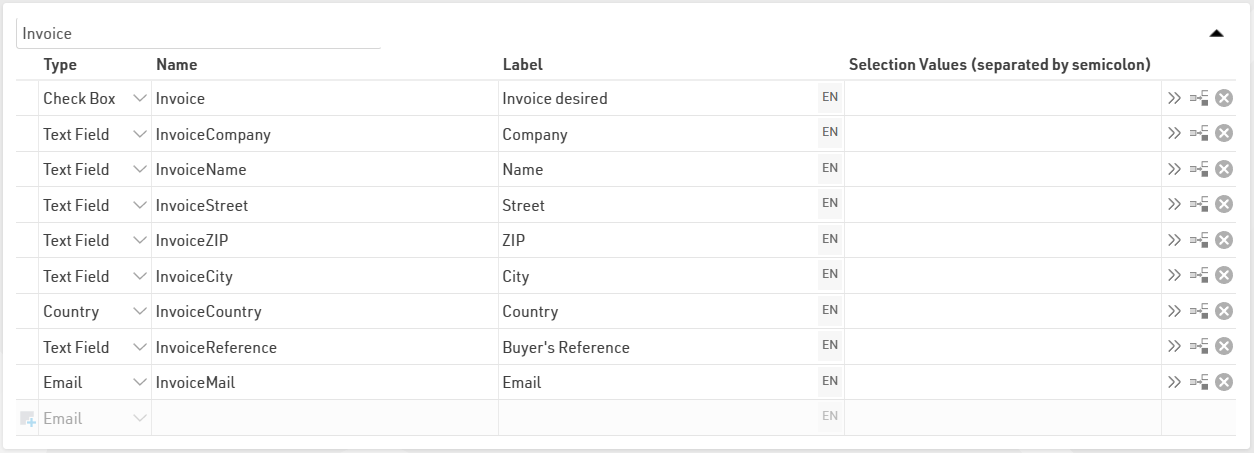
In Basic Settings > Participants Data > Additional Fields, create a new group with the required invoice fields. In addition to the invoice address, in the checkbox field [Invoice] we define whether an invoice shall be created and sent.
Define the Invoice Settings and Prepare the Invoice Layout
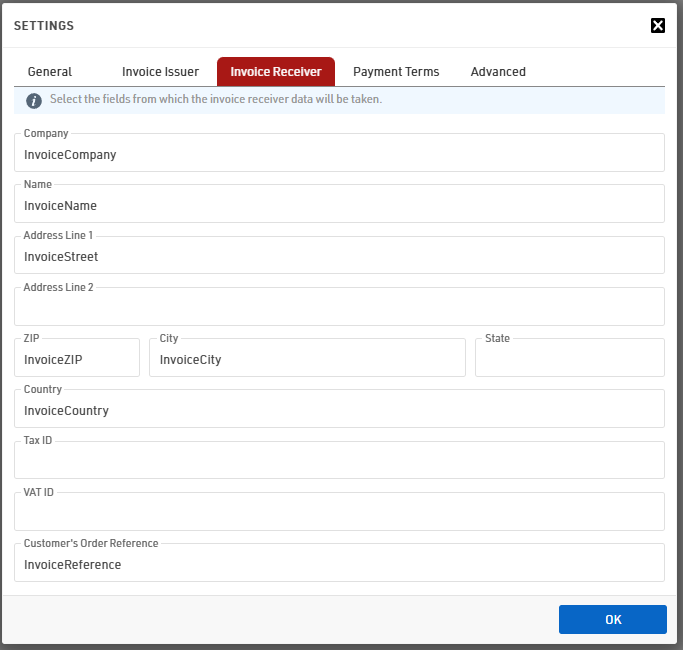
Under Finance > Invoicing open the Settings and define the details for the invoice creation, such as the invoice numbering, your company details as invoice issuer, . Lastly, navigate to Invoice Receiver. In here, assign the Additional Fields created for the Invoice Details to the respective Invoice Receiver Fields.
Prepare the invoice layout as outlined in this article.
Prepare dedicated Invoice Email
Under Email/SMS, create a new Email template. For the Receiver Field, select [InvoiceMail] to ensure the invoice email is sent to the dedicated invoice email address.

If required, you can add your companies' accounting email address as a BCC receiver to stream invoices immediately in your accounting tool.
At the very bottom of the template add an attachment of type Unsent Invoice. If the attachment name is left empty, it will automatically use [Invoice.Number].pdf as the file name.
Add Invoice Query to Registration Form and Define Auto-Send of Invoice
In the last regular registration step we add an Input Field for the field [Invoice]. In the extended settings we define the Deviating Field Label as "Yes, please issue an invoice".
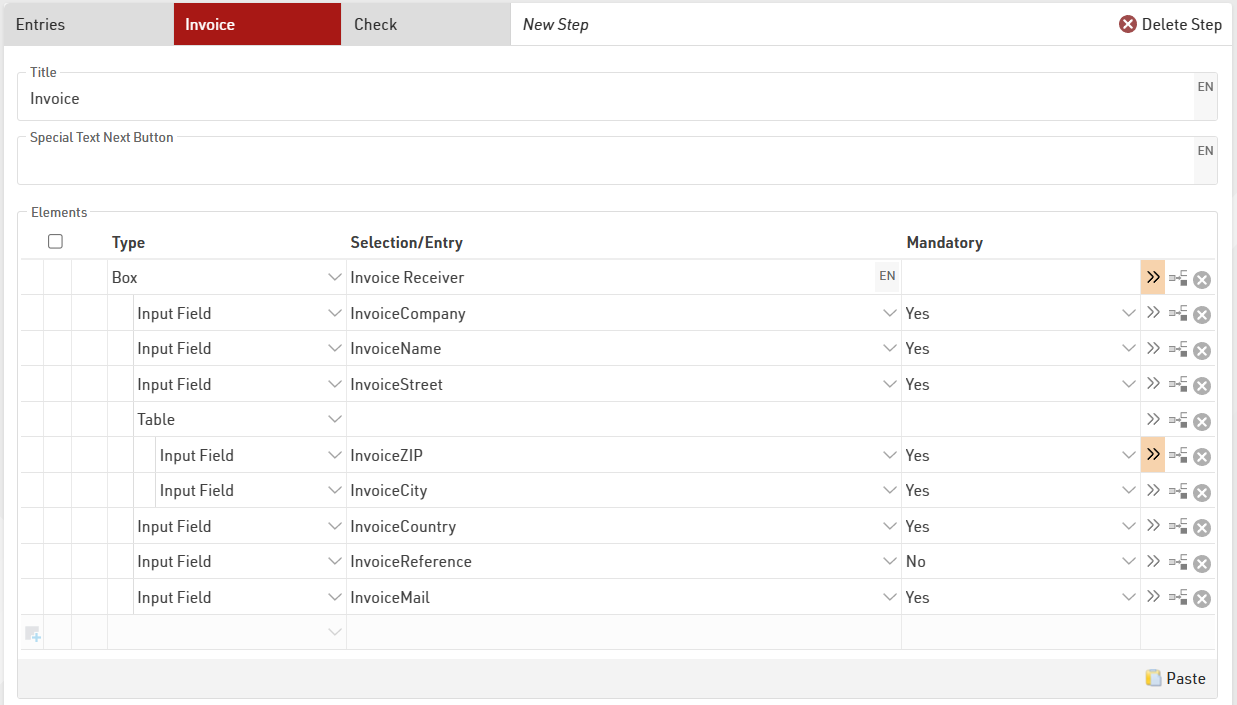
Next, we add another step after the query to issue an invoice. For better formatting we put the Invoice Fields in a Box. Additionally, we define a "Show If" for the whole box to show only if [Invoice]=1. By doing so, the whole step will be skipped if no invoice shall be issued.
The table for ZIP and City can easily be copied from the "Entries" step and the fields be adapted. This ensures a proper width of the fields side-by-side.
For Group Registrations, make sure ALL invoice related fields are defined as common fields.
Automatic Sending of Invoice
Under After Save Actions tick the box to automatically create invoice after registration with the following filter:
Under SEND EMAIL add the previously configured Invoice template and provide the exact same filter as above.