Managing Online Payments
Accounting for Payouts of Online-Payment
RACE RESULT is often asked about the correct accounting rules for the online payment payouts. This article provides a proposal. RACE RESULT does not take any liabilty for the correctness of this information. Please consult a local tax consultant for open questions.
How should I account for the payouts of the online-payment?
The registration of a participant creates accounts receivable. By receiving the payout these cumulated accounts are reduced.
Account regularly for new sales (e.g. weekly or monthly). The function "Sales List" under "Overview > Online-Payment" lists all sales for the given period.
| DEBIT | CREDIT | ||
|
Accounts Receivable |
1,190 EUR | Revenues at 19% VAT | 1,000 EUR |
| 19% VAT | 190 EUR | ||
Is the payout 500 EUR worth of entry fees and 11.90 EUR payment fees are deducted, book the accounts as follows:
| DEBIT | CREDIT | ||
| Bank | 488.10 EUR | Accounts Receivable | 500 EUR |
| Costs of money transfer | 10.00 EUR | ||
| Input VAT 19% | 1.90 EUR | ||
Please note that RACE RESULT 12 tracks when a sale is created. In case you use the online self-service and athletes can book chargeable services after the initial registration - e.g. by booking a shirt - this may result in different creation dates of the sales items.
Event is Cancelled - How Can I Refund Participants?
All following information without guarantee! This article serves as an example and makes no claims to completeness and generalizability.
In the event of a race cancellation, you may be asked by the organizer to refund participants. According to §5c of the Online-Payment contract we can't offer a participant refund. We can provide you with bank information of those participants that paid with SEPA Direct Debit. Please contact support@raceresult.com and tell us the event ID of all affected events. In case you used a deferred SEPA Direct Debit with a date in the future, you will need to cancel all outstanding payments in the Online Payment overview. If you only disable online payment, the payments will still be taken! For other payment methods we cannot provide any bank information.
Therefore we recommend using the ChangeLink to collect bank details from your participant.
It is recommended to wait with the refund process until all entry fees collected by us have been paid out to you. This avoids that entry fees that haven't been paid out yet are already refunded by you. Furthermore, in this case you can easily and quickly identify participants who have not paid at all.
Please note that it can be useful to set the event date to the day of cancellation in order to receive payments of less than 100 Euros at the end of the month. Furthermore, the holding period of the different payment methods (see payment contract) should also play a role in your considerations.
Define event structure to collect bank details
First, you need to define the structure of your event file to collect bank details. To do so, go to "Main Window > Event > Participants > Default Fields" and activate relevant Default Fields (2) like IBAN, BIC and AccountOwner.
Set up Online Self-Service
Go to "my.raceresult.com > Online Self Service > Basic Settings". First, activate the Online Self Service, then define the availability. For the mode you should use the same mode as for the online registration. There is no need to activate the Online Payment, as you don't want to charge participants further, but you only want to know their bank details. It is up to you whether you want to send an email confirmation. We recommend a confirmation either on the confirmation page of the Online Self Service or via email.
Add Bank details to Online Self Service Form Fields
As for the online registration you can define your form fields for the Online Self Service under "my.raceresult.com > Online Self Service > Form Fields". If you have setup the Online Self Service already and if you were using it before the race got cancelled, you can decide whether you want to hide all other fields for the moment. Most importantly, you should add a <Separator/Text wide> or <HTML Line> where you describe how the refund process is handled. For the bank details we recommend asking for AccountOwner, IBAN and BIC separately. The fields "Bank Account" and "Bank Account (SEPA)" include a SEPA Mandate, which is not necessary for the refund and may confuse participants.
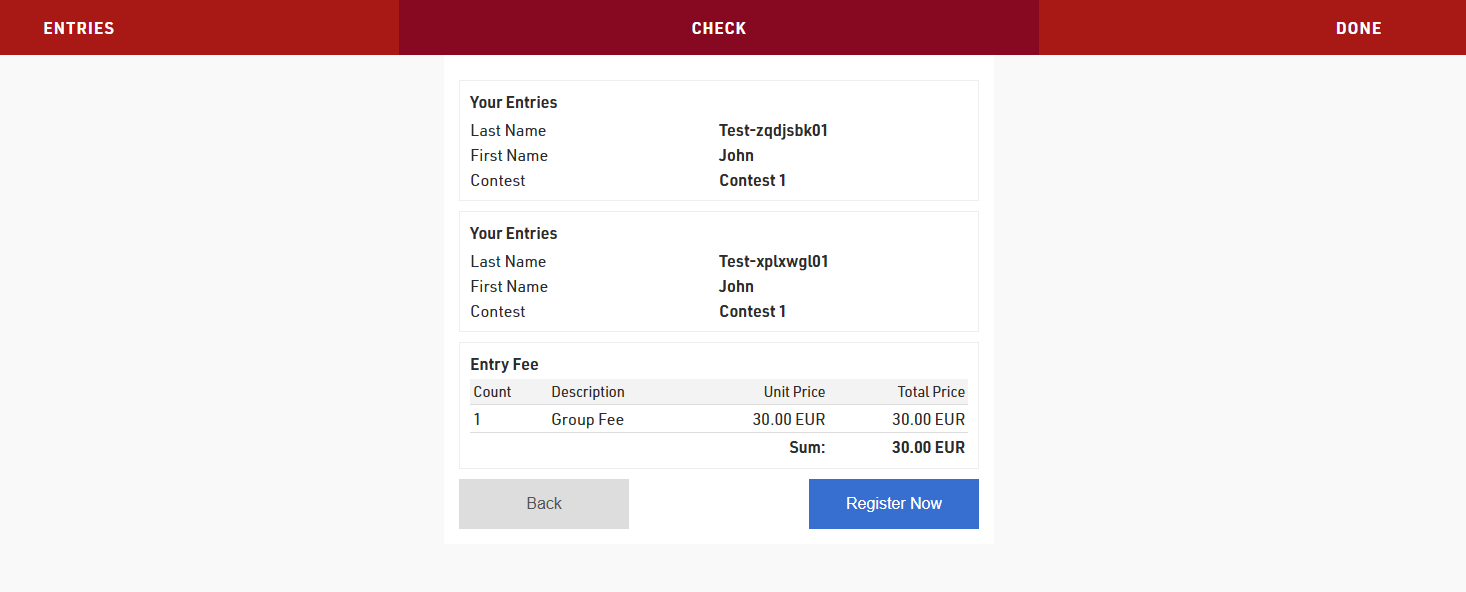
This is how the form fields may look like. We have included the name, club and contest of the participant to reassure, it is the right participant to refund.
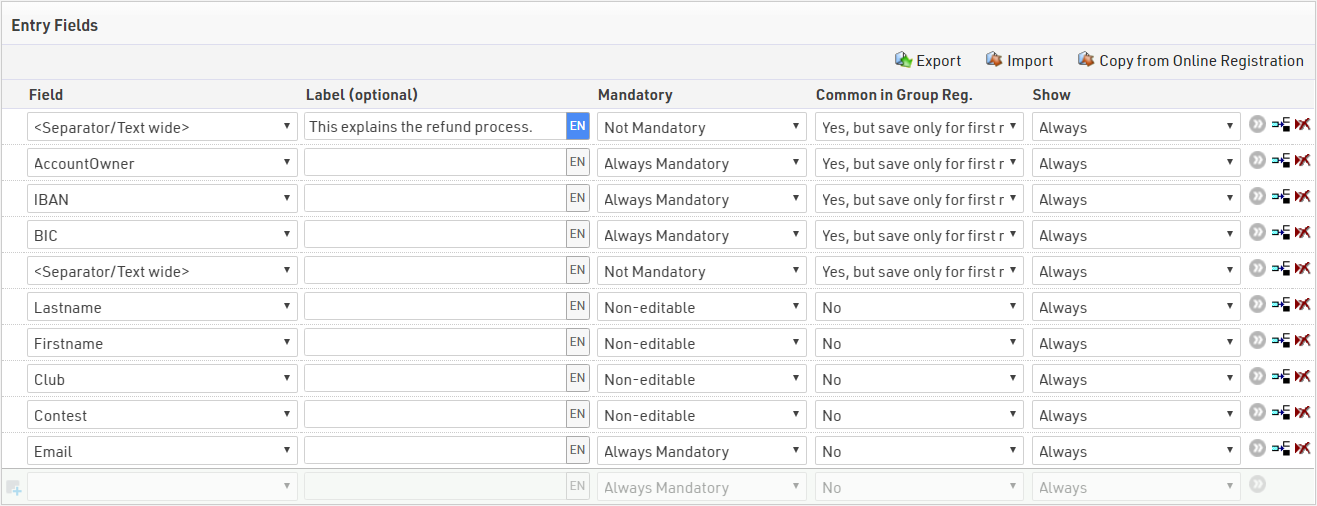
Since only one payment is made after a group registration, we defined the fields with bank information as common fields in the group registration. Additionally, the information is only saved for the first record. This minimizes the risk of having to reimburse entry fees twice.
You will find a more advanced example including the option for a donation here.
Define a AYN to mark successful refunds
As soon as you started refunding participants, if you don't refund everybody the same day, you need to mark some participants as refunded. The easiest way to do so is setting up an AYN. Once you refunded a participant, you can easily tick the AYN and use this for a filter. As an alternative you can also define a due date until when participants need to enter their bank details. This way you wouldn't need to mark participants as paid out, as you most probably want to do a mass wire transfer for all affected participants at once.
Create an email template to inform participants about refund option
To inform participants about the option of the refund, you need to send them the ChangeLink. This is only possible through the EMail/SMS-Module in RACE RESULT 12. Setup your template in "Main Window > Event > Email/SMS Templates", make sure to inform the customer about the process and include the ChangeLink. You can include the latter by using the expression [ChangeLink]. As participants may create a chargeback, tell them not to do so. This will make the whole refund process more complex for you and may result in another financial loss. Using the filter [GroupRegPos]<=1 you can ensure that the e-mail is only sent to single registrants and the "main registrant" of a group registration, as this is usually also the one who pays the entry fees.
After the completion of this email, you need to provide your own SMTP server to send mass e-mails to participants. Finally, go to "Participants > Tools > Email/SMS Module" and send the email.
Monitor the status of refunds
The easiest way to monitor which participant entered his bank details is a dedicated output list. You can add all necessary fields so you can also easily export this to an Excel spreadsheet. Here, too, it is recommended to use the filter [GroupRegPos]<=1 to display only those participants who have actually paid entry fees.You probably want to add the bib, FirstLastname, OPEntryFee (what the participant actually paid through the Online-Payment. With group registrations this will show the total entry fees paid), AccountOwner, IBAN & BIC. In addition, you can set a filter on your AYN (see above) so this list only shows participants that haven't been refunded, yet. Last but no least, add a filter on OPBalance to show only those that have actually paid their entry fee.
Before making a payment, you should also take a look at the overview of online payment, especially at the participants listed under "not yet paid". Mark them separately, as no money has been received here yet. Thus, these participants should not receive a refund.
Set Entry Fee Based on Group Size
Events may offer discounted entry fees for group registrations, typically calculated in one of the following three ways:
-
Discount Starting from the n-th Participant: The discount is applied only to the n-th participant and any additional participants thereafter.
-
Discount for the Entire Group: The discounted entry fee applies to all participants in the group, provided the group meets a minimum size requirement.
-
Fixed Price for Group Registration: A set price is applied for the group registration, regardless of the number of participants in the group.
Starting From the n-th Participant
This method is based on the default [GroupRegPos] field, which is calculated for each participant in a group registration.
During a Group Registration all participants will be assigned the same value for [GroupID] and then are numbered starting from 1 in the the [GroupRegPos], corresponding to the order in which participants are entered in the form.
To assign different entry fees based on [GroupRegPos], use the filter in the entry fee settings.

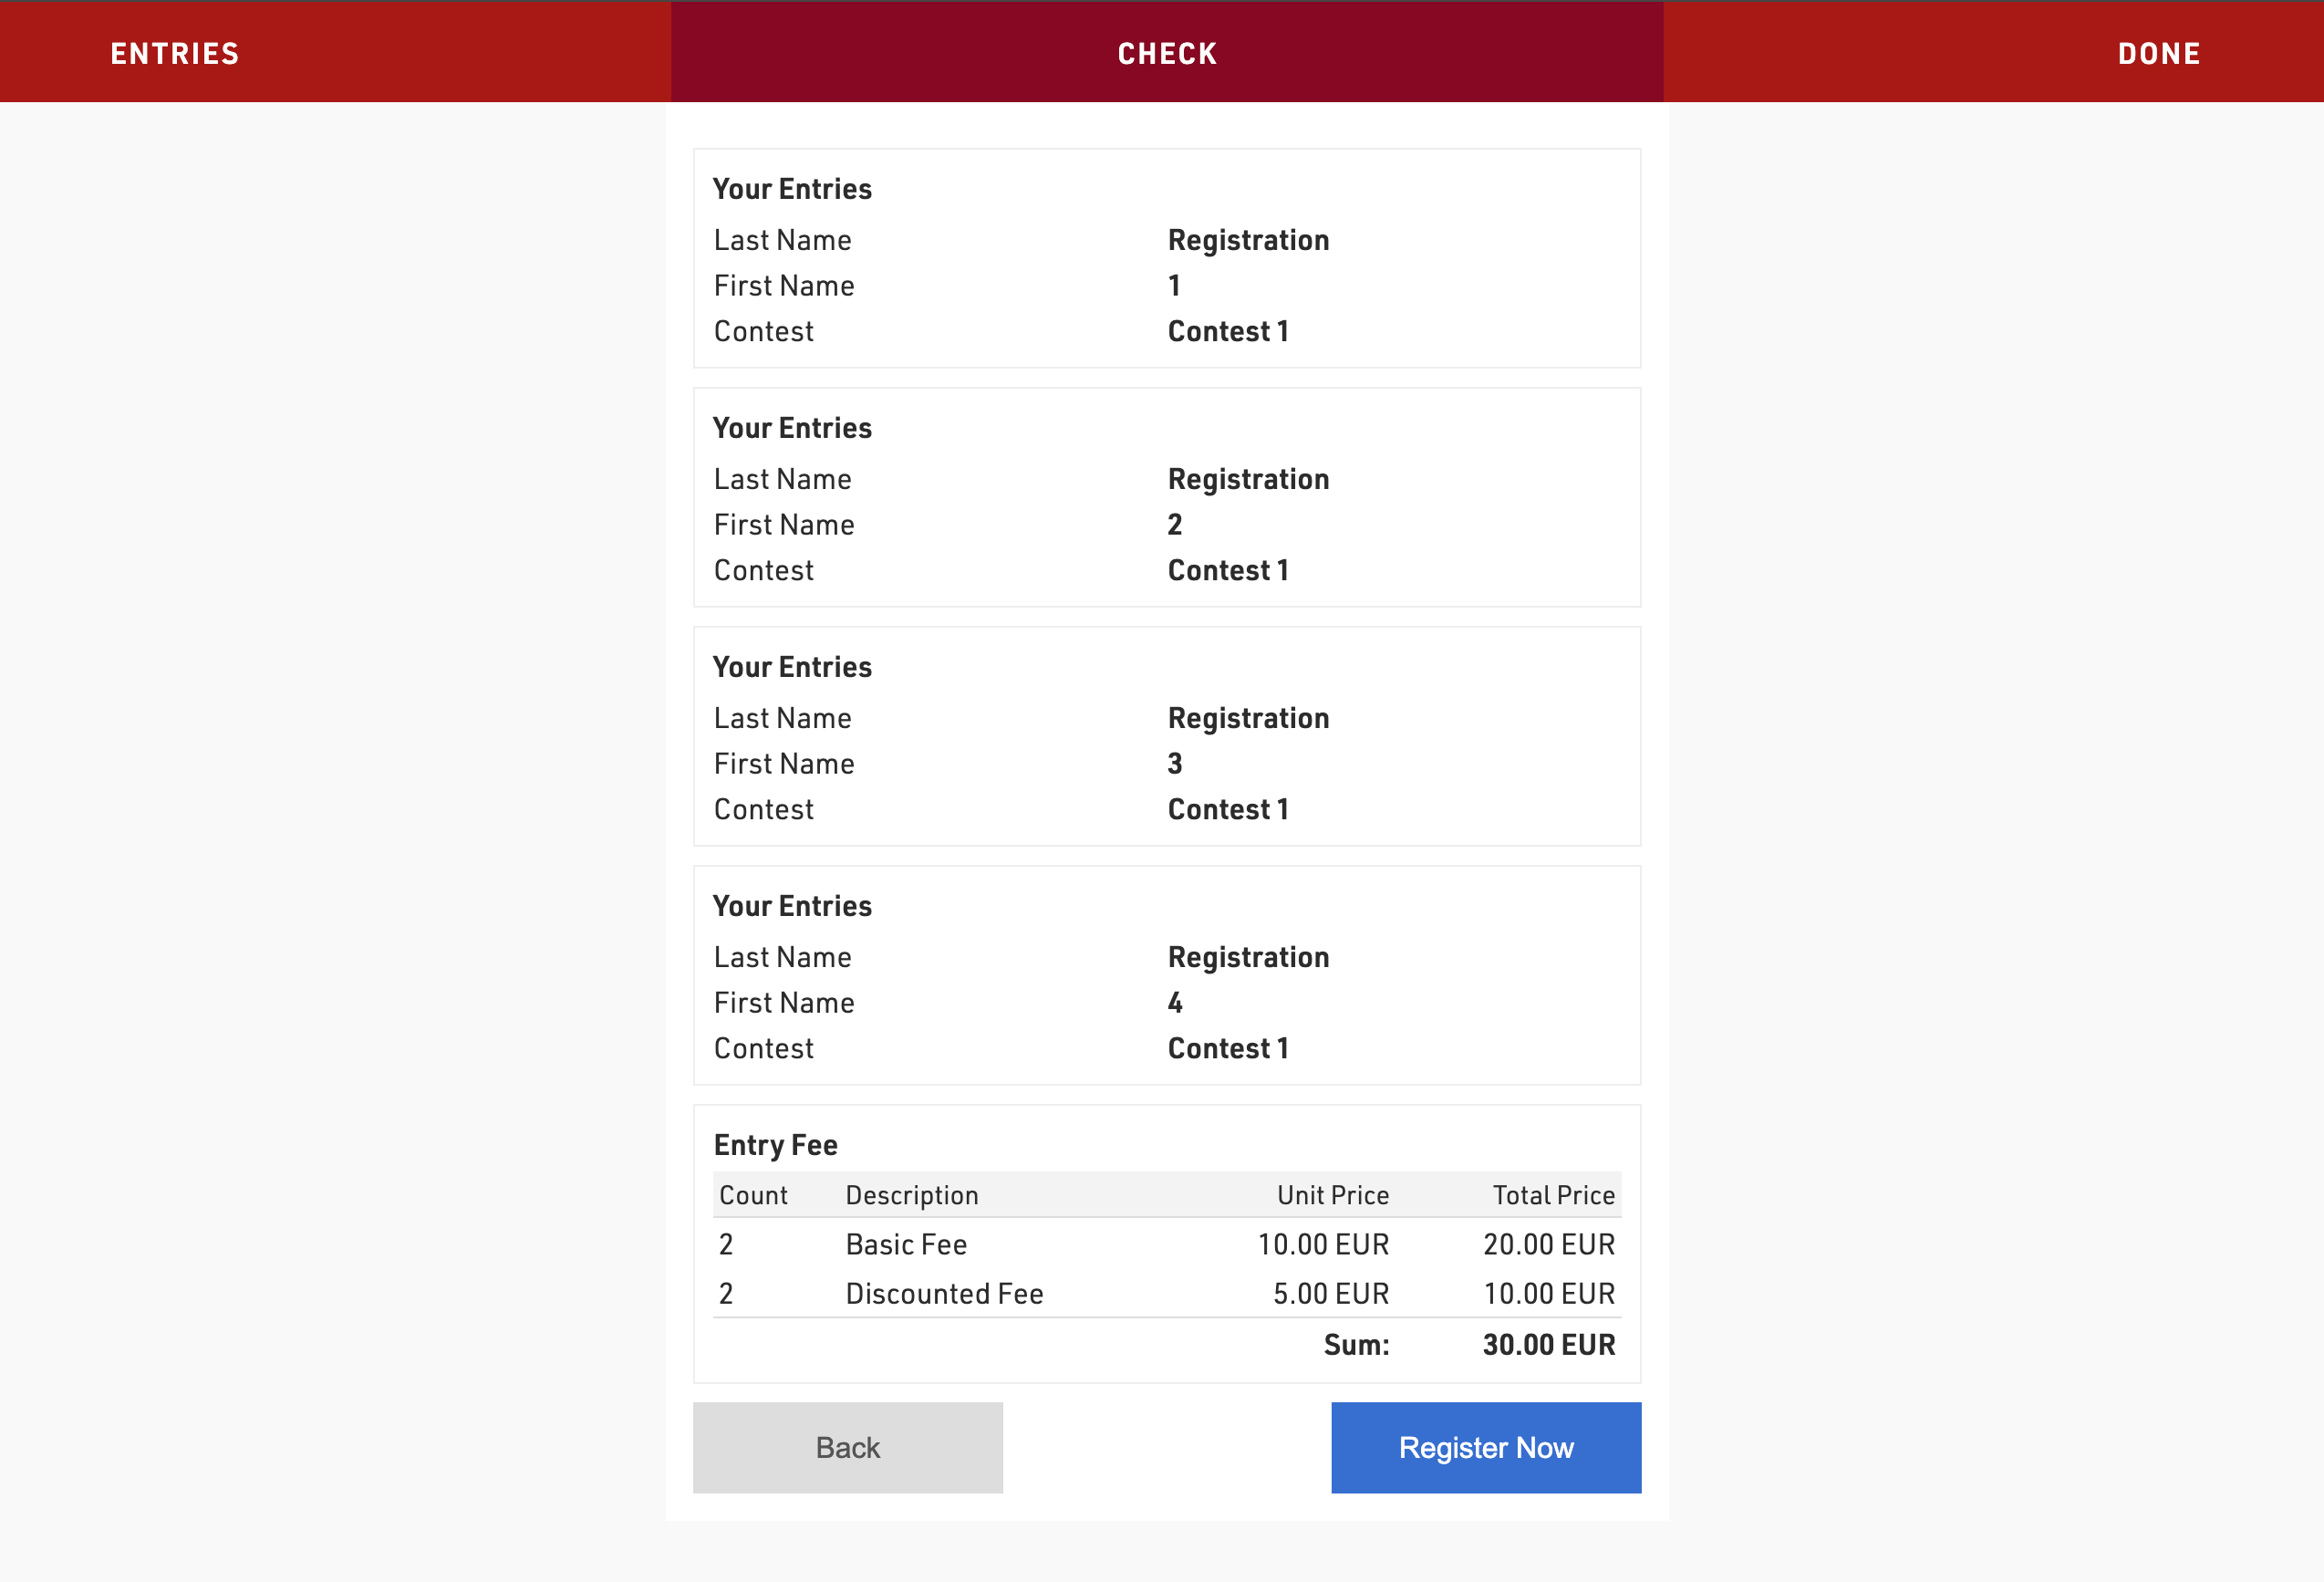
In this example - an entry fee of 10 EUR will be applied to the first two participants in the group, and then for the third participant and above an entry fee of 5 EUR is applied.
Whole Group
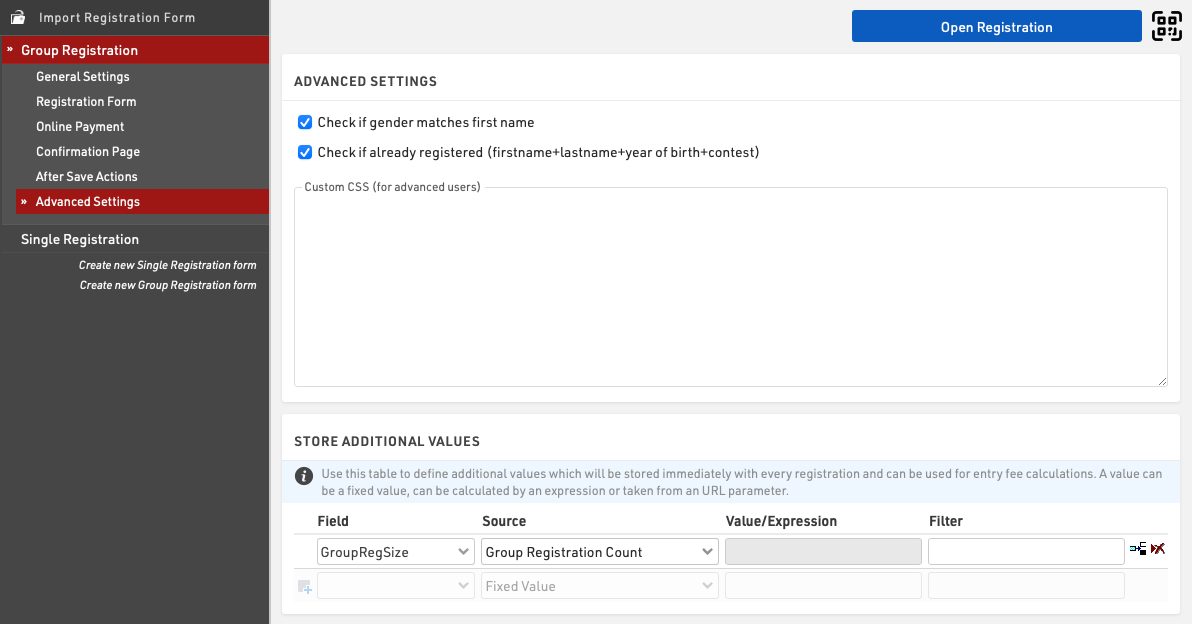
This method is based on the Group Registration Count, a source in the Advanced Settings of the registration form.
Create an additional field set as a number (integer) which will be used to store the group size for each participant, in this example it is called GroupRegSize.

In the advanced settings of your Group Registration form add the field to the Store Additional Values settings with the source Group Registration Count.
To assign different entry fees based on [GroupRegSize] use the filter in the entry fee settings.

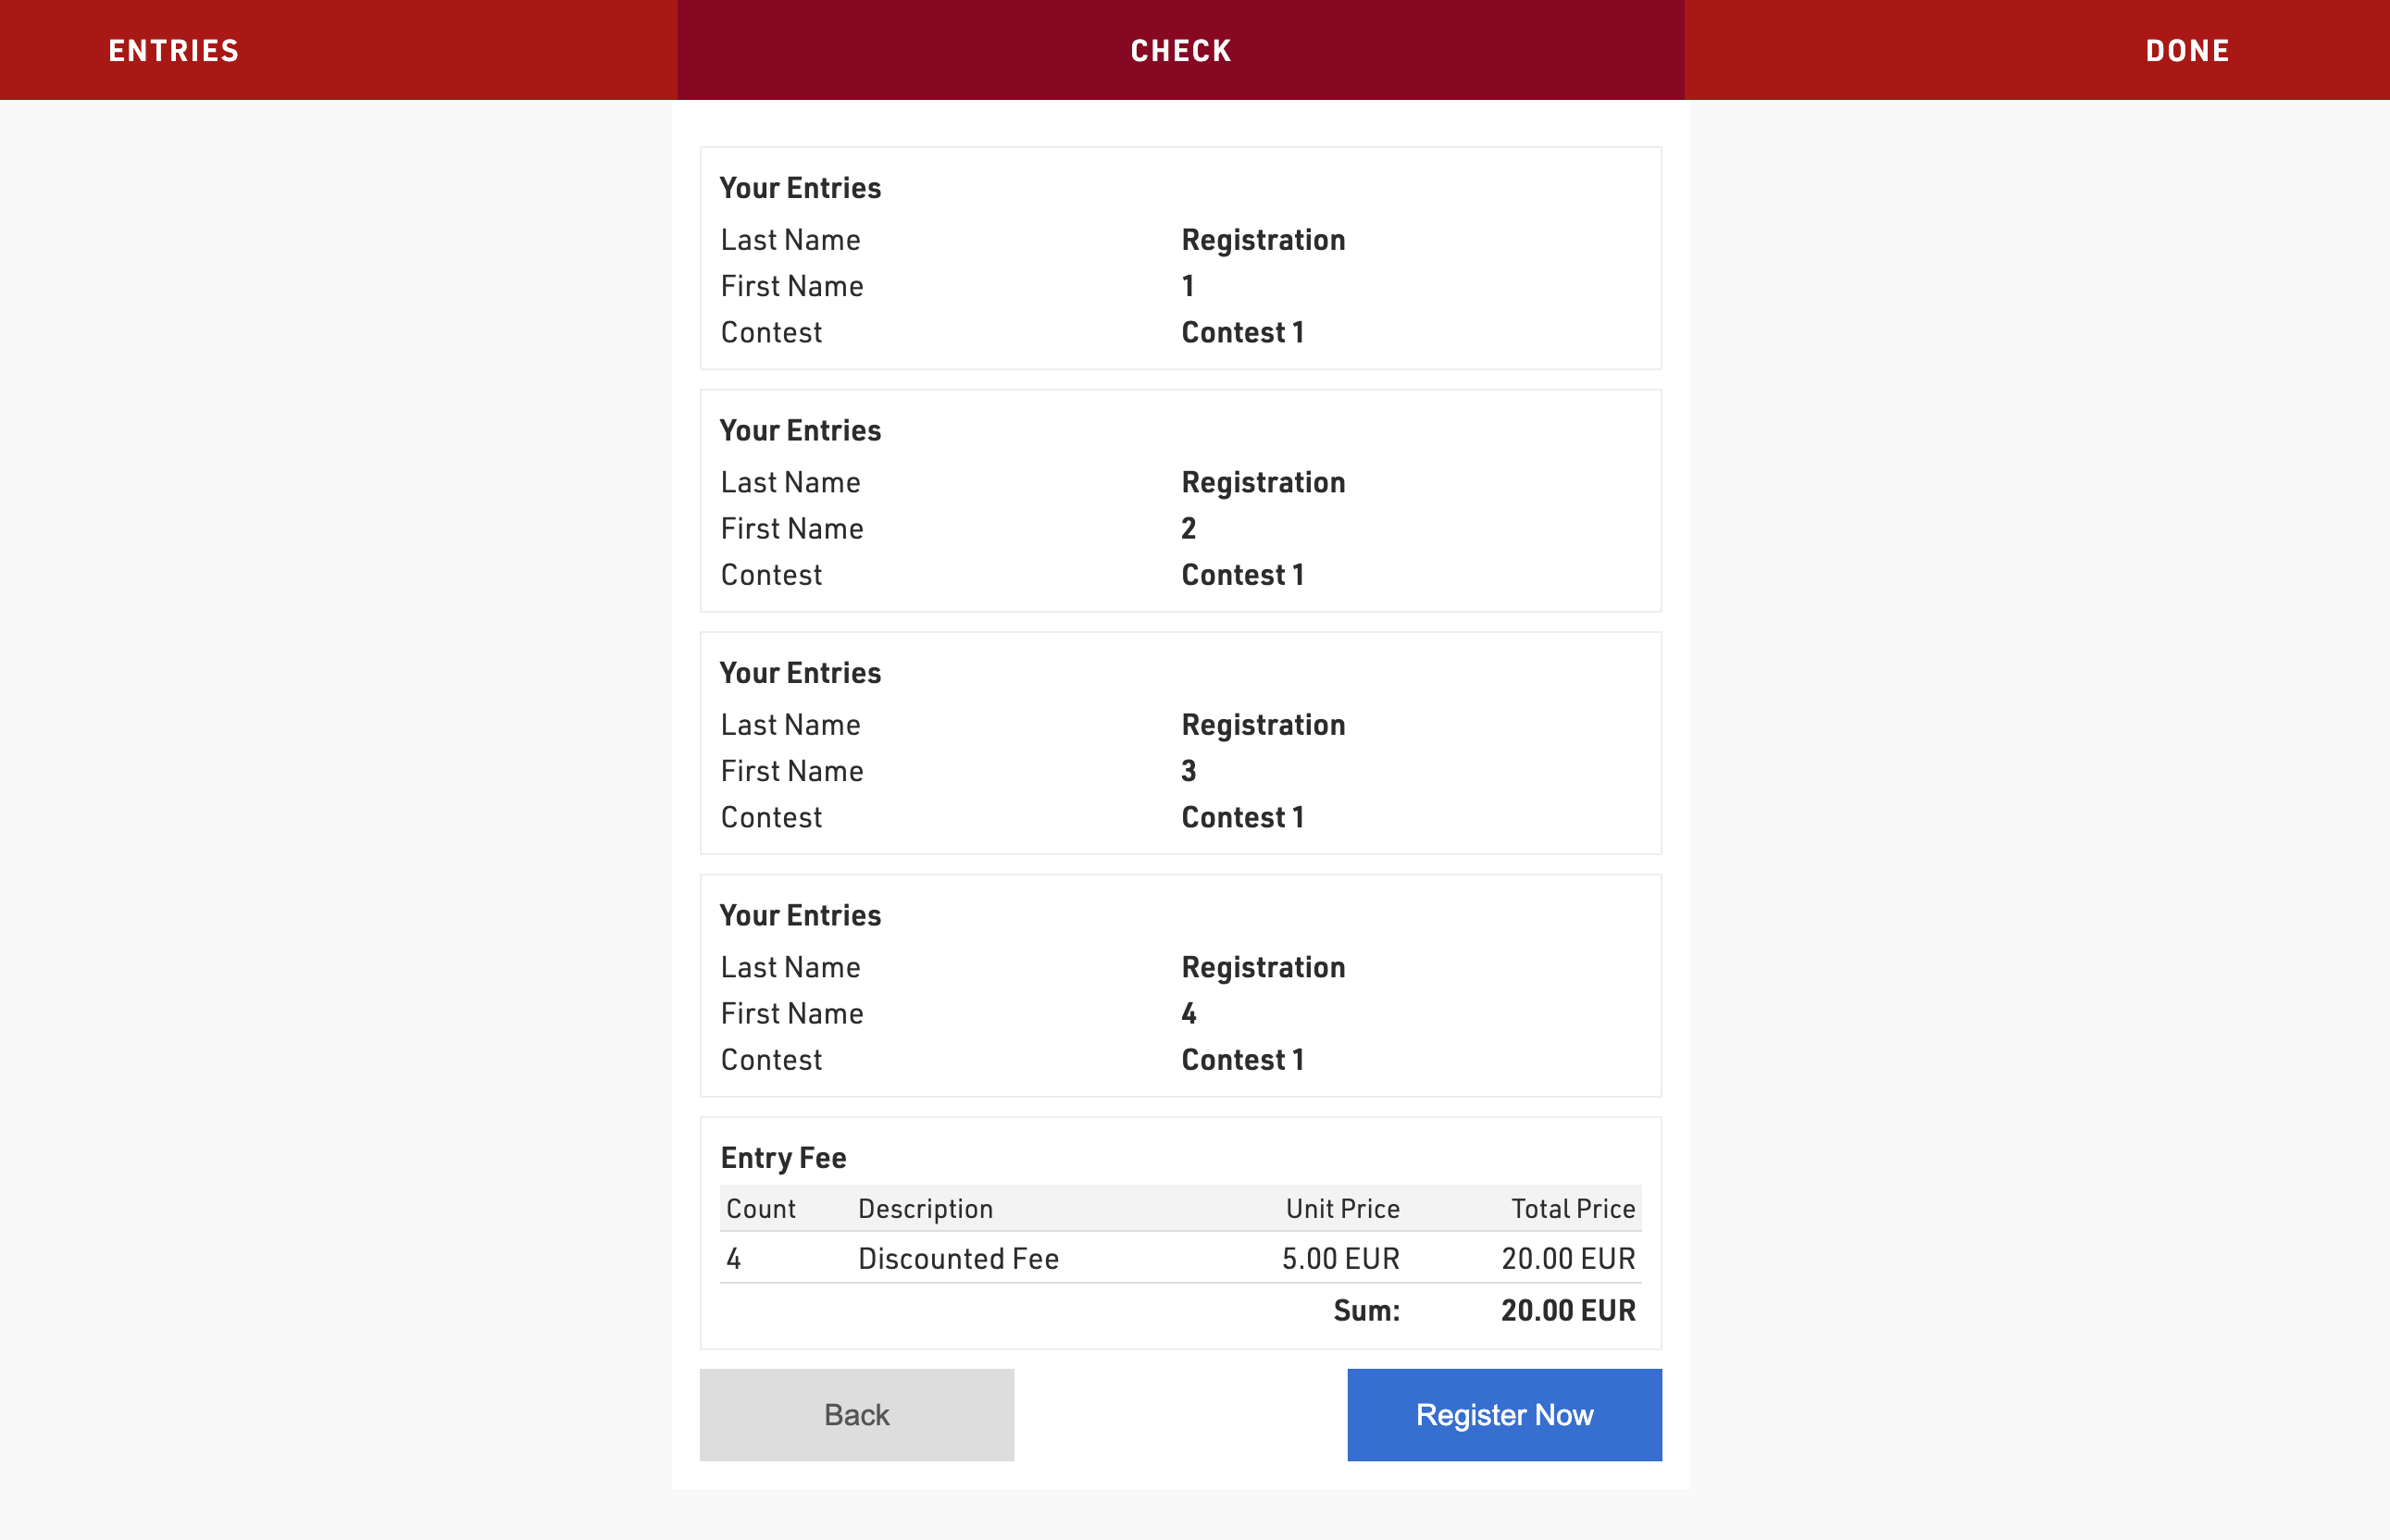
In this example groups of 3 or less will pay an entry fee of 10 EUR per participant, whereas groups with more than 3 participants will pay an entry fee of 5 EUR per participant.
Fixed Price for Group
This method is based on the default [GroupRegPos] field, which is calculated for each participant in a group registration.
In a Group Registration, all participants are assigned the same value for [GroupID] and are sequentially numbered starting from 1 in the [GroupRegPos] field, based on the order of entry in the registration form.
In a Single Registration, [GroupRegPos] is set to 0.
To assign a fixed entry fee to the group, apply the entry fee only to participants with [GroupRegPos]=1.
For single registrants, the entry fee is applied when [GroupRegPos]=0.

In this example groups will pay an entry fee of 30 EUR, and the fee is charged virtually only to the first member of the Group Registration.
Setting up a Registration form of type Self Service
It is often useful that participants are able to change their own data online. For this you can provide participants a unique individual link to a Self Service form (What is a Self Service form?) where they can adapt their data.
Registration Form Setup
The form is setup as a Registraion Form, create a new form and select the type Single Self Service.

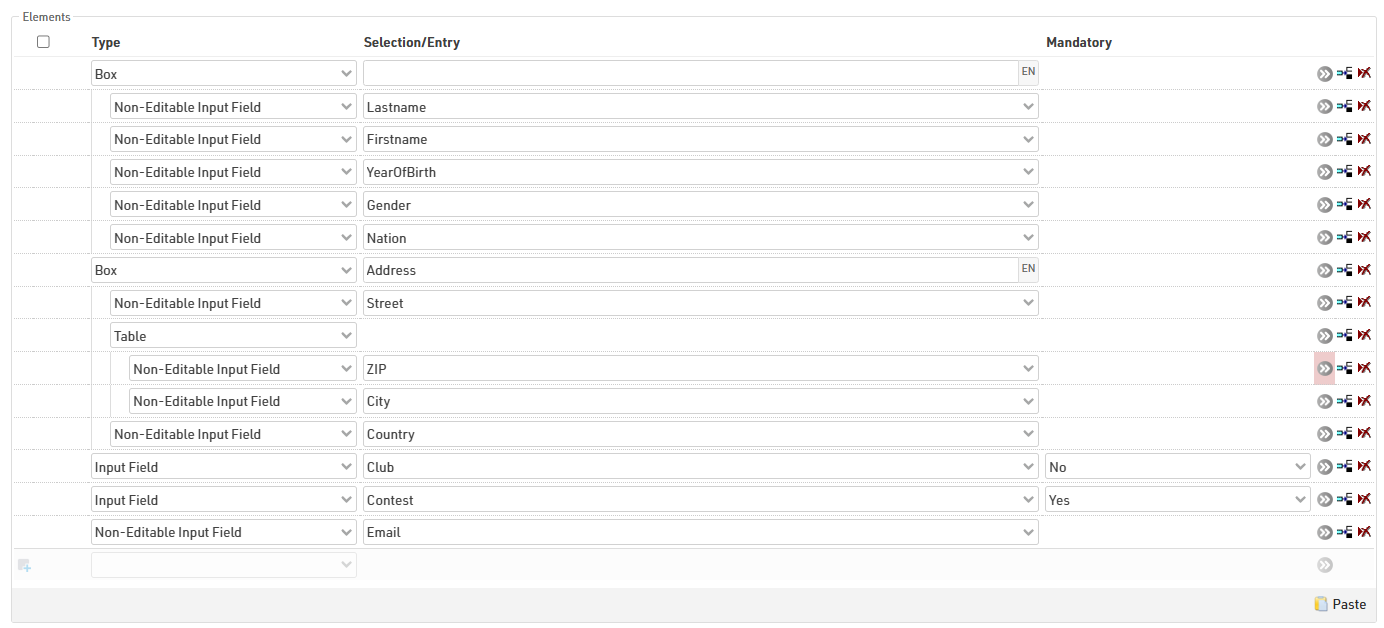
The form type Self Service allows a special element type in the formfields:

This field type is used to show pre-existing data which should not be editable. For example in this case the participant would only be allowed to change his contest or the club name, as these fields are still set as Input Fields.
The URL to the participant's personal Self Service form is generated using the Changelink() function, this can be send in an e-mail template, to see how check our Knowledge Base guide on Adding a URL-Link for a Self Service form in an Email template.
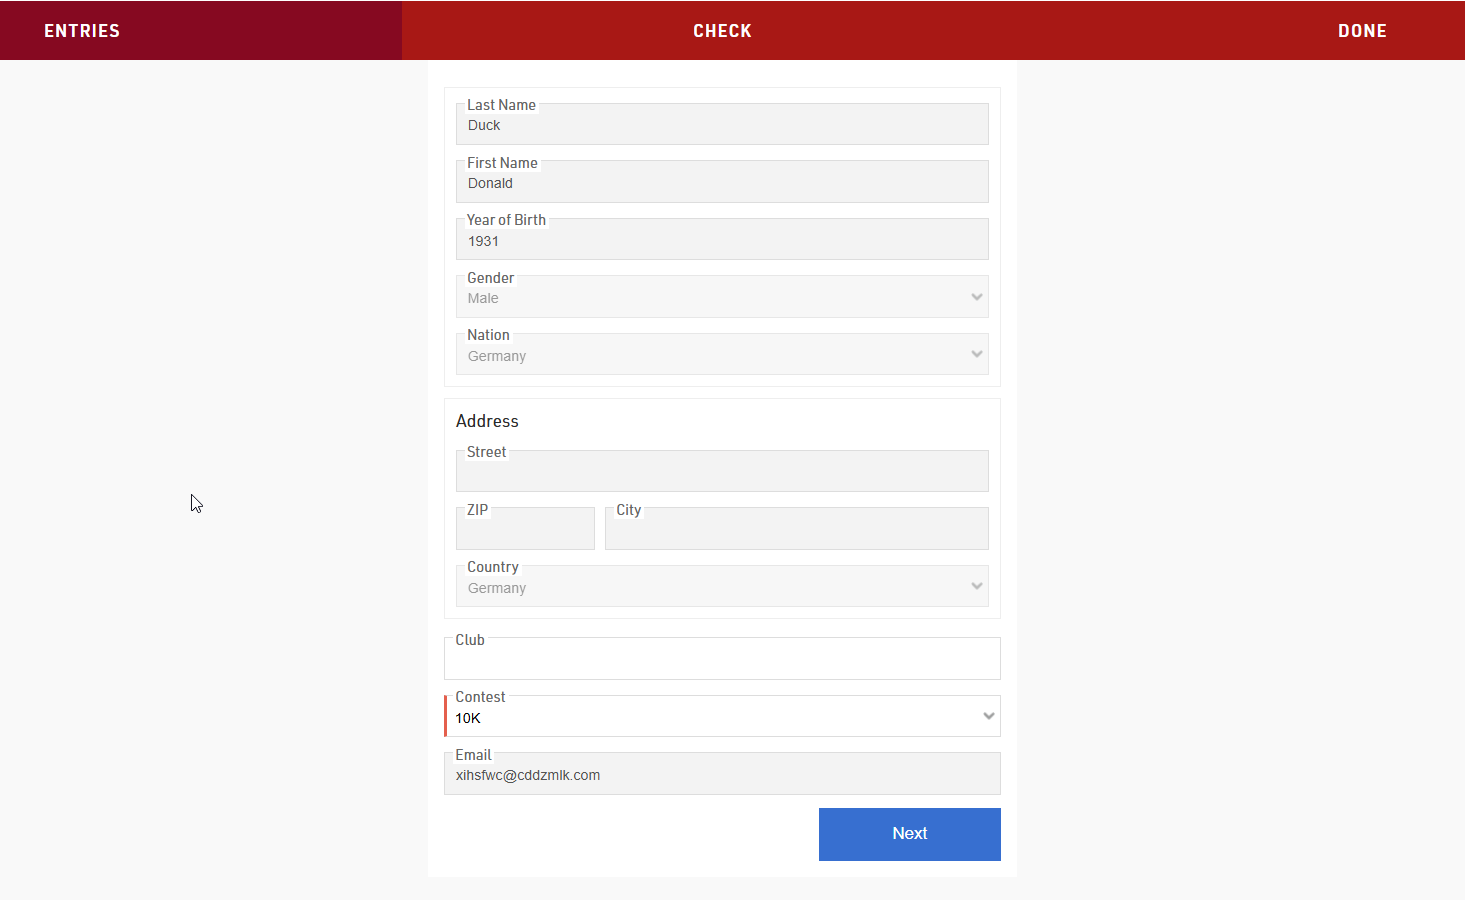
When the participant opens the Self Service form via the link he received through the Email, he will see his pre-entered data and be able to adapt the data that is editable for him.
Sending a Payment Link with a Self Service Form
In some cases participants may have to pay additional fees after their initial registration either for additional services or because the fees were not captured originally. These fees can be captured using the same Online Payment methods as used in the Registration Forms, and can be sent to participants by creating a Self-Service form with the online payment enabled.
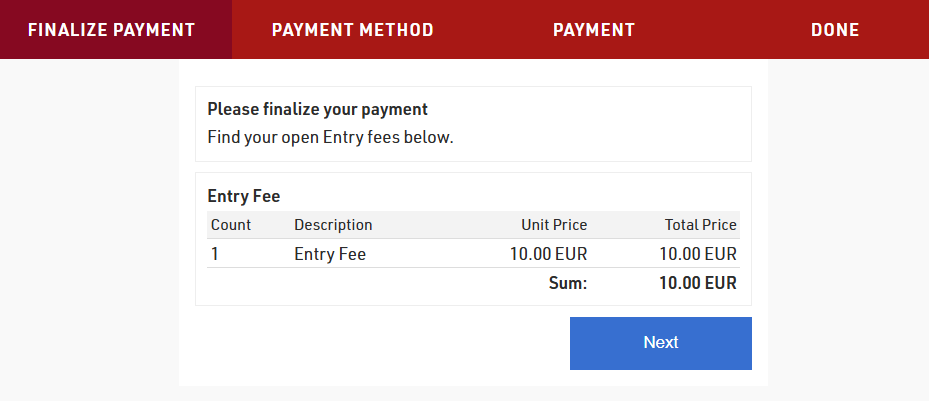
Registration Form Setup
The payment form is setup as a Registration Form, create a new form and select the type Single Self Service.
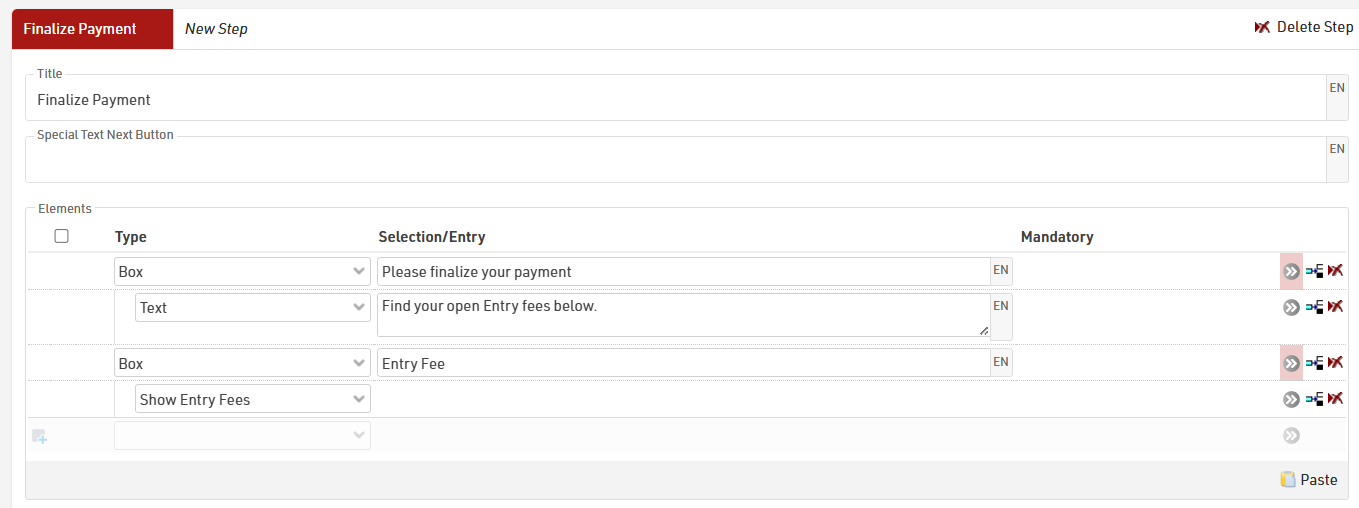
In this case it is not necessary to have a step in the registration form where the participant is able to adapt any data, therefore, we add only a very basic "Finalize Payment" step in the self service form, where only the Entry Fees are shown:
To then enable the payment in the form, activate the Online Payment in the form settings. See here for detailed information: Online Payment.
When the participant opens their Self Service form, they will see the summary of entry fees that are due, and the second step will then allow them to complete the online payment.
The URL to the participant's personal Self Service form is generated using the Changelink() function, this can be send in an e-mail template, to see how check our Knowledge Base guide on Adding a URL-Link for a Self Service form in an Email template.
Adding a URL-Link for a Self Service form in an Email template
When using self-service form it is most common to send these in an e-mail either through to the E-mail / SMS Module or as an e-mail confirmation during registration.
To do so the e-mail format must be set to HTML, then It is possible to insert a URL link by clicking the link icon (  ) and using the Changelink() function.
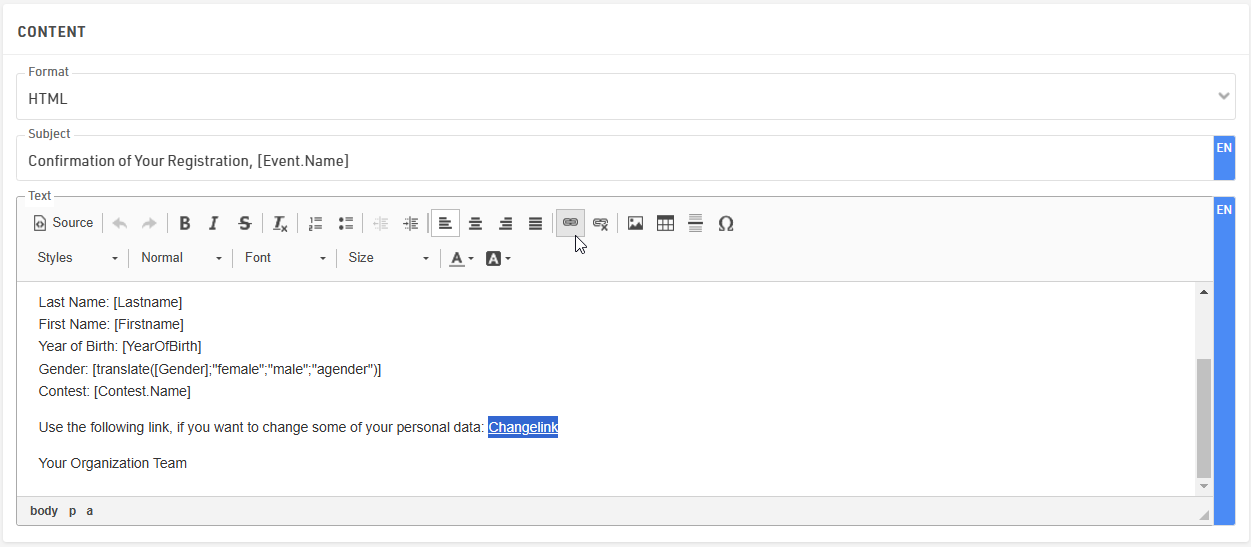
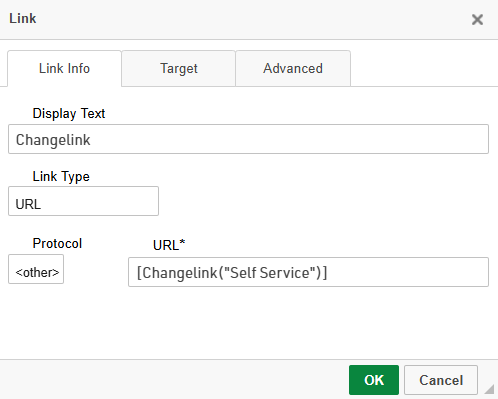
When clicking the link icon, a small window pops up where the Display Text can be adapted, this is the text that will be shown in the email instead of the whole URL link. In the URL section we call the Changelink() function in square brackets. Inside the ChangeLink() function you need to then type the name of the registration form in quotation marks.
It is very important to select the Protocol type <other> as the ChangeLink() function will already create the https:// prefix.
In order to send out the confirmation Email automatically, the template needs to be added in the After Save Actions of the regular registration form.