Decoders
Guidelines courtesy of Event Timing.
Transponder Integration (Hardware):
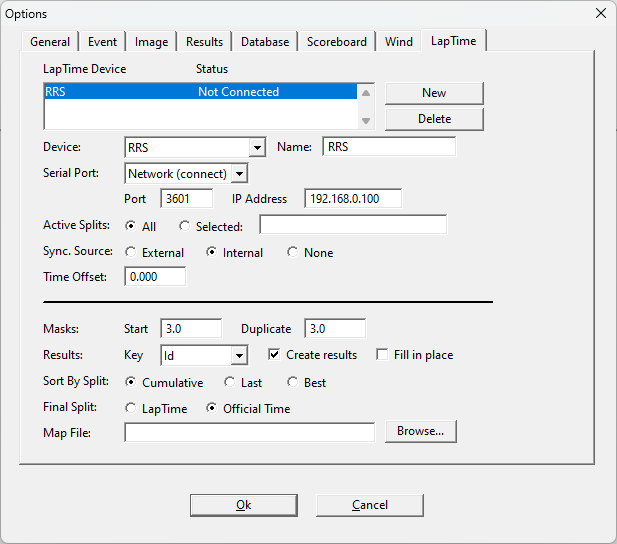
Ensure the laptop, decoder and camera are on the same network.
Set the LapTime as in the screnshoot below
If you want to create the map file, note that the bib number must be in the first column and the transponder code in the second. Open the XLS file in Excel and reorder the columns, as outlined above, if necessary. Save the file as a .csv
Change the extension to .txt and ensure that all letters in the transponder codes are capitalized.
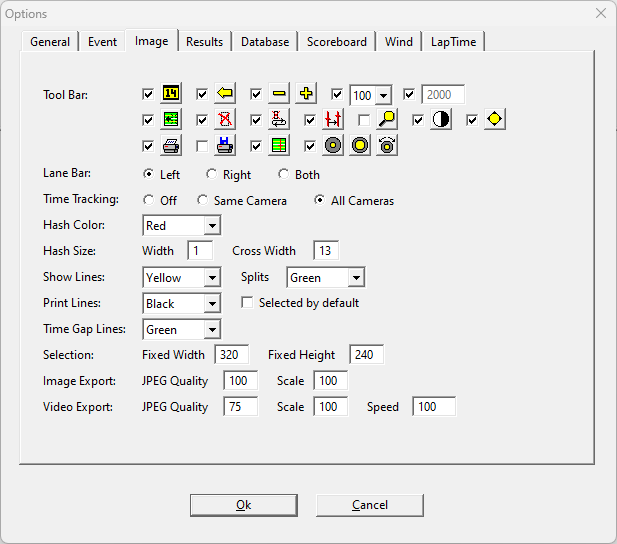
For enabling image overlay, go to Image >Print Lines and set a color.
To test if the transponder passage is showing on the image, use manual capture and take one long picture while passing the transponder.
If there is no passing visible on the image, check that a line colour is set for splits in the Image>Options menu.
Split times will be generated on the image and in the results window when a passing is detected
The competitors will be ordered in the results window based on split time, you may then go through and visually confirm the placing and rider ID with the transponder information.
The transponder split will not place the riders, typing in the rider number and placing it on the image will confirm that placing.
The transponder information can be used to determine the bib number of a rider where their number is not visible in the image.
Connecting RACE RESULT Devices to Finishlynx via RR14
No matter which RACE RESULT Timing Device you connect to RACE RESULT 14, with the Exporter function you can send the timing detections from RACE RESULT 14 directly to FinishLynx.
Setup LapTime option in Finishlynx
Choose the device Lynx, set the port into Network (listen) with port 3601 and set the Sync.Source as None.
Use as a key the ID and flag the Create results checkbox, to automatically create records in your Lynx Capturing Window with the BIB of the participant.
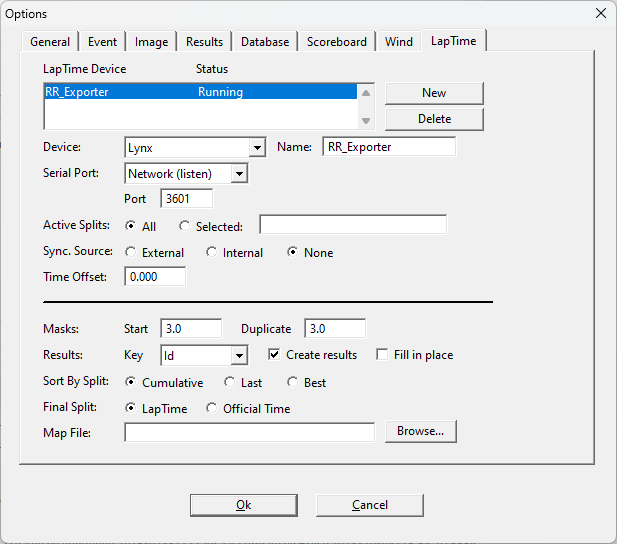
If the Status of your exporter is not set as Running, close and re-open FinishLynx and check it again.
Setup the Exporter in RR14
Under Timing > Exporters+Tracking, set an exporter with the following settings.
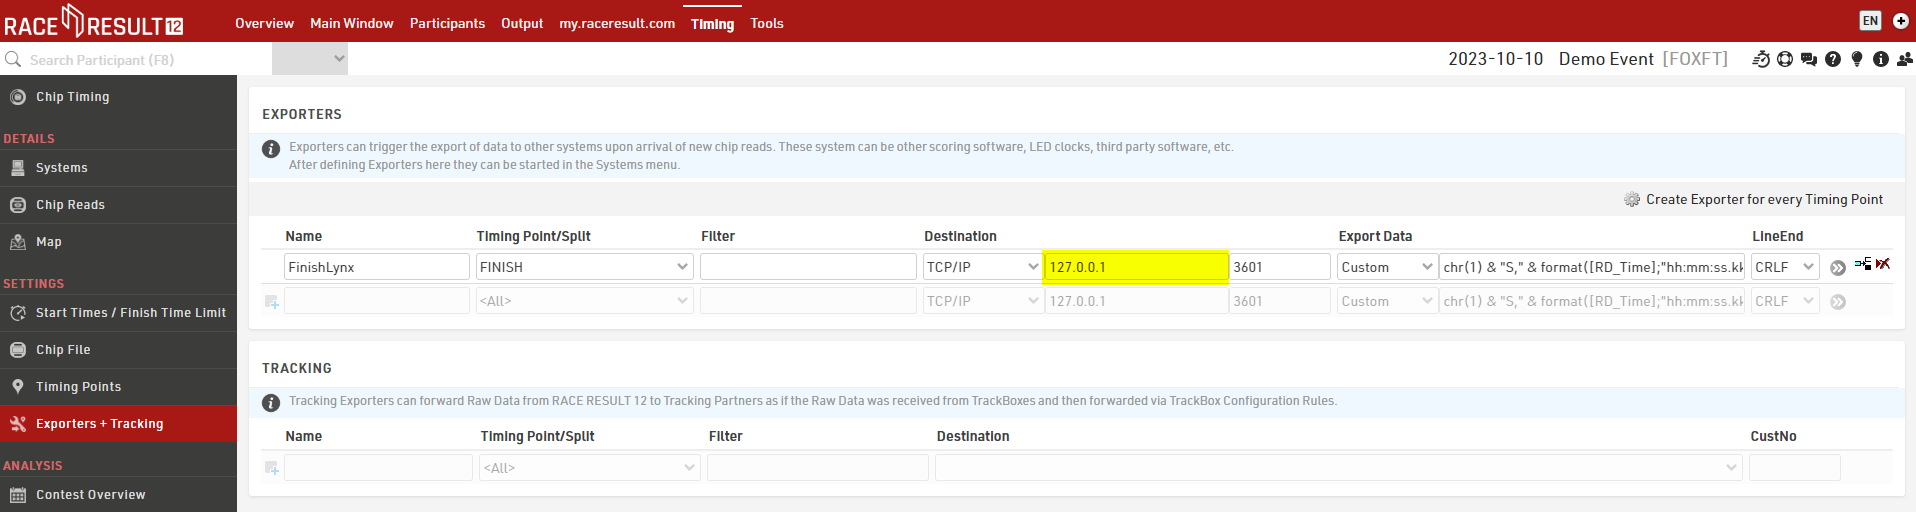
Under Timing Point, choose the timing point where you collect your lap detections, and under Destination enter the IP address of the machine where Finishlynx is running, with the port 3601.
If FinishLynx and RR14 are running on the same machine, then enter the localhost 127.0.0.1 to open the internal communication between the two software.
Set the exporter as Custom with the following string.
Connect the Timing Device and Start the Exporter
Connecting to Systems
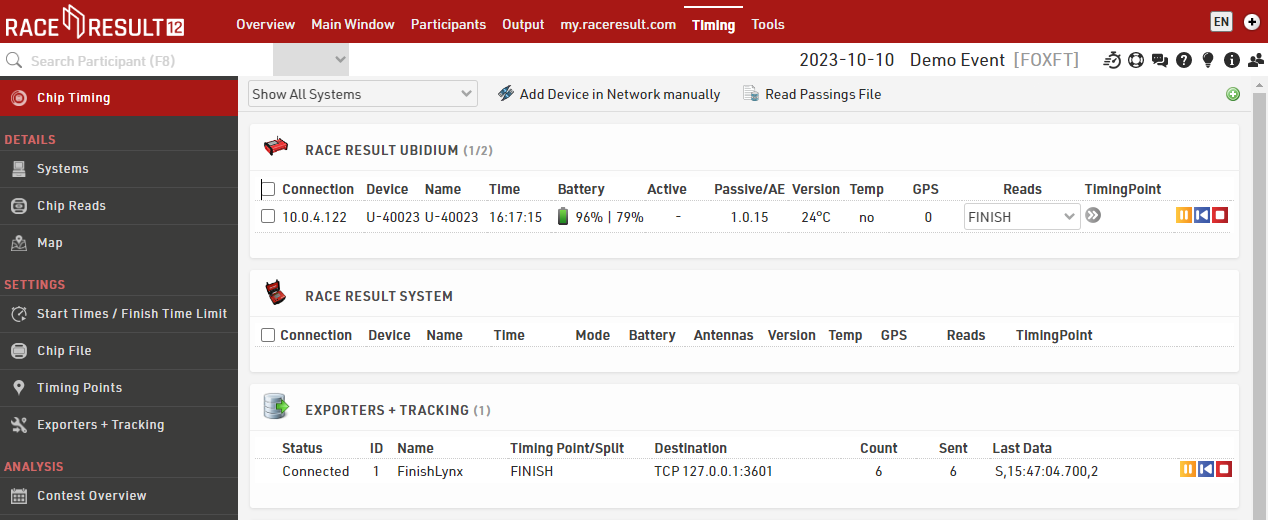
Data is pulled in from your timing systems and sent to the exporters through the Systems/Chip Timing page of the Timing tab.
Receiving / Sending Data
Next to the relevant device, select which timing point this should be assigned to, or leave it blank if using Automatic Timing Point Selection and press the green play button to connect to the system.

That system will now send any data it records to the software. If you need data recorded before the connection was made, then the blue button will replay all data from that file.
Exporters are connected and replayed in the same way using the green play button and blue rewind button, once connected all data which meets the criteria of your exporter will be sent immediately.
When data is being received or sent, then there is a count of the data next to the relevant device or exporter.
If you wish to close a connection, then click the red stop button.