Windows-Based Tools
Note that all of the functionality from the windows-based tools has been replaced by an alternative in the browser, and so there should only be rare cases where these are required.
Most of RACE RESULT 14 is run directly from the browser page, however the standard installation also includes some tools as separate windows-based programs which run independently from the main web server.
Each of these can connect to either a local file, a web server on the local network or the online web server.
To connect to the event file you are working on, open the relevant program, and open the File menu, select either 'Open Event' to open an SES file or Connect to Sports Events Server.
To connect to a web server on the local network enter the IP address of the web server or enter events.raceresult.com to connect to an online file and click connect, you will then need to enter your customer ID and password if connecting to the online server.
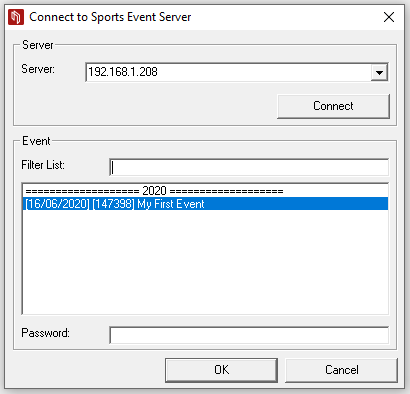
The open files in the web server or your available online files will be listed below and can then be opened by the program.
Transponder Module
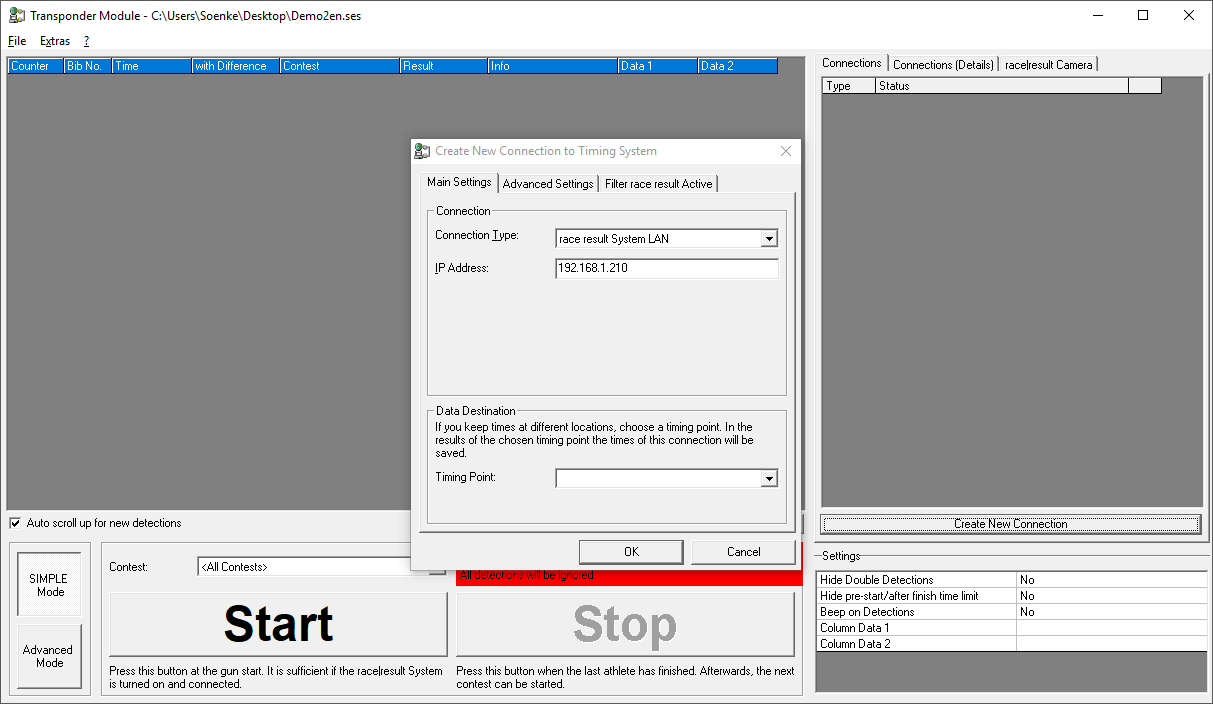
Transponder Module is a Windows based program used to read the detections from the timing system such as the RACE RESULT System and to write them in your Event File. It can be started through the Windows start menu.
Setting up the Connection
First, open your event file via the File menu. Then, the window "Create New Connection to Timing System" pops up. Select the type of system you would like to connect to and enter the connection details such as the IP address. Select the Timing Point to which the detections from this connection shall be written into. Finally click OK to create the connection.
If you wish to create another connection to a second system, click the button Create New Connection on the right.
Simple vs. Advanced Mode
When using the RACE RESULT System, you can decide between Simple and Advanced Mode. In Simple Mode, the timing system starts from 0:00:00 when a contest starts whereas in Advanced Mode you would usually use time of day. Consequently, Simple mode cannot be used for overlapping contests, i.e. the last participant of one contest must have finished before the next contest can be started.
Simple Mode
In Simple Mode, make sure that the RACE RESULT System is in Test Mode, i.e. it will not store any chip reads from participants warming up or standing on the timing mat before the start.
Select the Contest you would like to start from the drop down box and hit the big Start button when the race starts. This will, first, start the timing mode of the RACE RESULT System and, second, make sure that only detections from participants registered in that contest will be accepted.
After the last athlete has finished, click the big Stop to set the decoder back to test mode.
Advanced Mode
To use Advanced Mode, make sure that the RACE RESULT System is running on time of day (or use the GPS time). Press the green Start button on the decoder to activate Timing Mode.
In Main Window->Timing Points activate the option Ignore chip reads before start time (T0) and in Main Window->Start Times/Finish Time Limit set the start times for each contest. If the start times are not 100% fixed, but instead can be a few seconds or minutes later or earlier, enter a start time like 23:59:59 so that all chip reads will be ignored. When the race starts, click Set Start Time for that contest to set the start time and to make sure chip reads will not be ignored anymore from that time on.
Presenter
The Presenter program is primarily used to display results on display screens, it offers more advanced customisation of the display and more functionality than the browser based Present Results, similarly it also uses the output lists which you have setup in your event file. Customisation of the display is controlled by both the Presenter settings and the Output List page settings as explained in the following sections.

You can select to run the presenter as a "Local Presenter" or from one of 10 "Remote Controlled Presenter" options, when run locally the settings can only be controlled by the machine running the program. If you want to be able to control the display from another computer then you can use a remote controlled presenter, in this mode the settings are updated from the server and so you can update the settings from another computer without exiting the display.
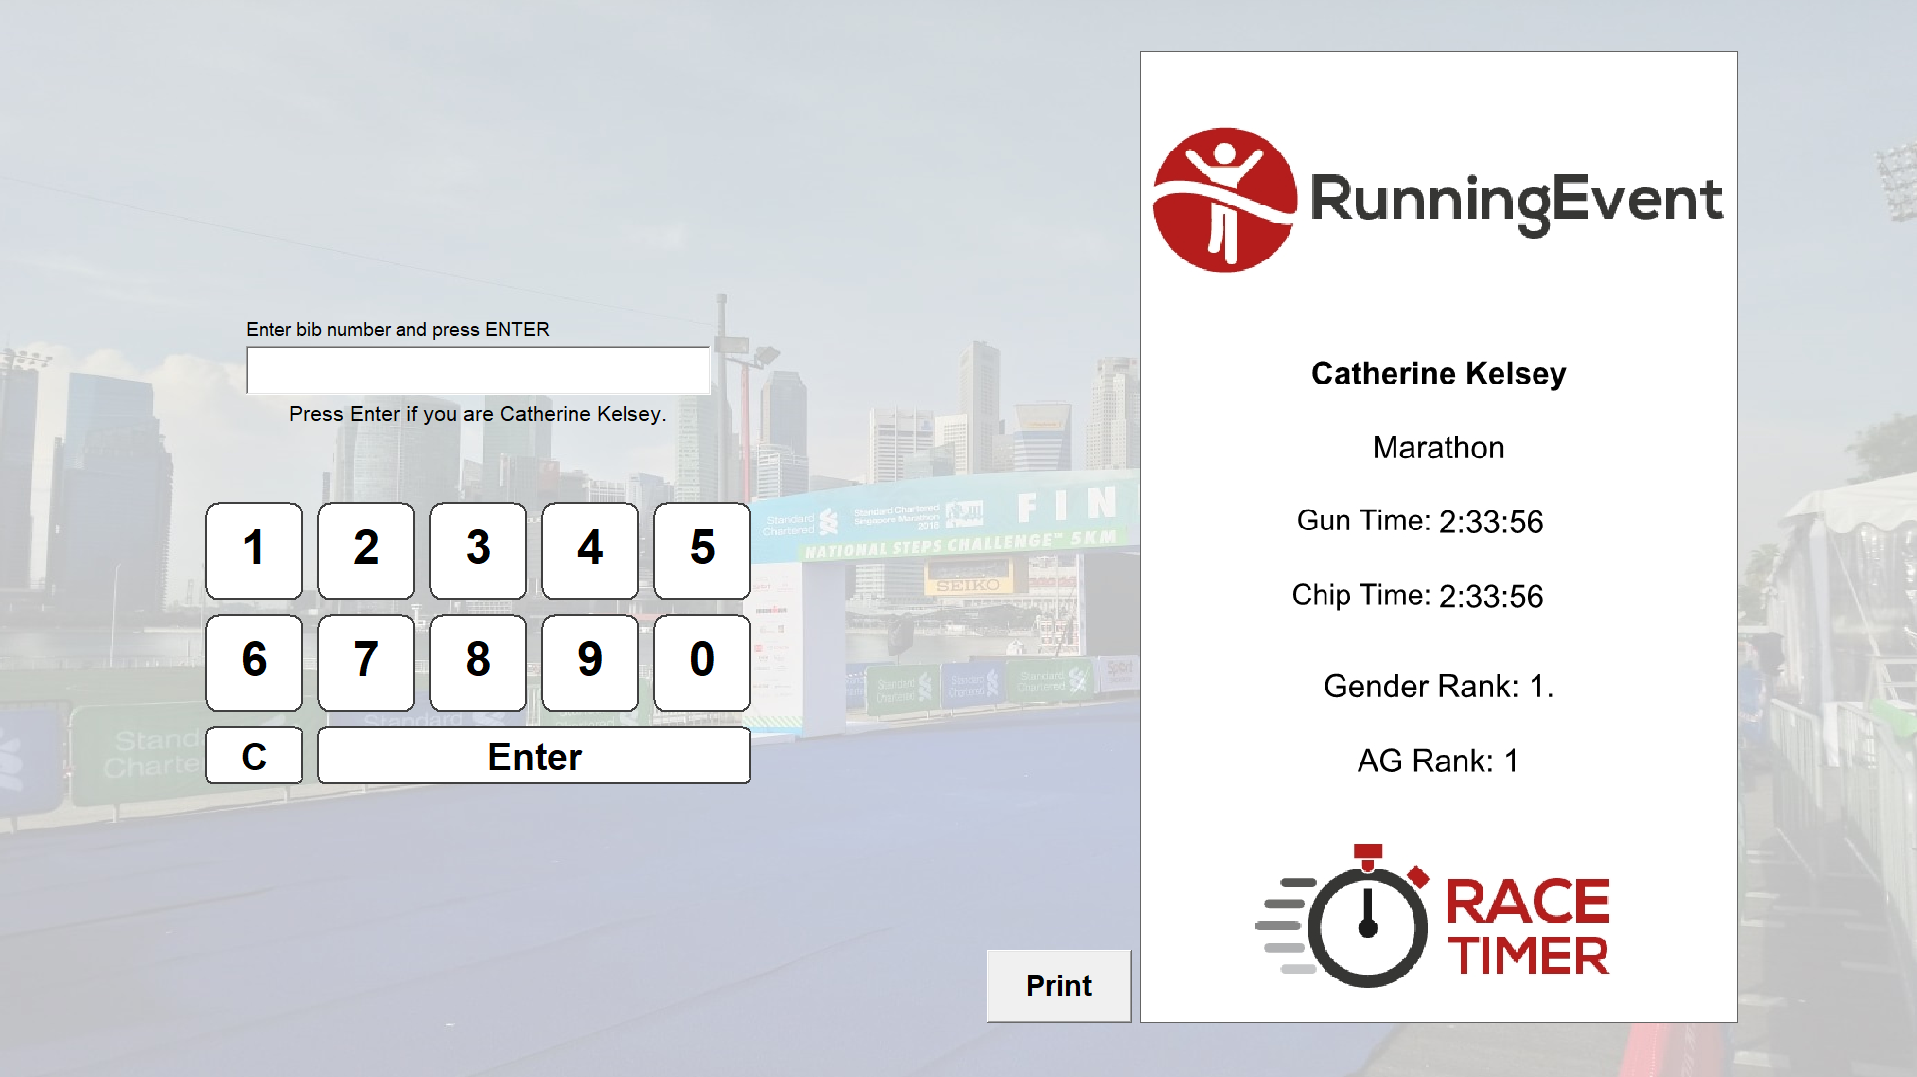
Certificate Terminal
The Certificate Terminal is similar to the Result Kiosk and is used for printing Certificates at a venue, normally on a receipt printer, with the participant's results. It runs independently of the main RACE RESULT 14 software and can open a file directly or connect to a local or online web server.
You will need to setup your Certificate Sets which you want to print before running the software.
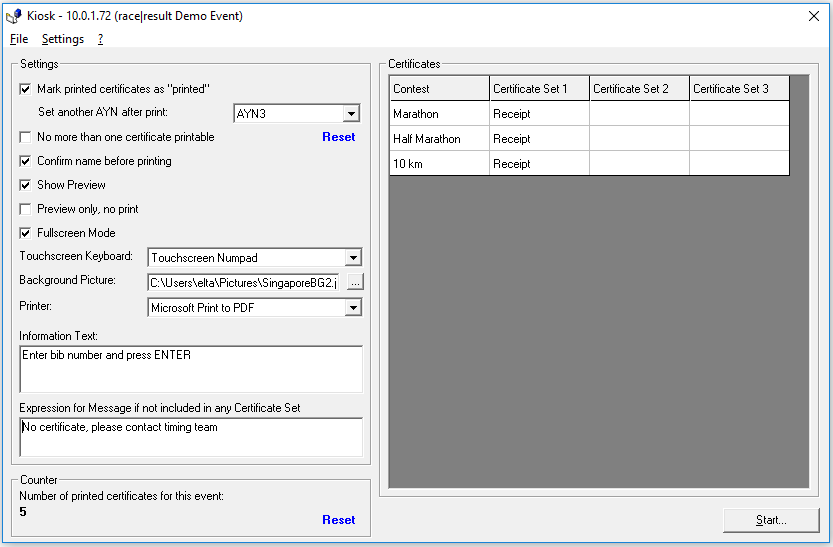
Once open and connected to an event file you will have a number of settings to customize the functionality of the kiosk.
Settings
Mark printed certificates as 'printed' - When a certificate is printed it is marked in the event file as printed, this can be used to then prevent the same certificate being printed multiple times.
Set another AYN after print - You may wish to also set an AYN for each participant to later check who printed certificates or to apply a filter to your certificate set to manually filter double printing of certificates. Select the relevant AYN from the drop down.
No more than one certificate printable - To prevent the same bib printing their certificate multiple times then tick this setting, certificates marked as printed cannot be printed again without clicking reset.
Reset - This will reset the printed status of all certificates in the event, this will allow them to be printed again.
Confirm name before printing - When the bib number is entered a warning will come up below the input "Press enter if you are [Name]", certificates will only be printed if enter is pressed again or another bib number can be entered.
Show preview - The entry field will be shifted to the left of the screen, when a bib is entered a preview of the certificate from Certificate Set 1 will be shown on the right, pressing enter or clicking print will then print the certificates.
Preview only, no print - Certificates may only be previewed on the screen and will not be printed.
Fullscreen mode - The kiosk will be opened in fullscreen and can only be exited by pressing Esc 5 times in a row.
Touchscreen Keyboard - Will display either an on-screen-keyboard or on-screen number pad below the entry for participants to type their name or bib using a touch-screen.
Background picture - Select a background image to use for the kiosk, this can be selected from your local machine.
Printer - The printer which should be used to print certificates.
Information Text - This text is displayed above the entry field, usually to prompt participants how to use the kiosk.
Expression for message if not included in any certificate set - Custom text to display if no certificate is available for the participant.
Counter - The count of certificates which have been printed.
Certificates
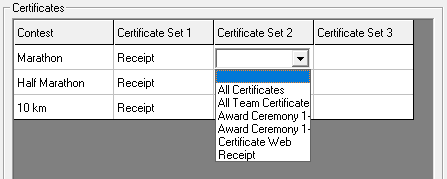
Up to 3 certificate sets can be selected for each contest, the kiosk will print all available certificates for a participant, you should therefore ensure that if using different certificate sets that participants only appear in one set.
Display
Start the kiosk with the Start button in the bottom right, it can be exited using the X or by pressing Esc 5 times when in fullscreen mode.